
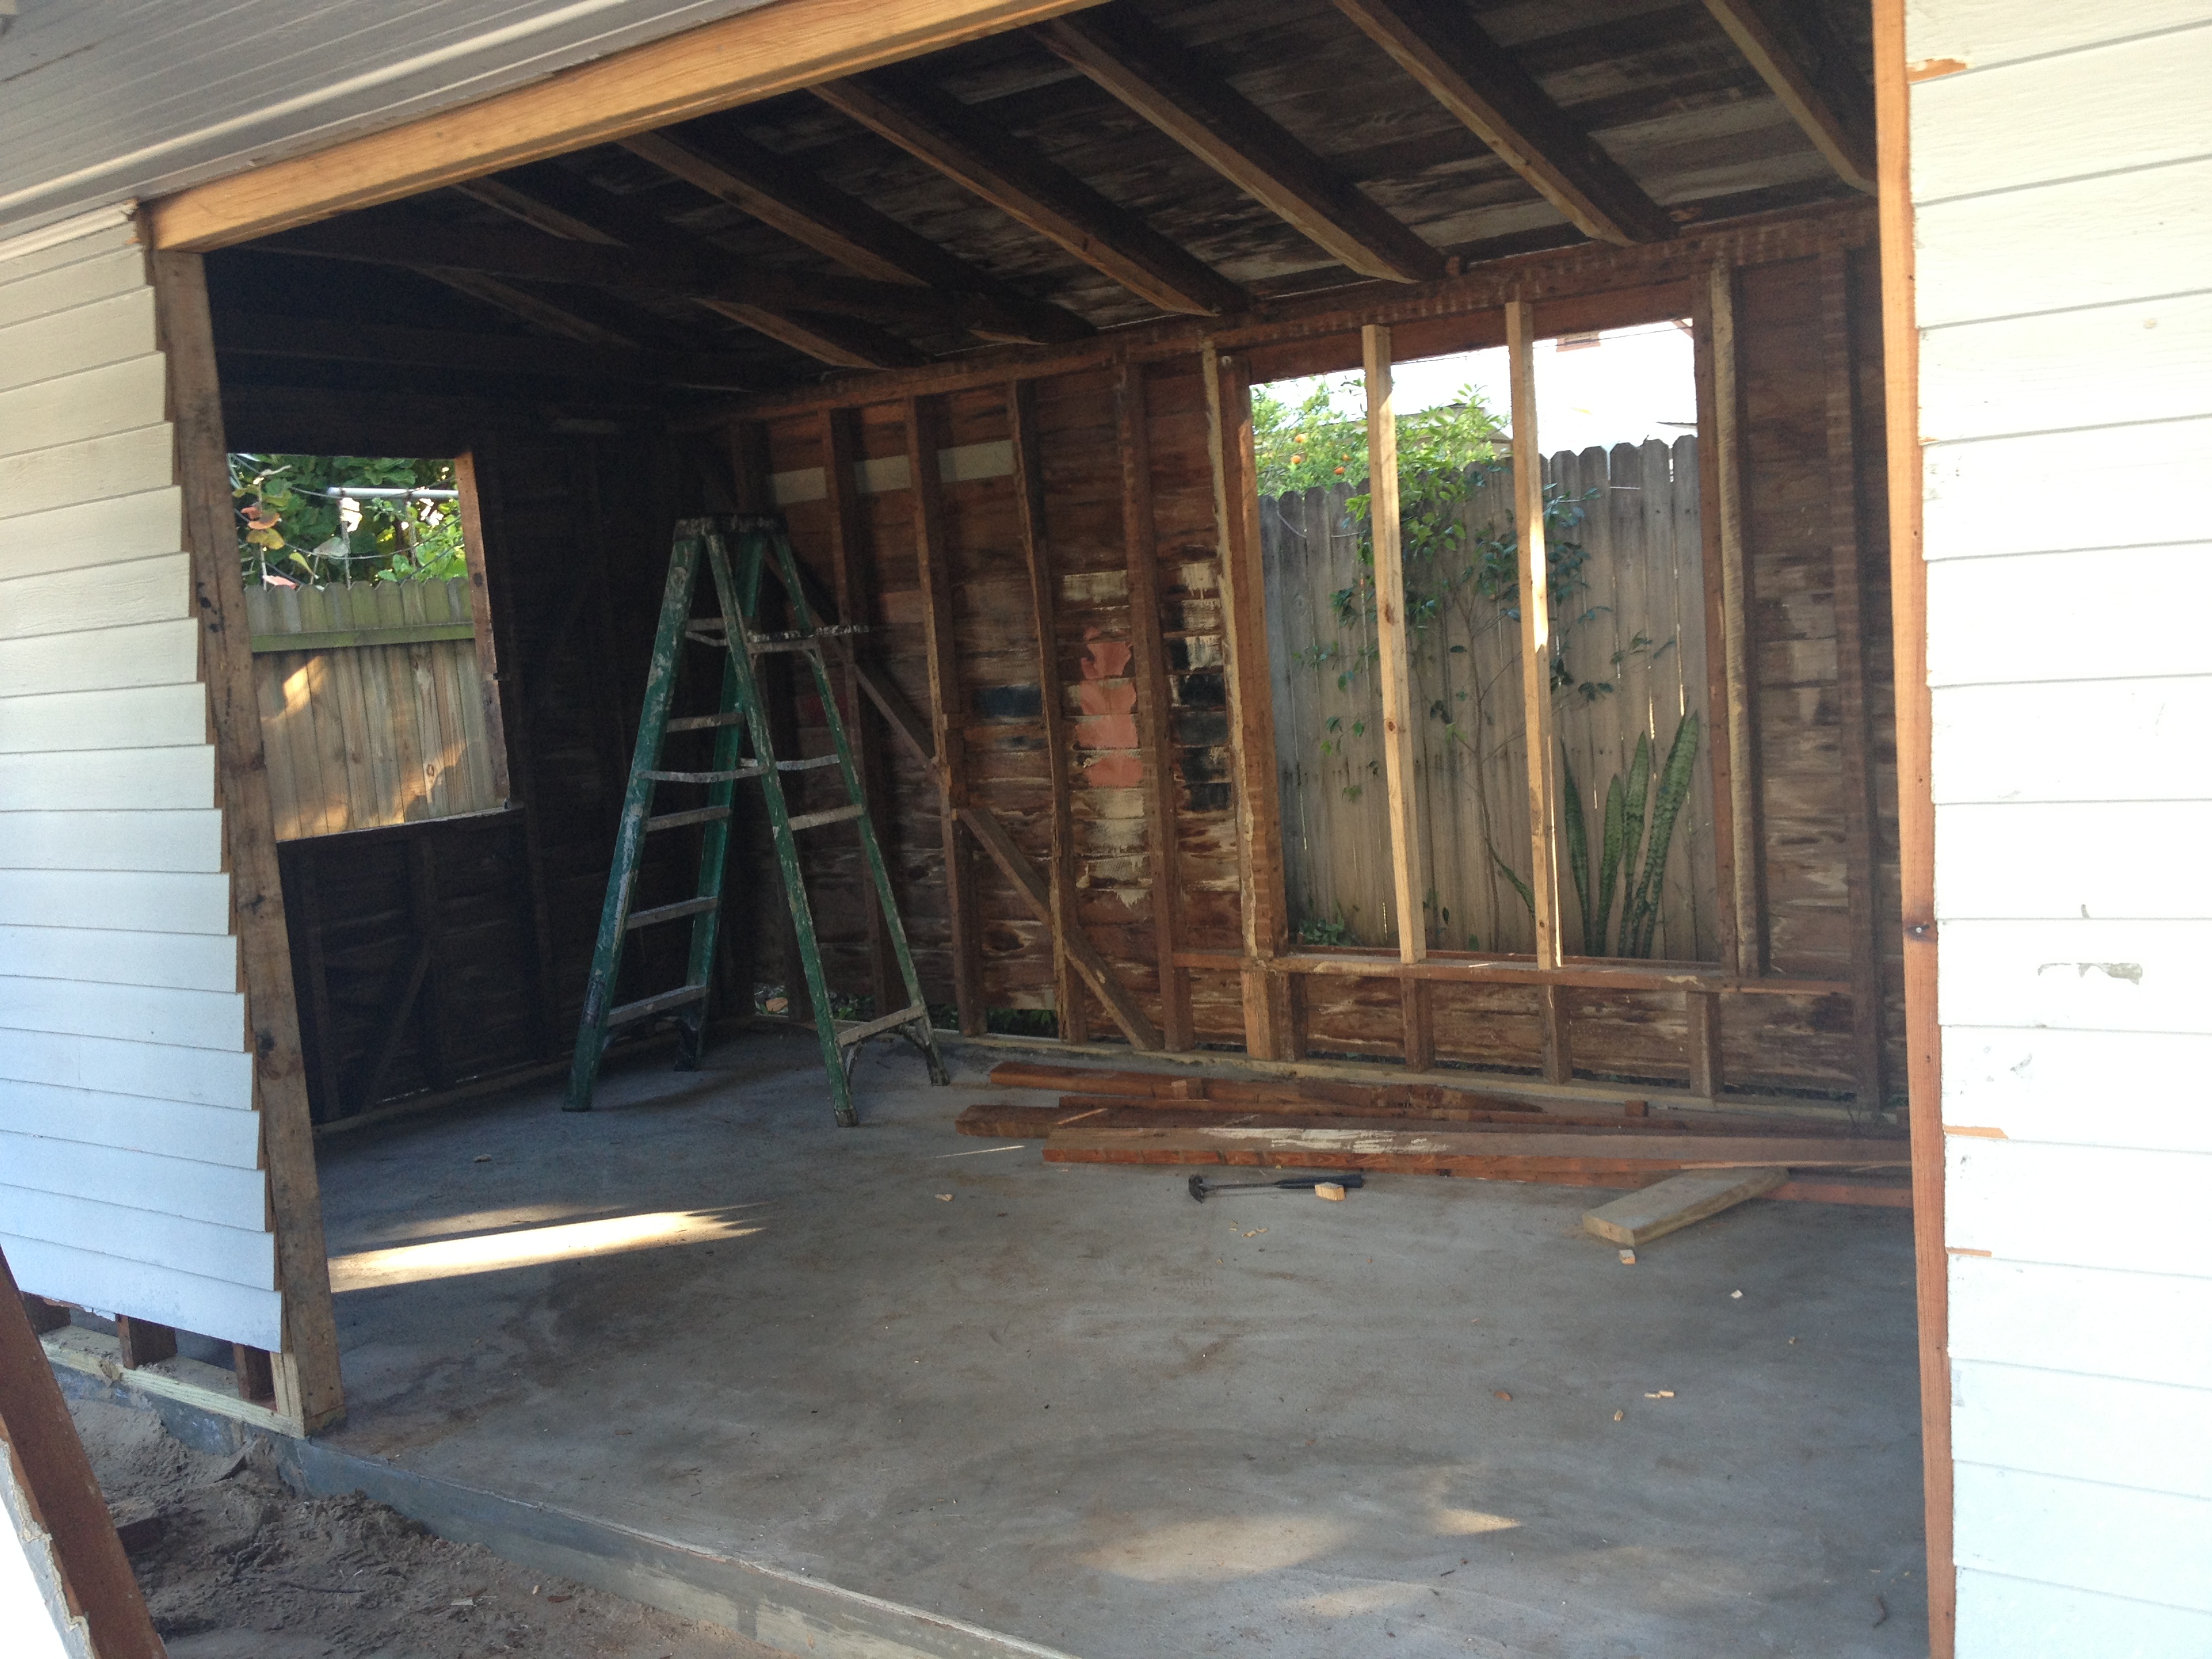
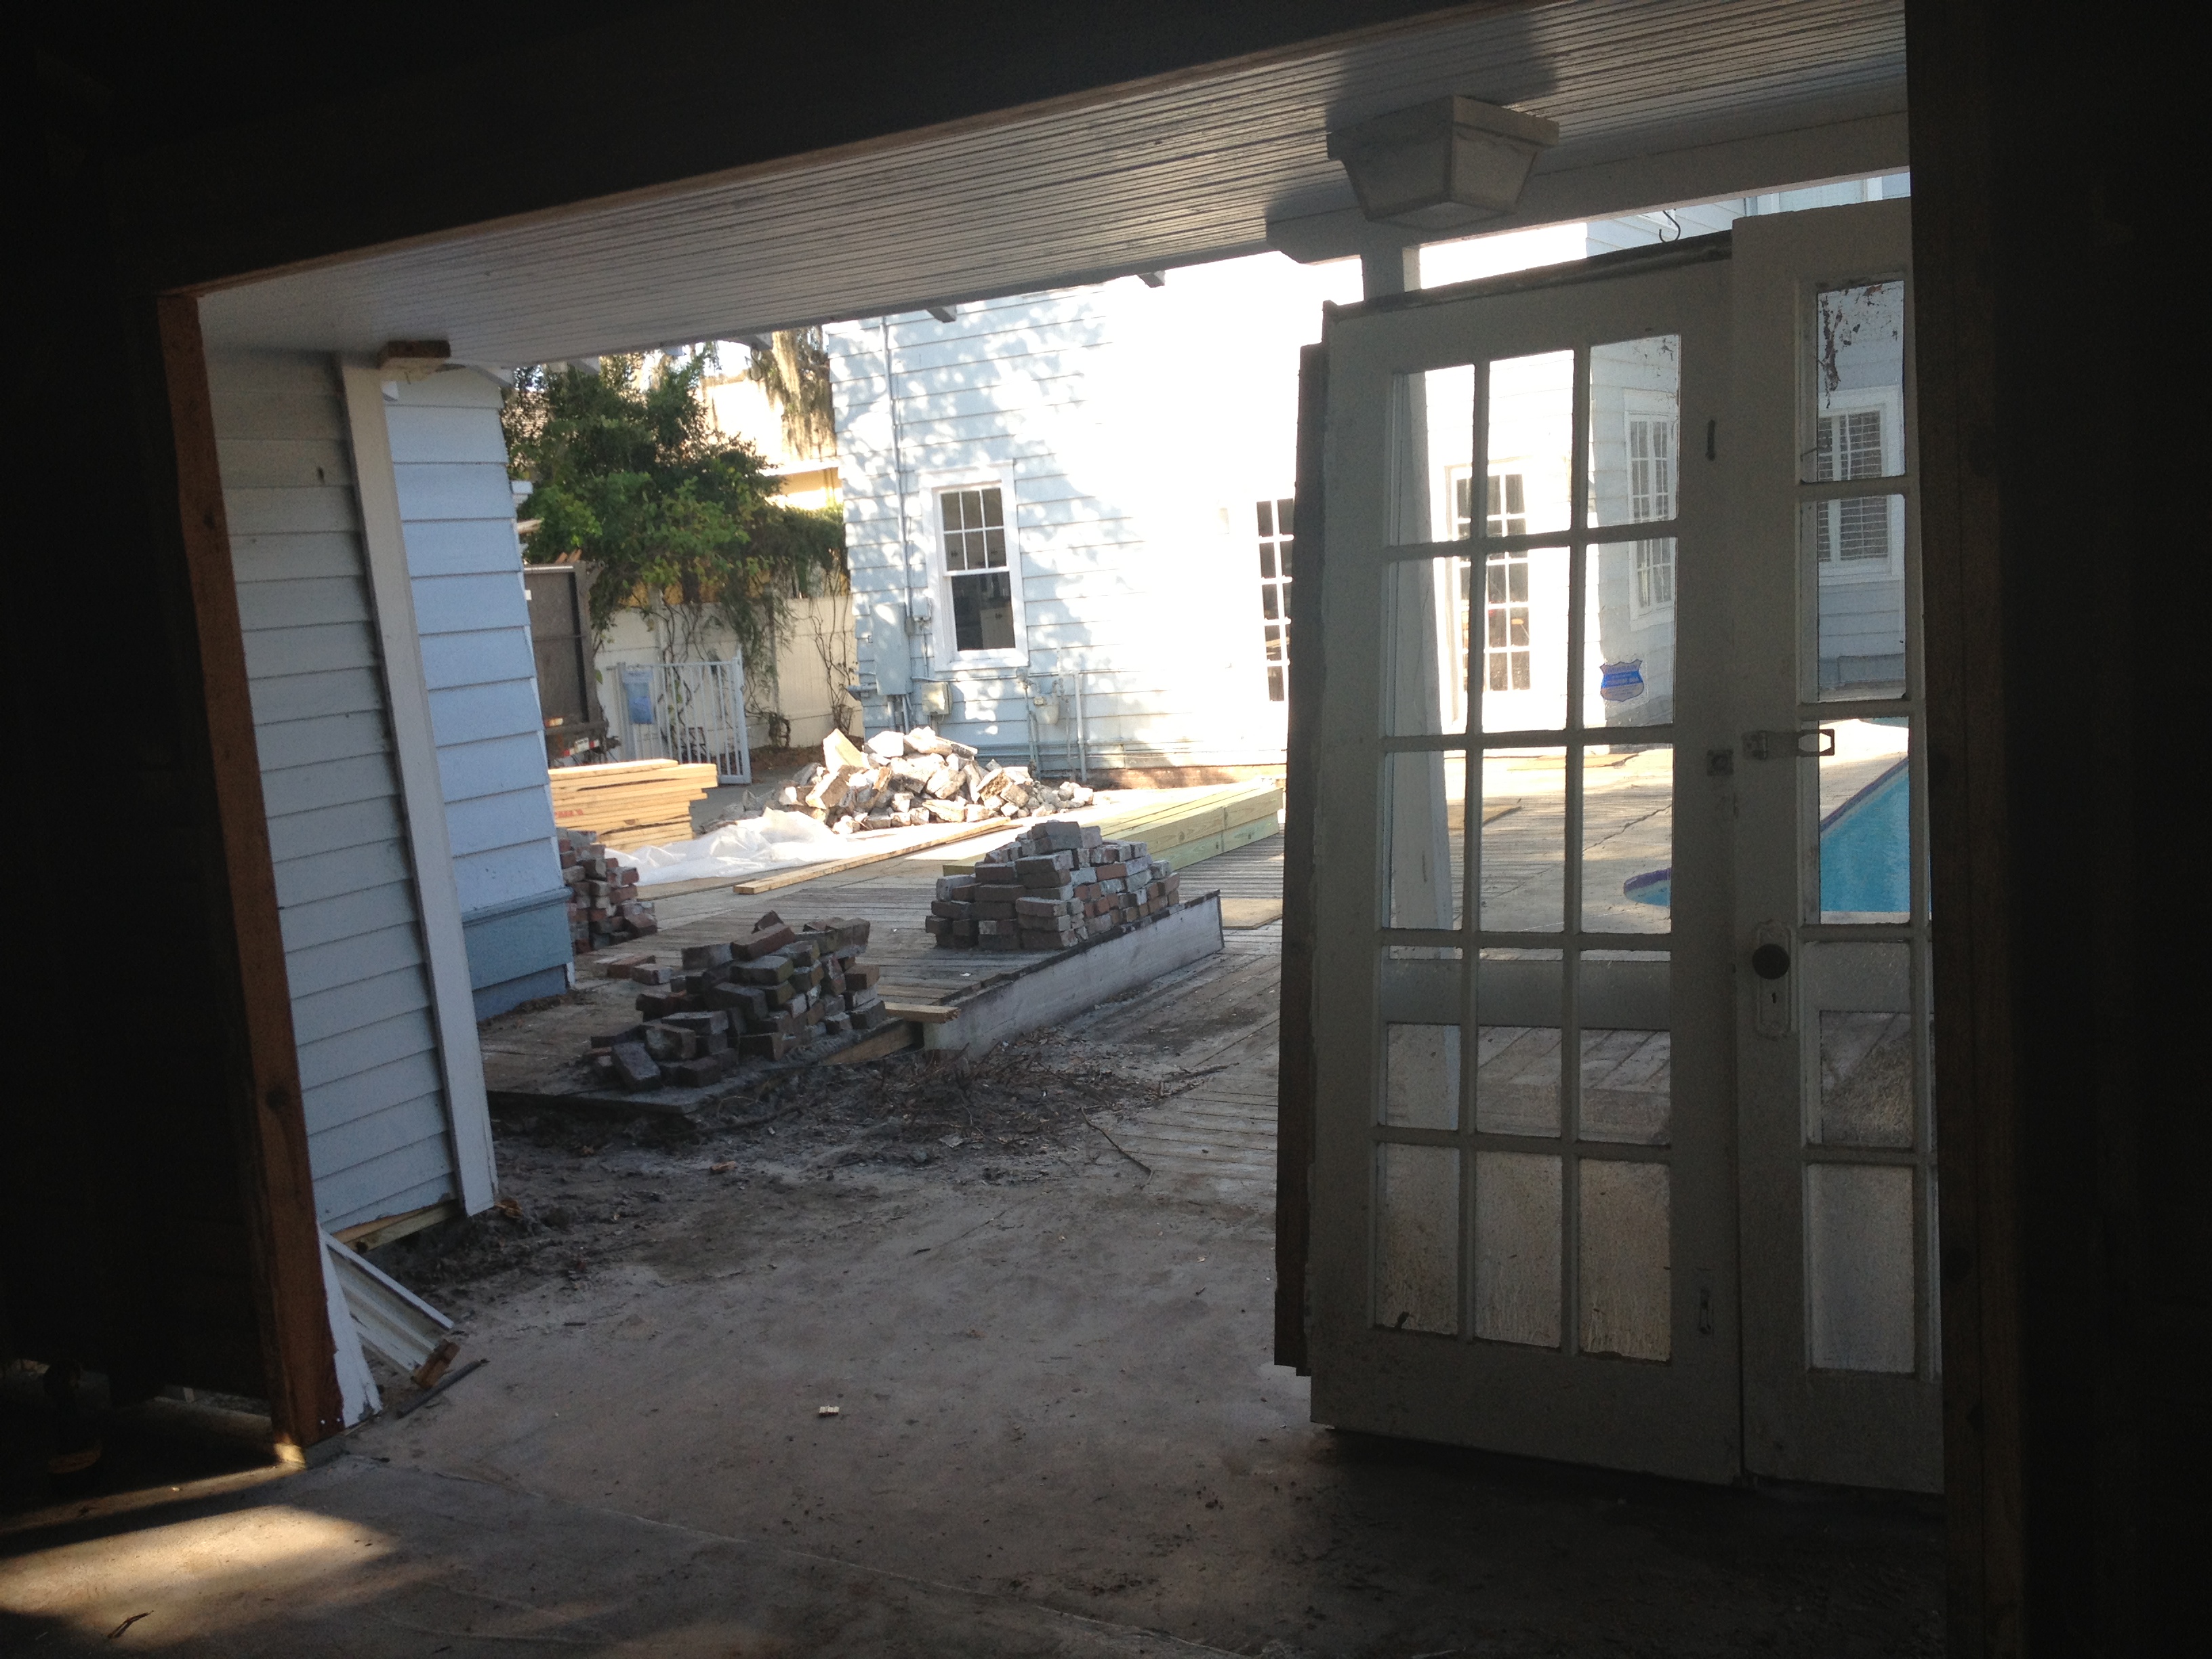
Before – Standing in the backyard looking into existing structure. Soon to be the new kitchen.
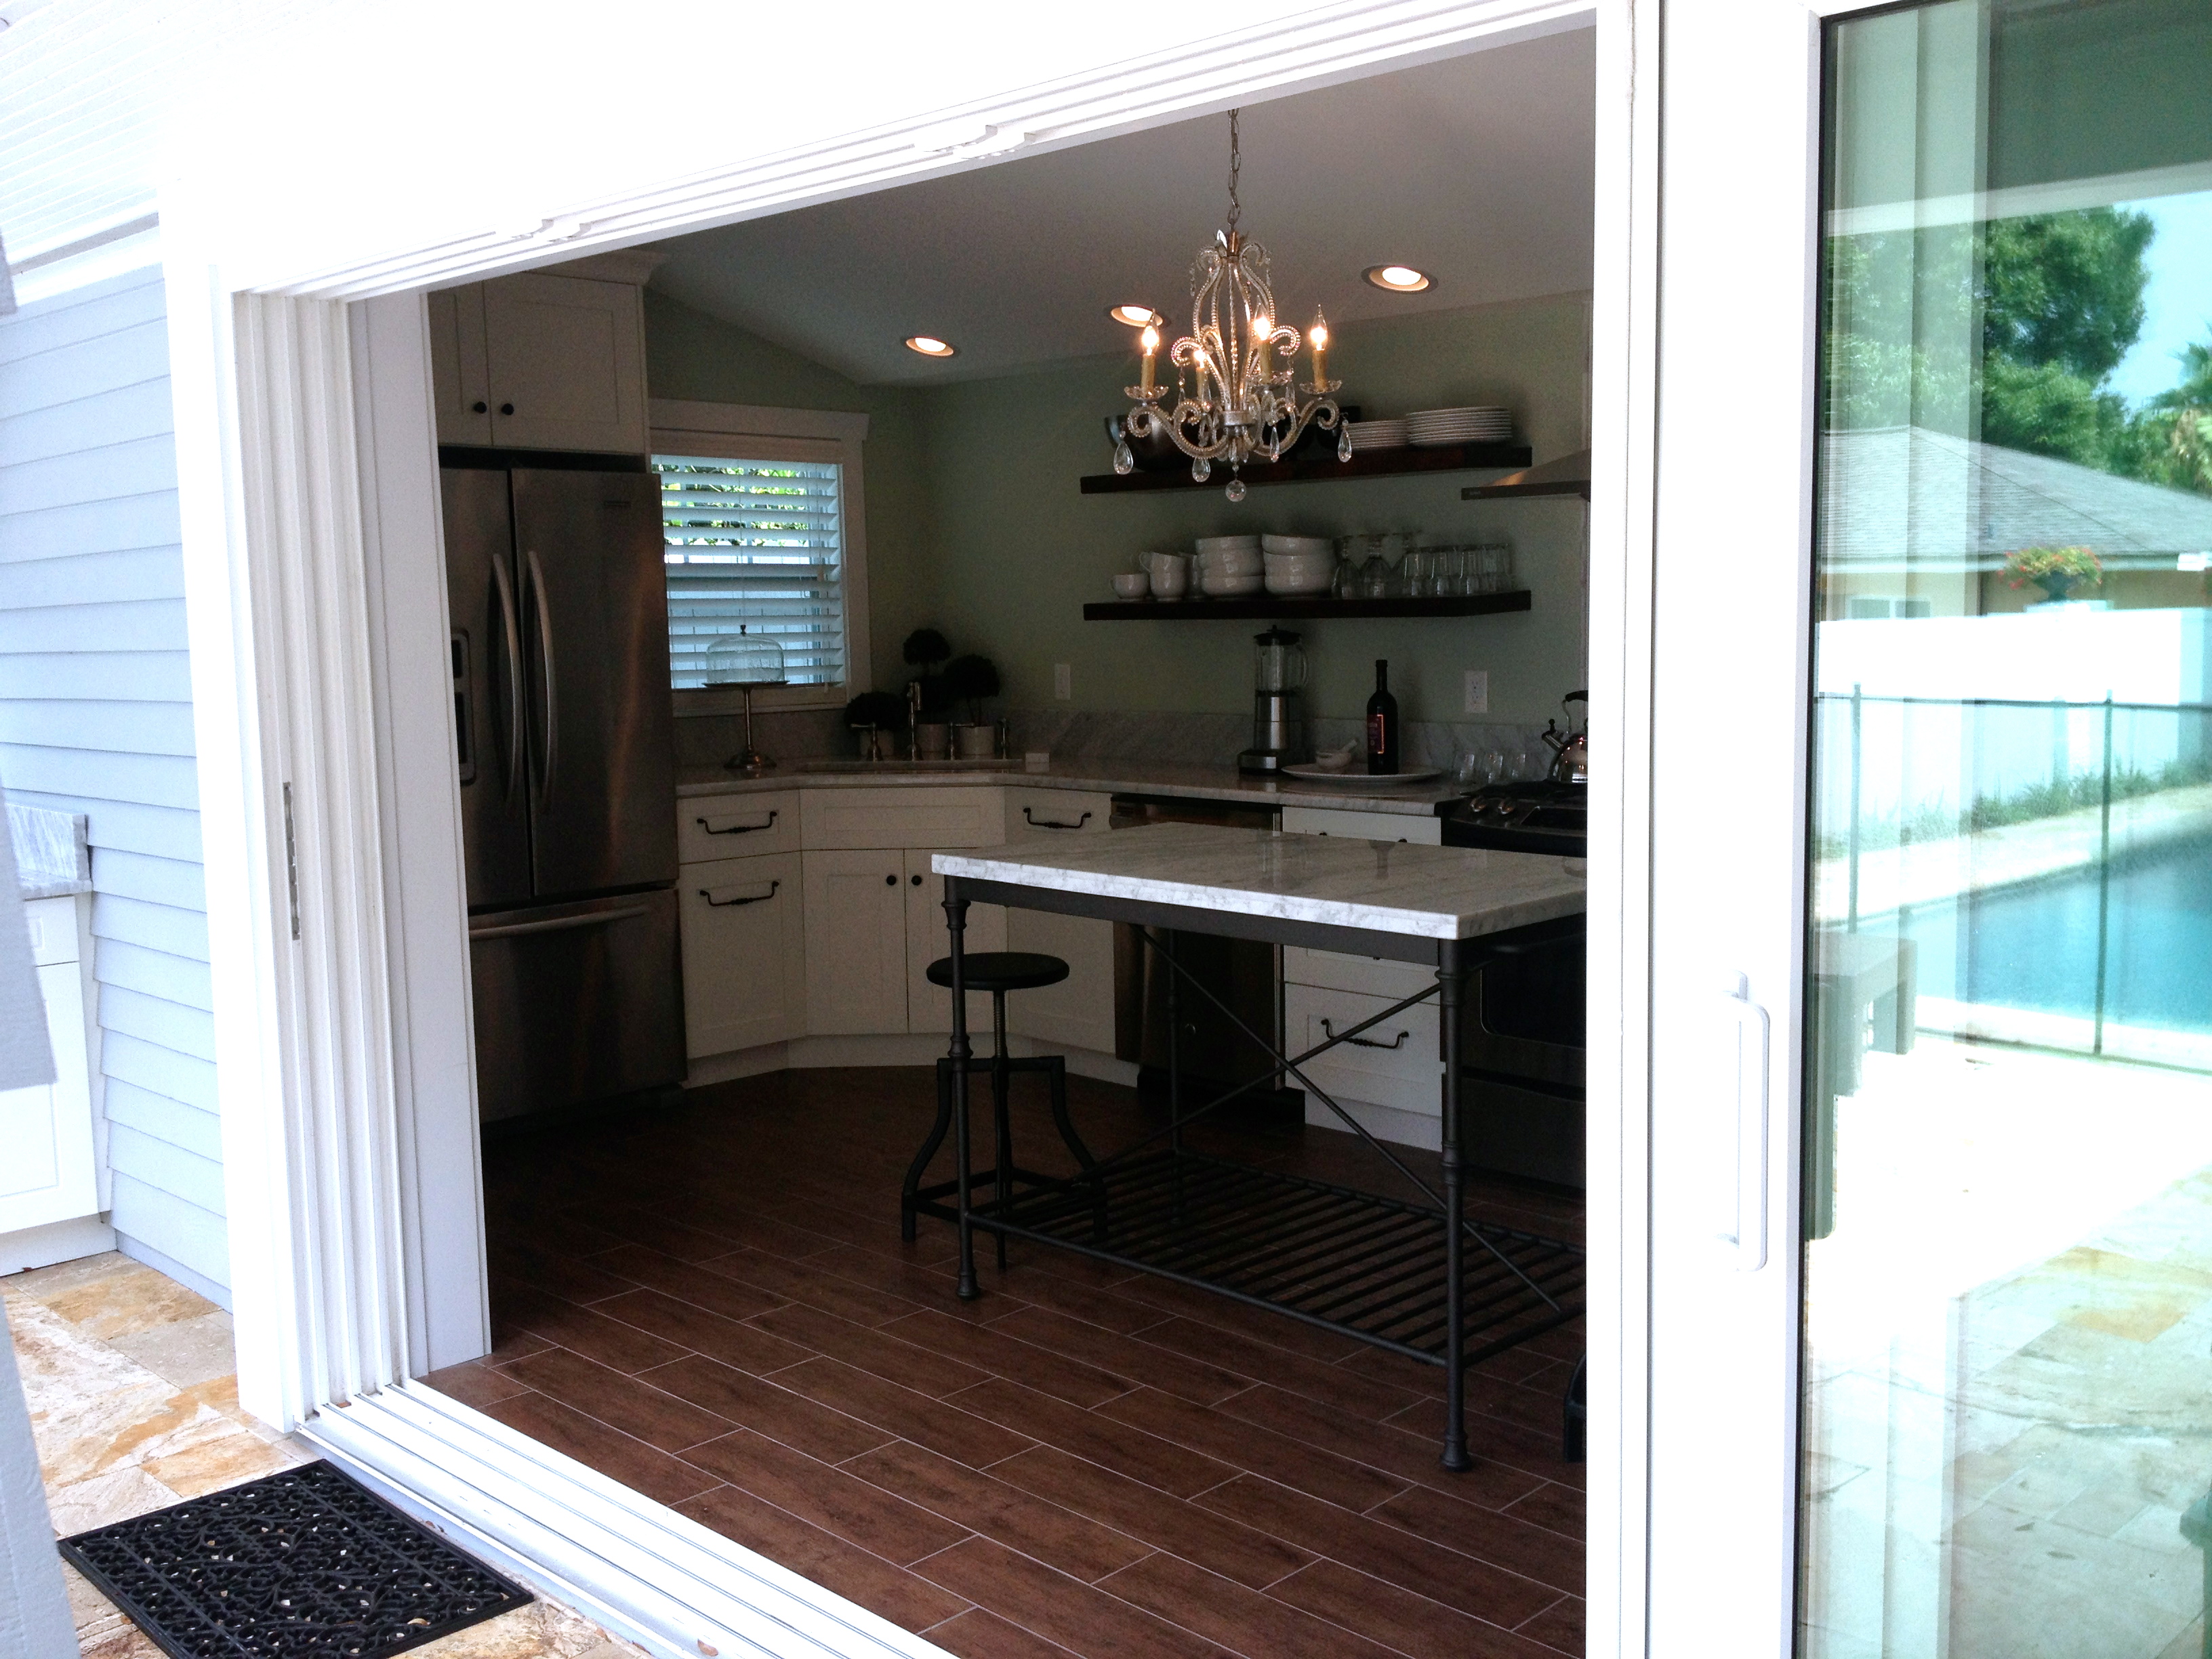
After – Standing in the backyard looking into new kitchen.
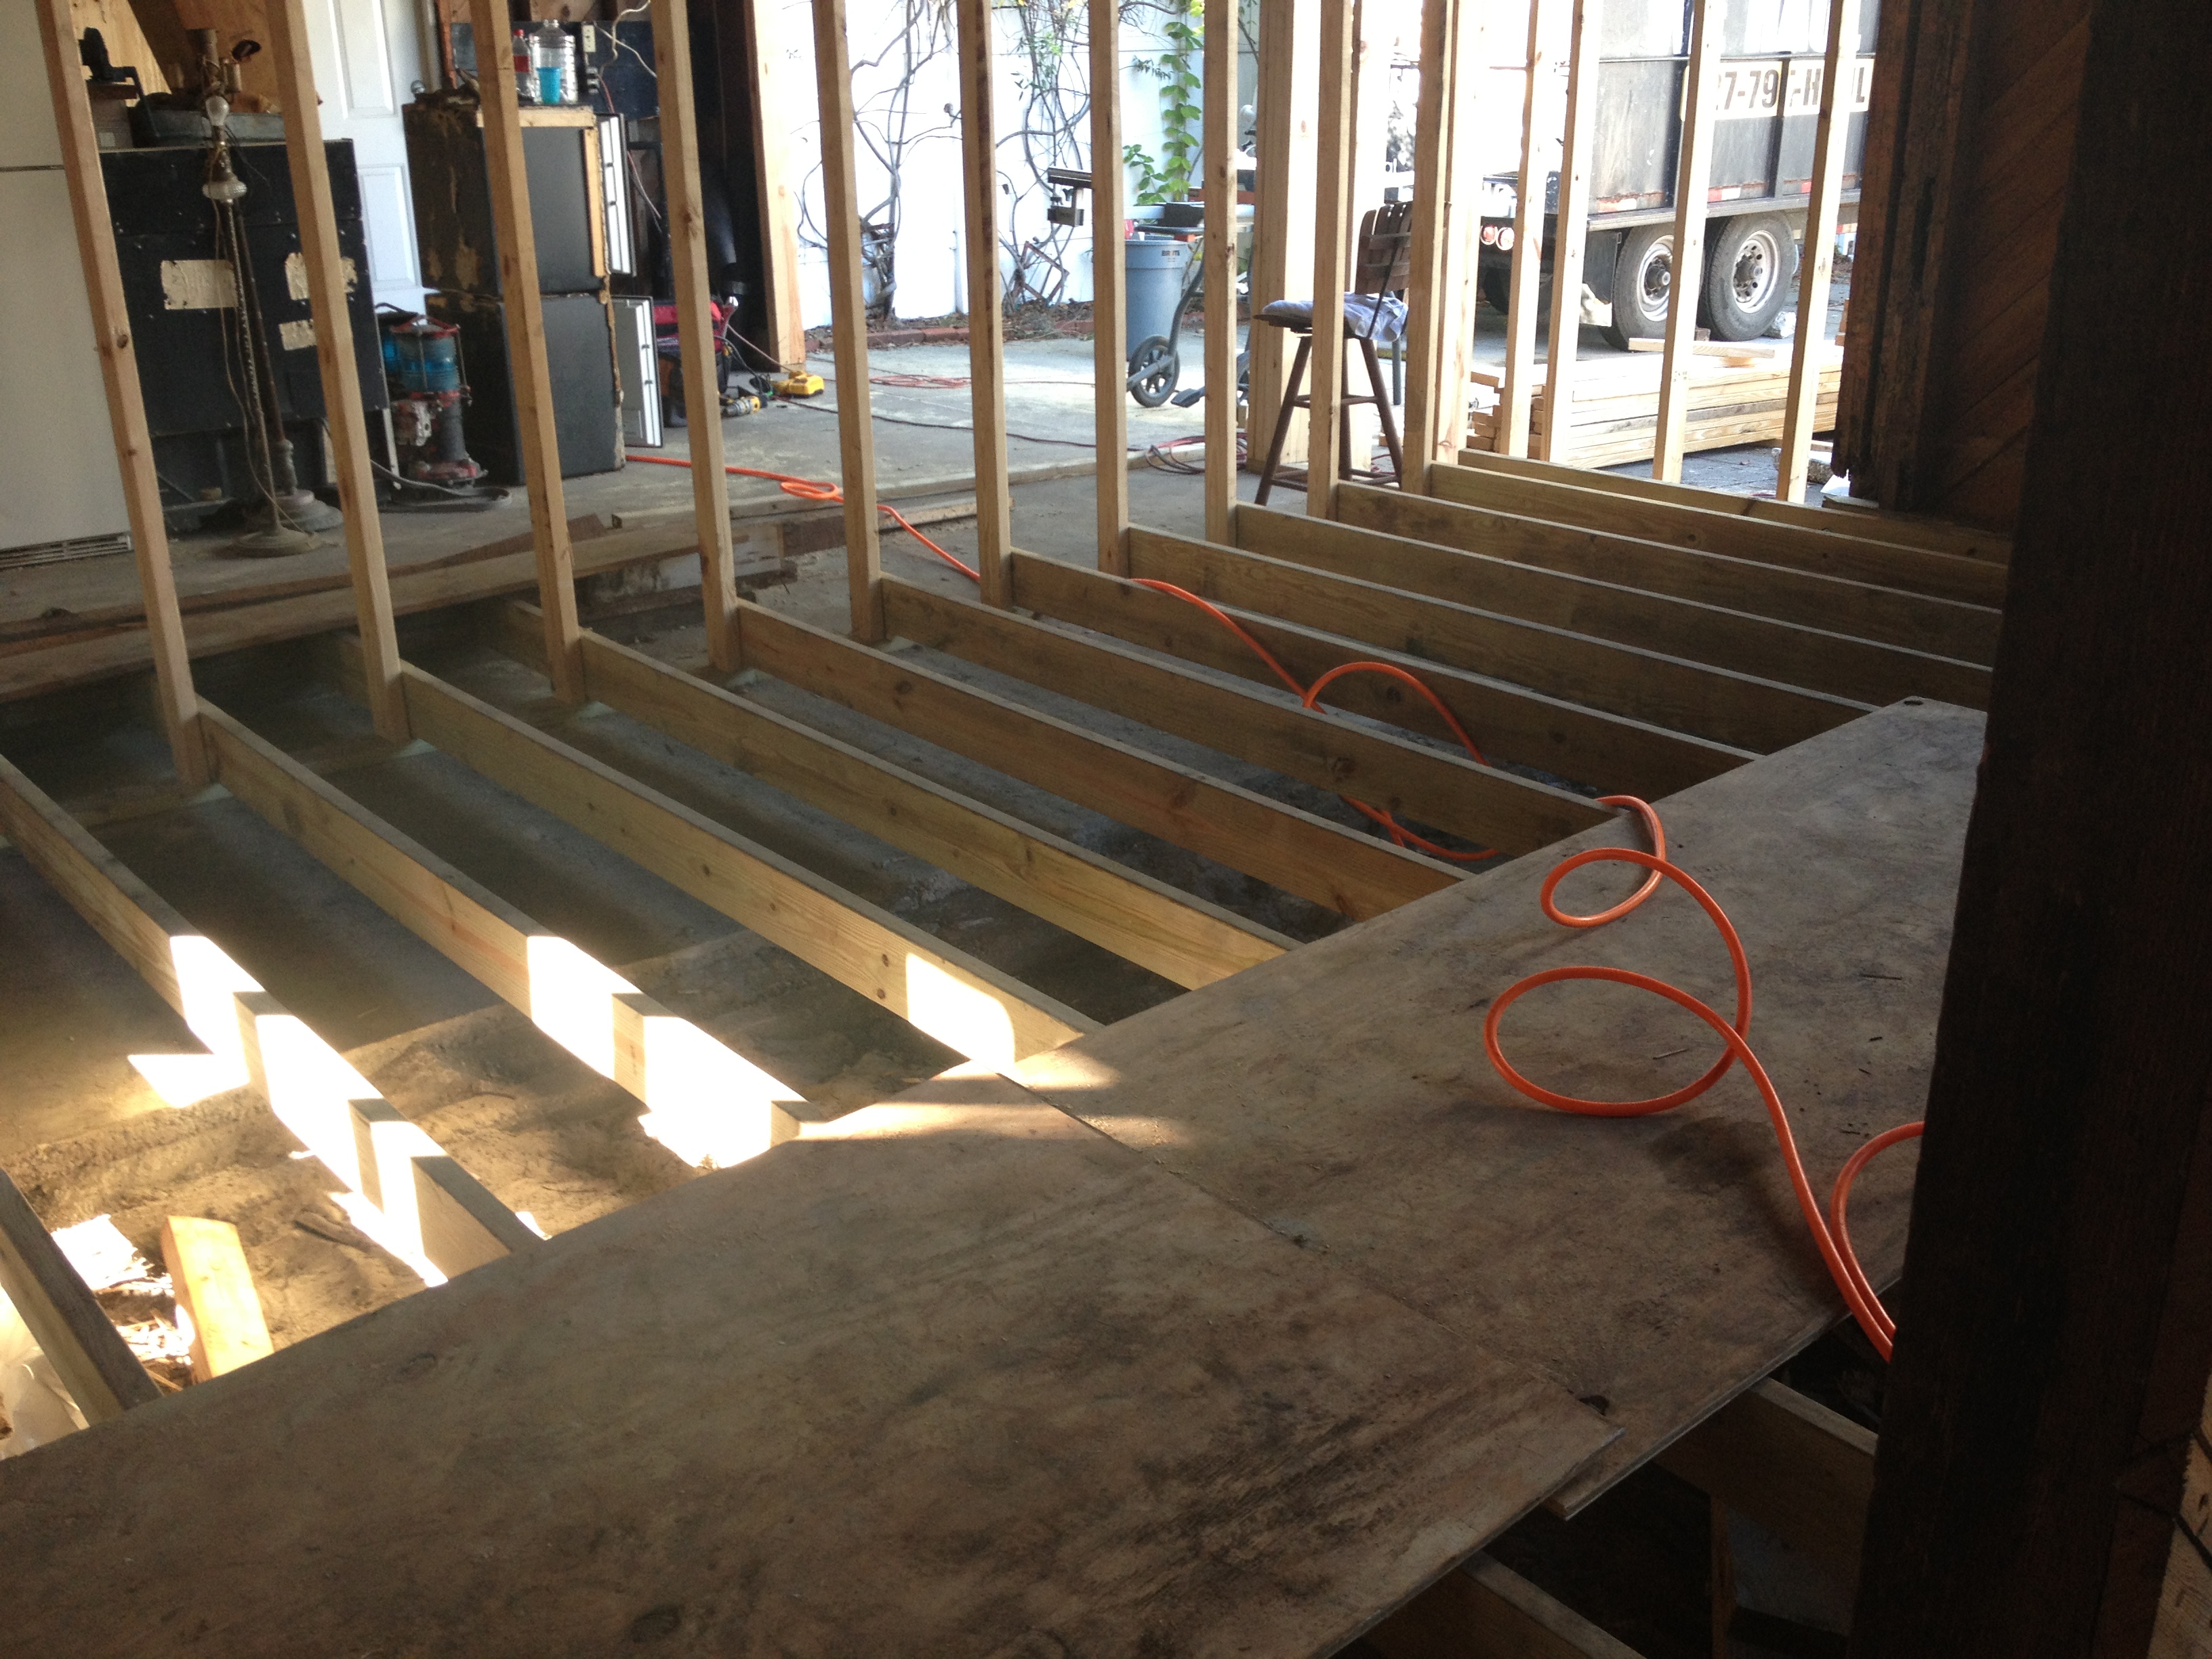
Before – This view is looking at what will be the new kitchen. The ceiling was low, it was level with that single beam in the middle of the room. We raised it up!
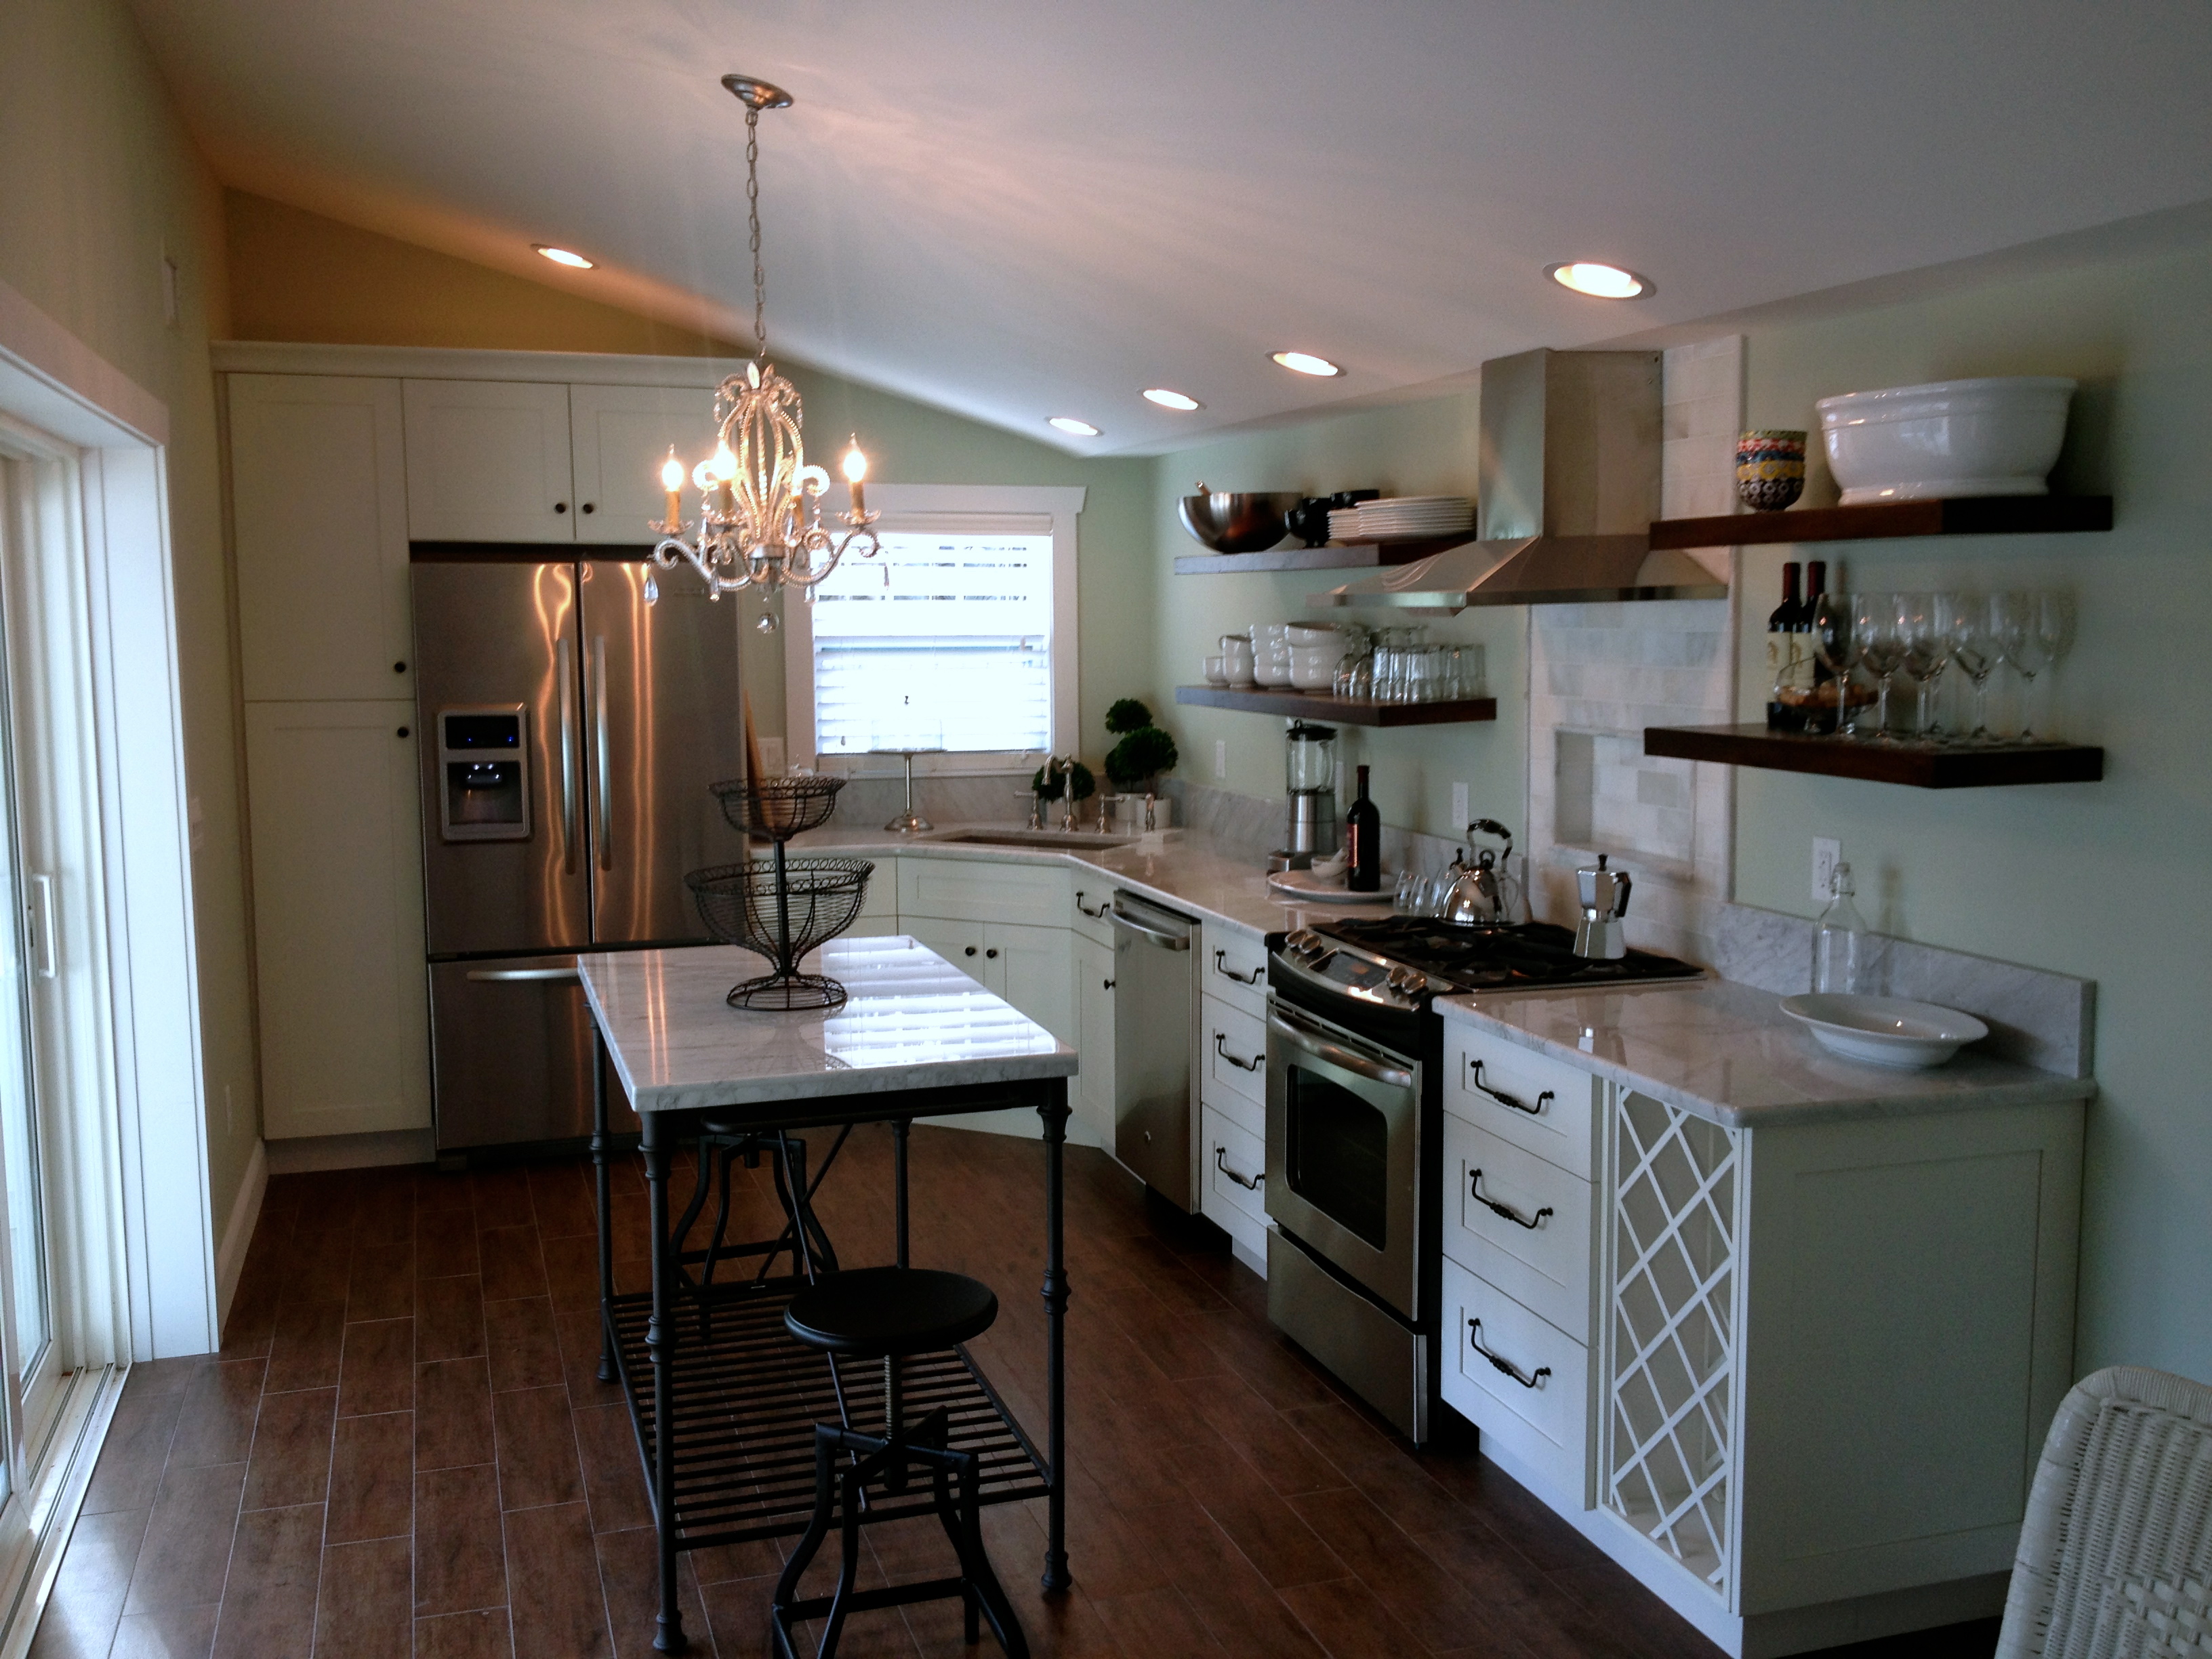
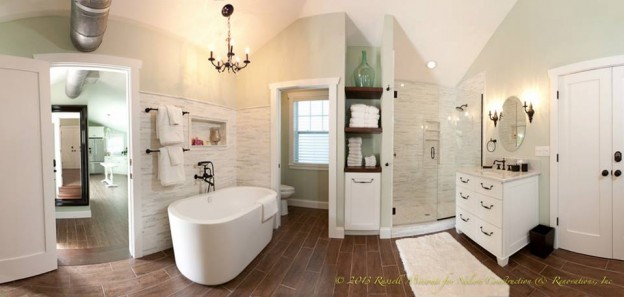
After – The new kitchen. I’d have to say my first inspiration came to me before I even got a call from these clients. I was at Crate and Barrel shopping one day and saw the ‘French Kitchen Island’. I was in love and knew right then I would get to see that in a future project! And here it is in the middle of this kitchen about 6 months later. I want one too…
Before – This view is looking into what will be the new bedroom. I moved the existing back wall that was dividing the garage and bedroom into the garage about 3 feet. This allowed for a larger room and still kept a nice oversized garage space. I also raised the 8′ drop ceiling as high as the roofs pitch.
View walking into new bedroom
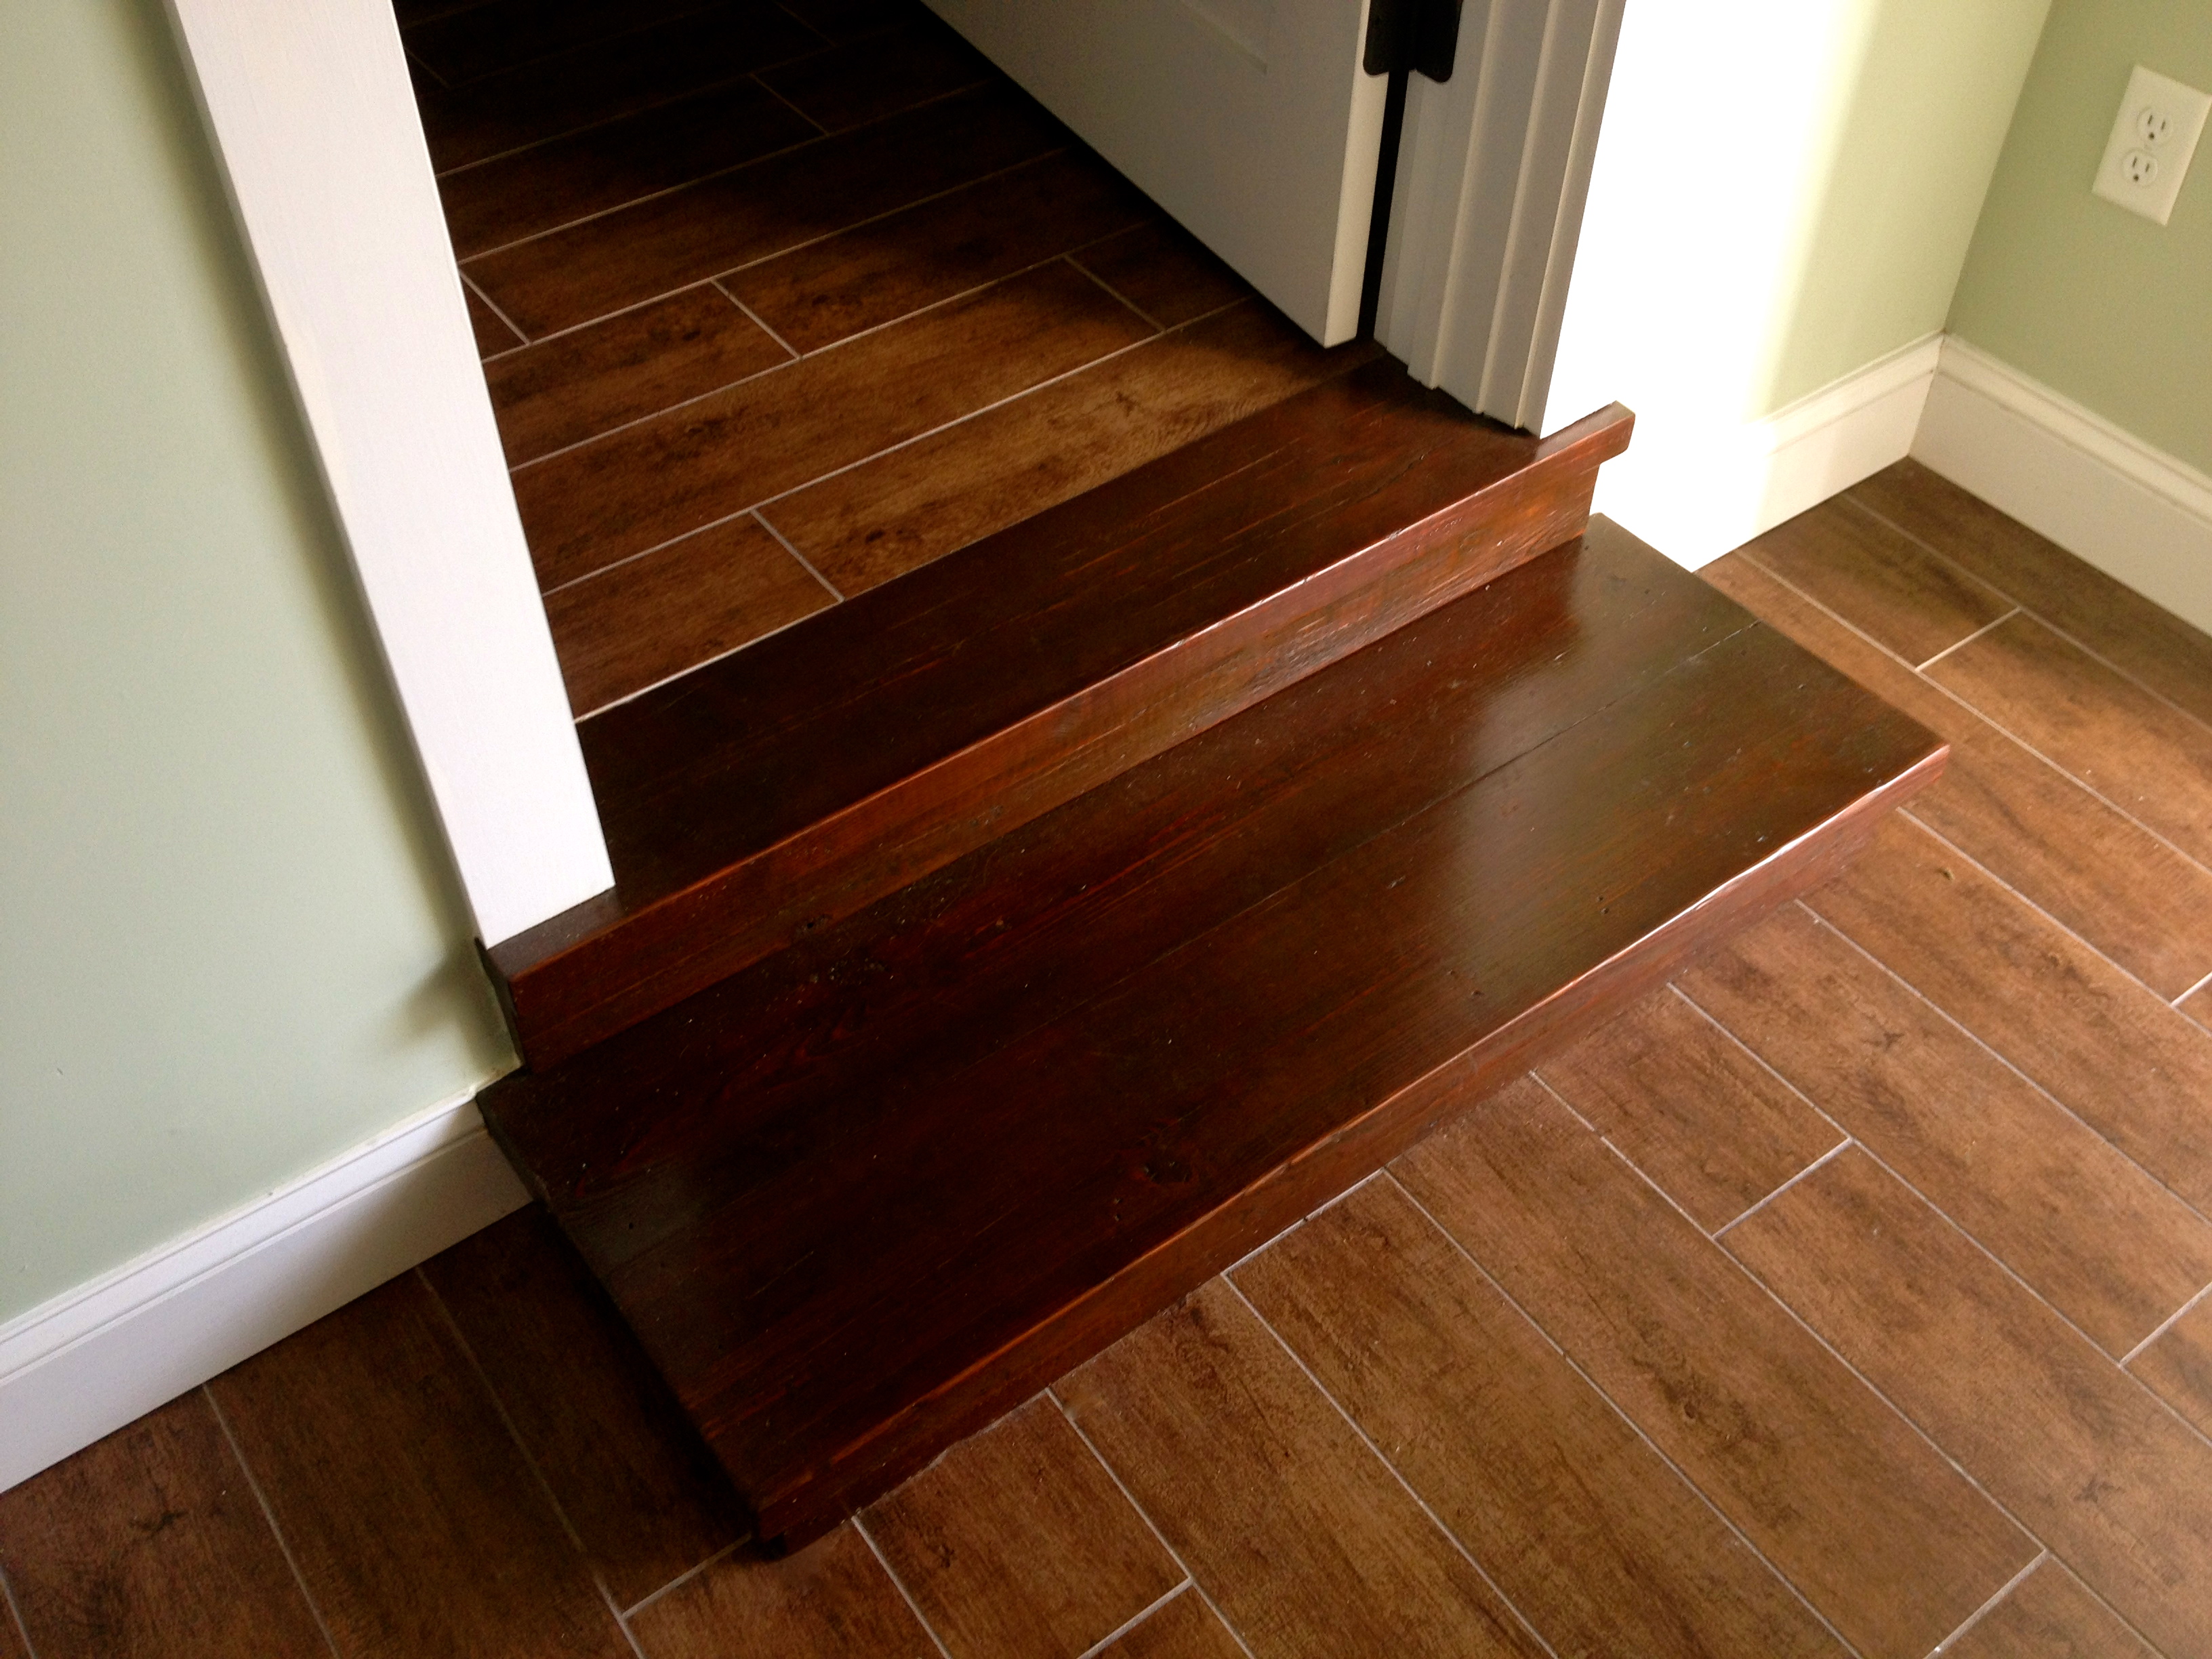
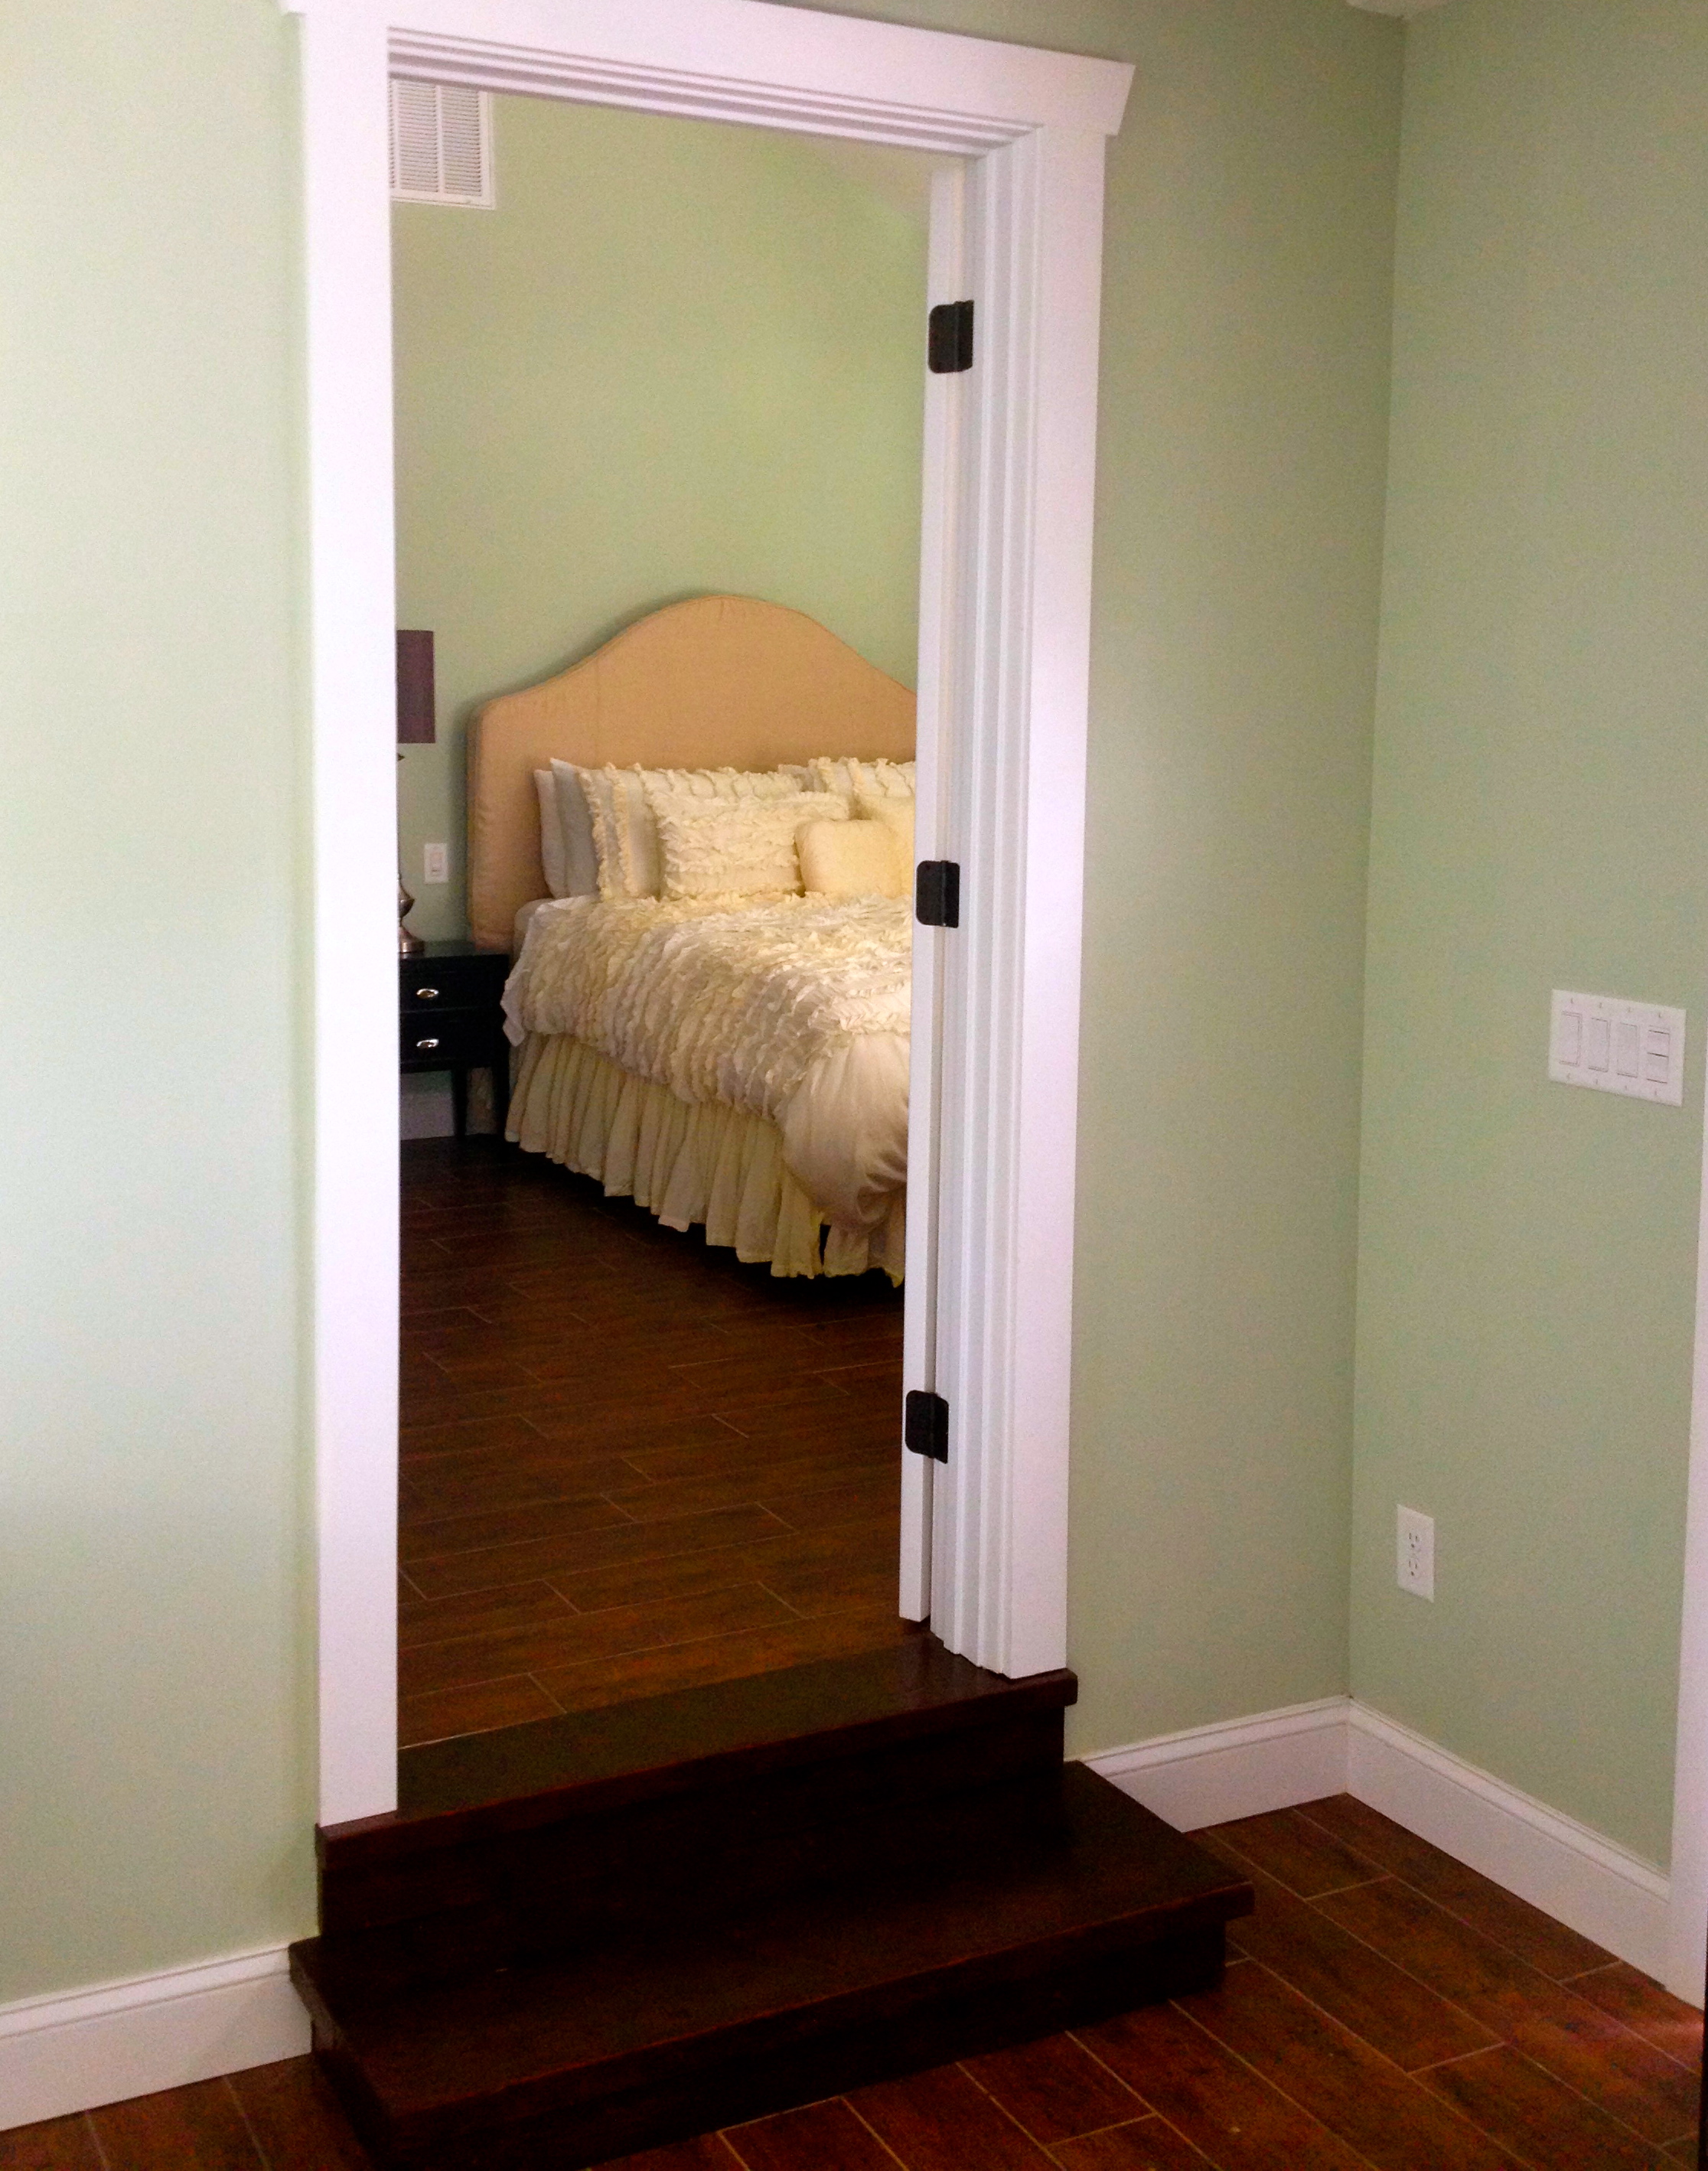
New steps going into the bedroom. Richard, of Nelson Construction, suggested we use some of the reclaimed wood from the old floor joists. We agreed and he made these steps on site. Great idea Richard!
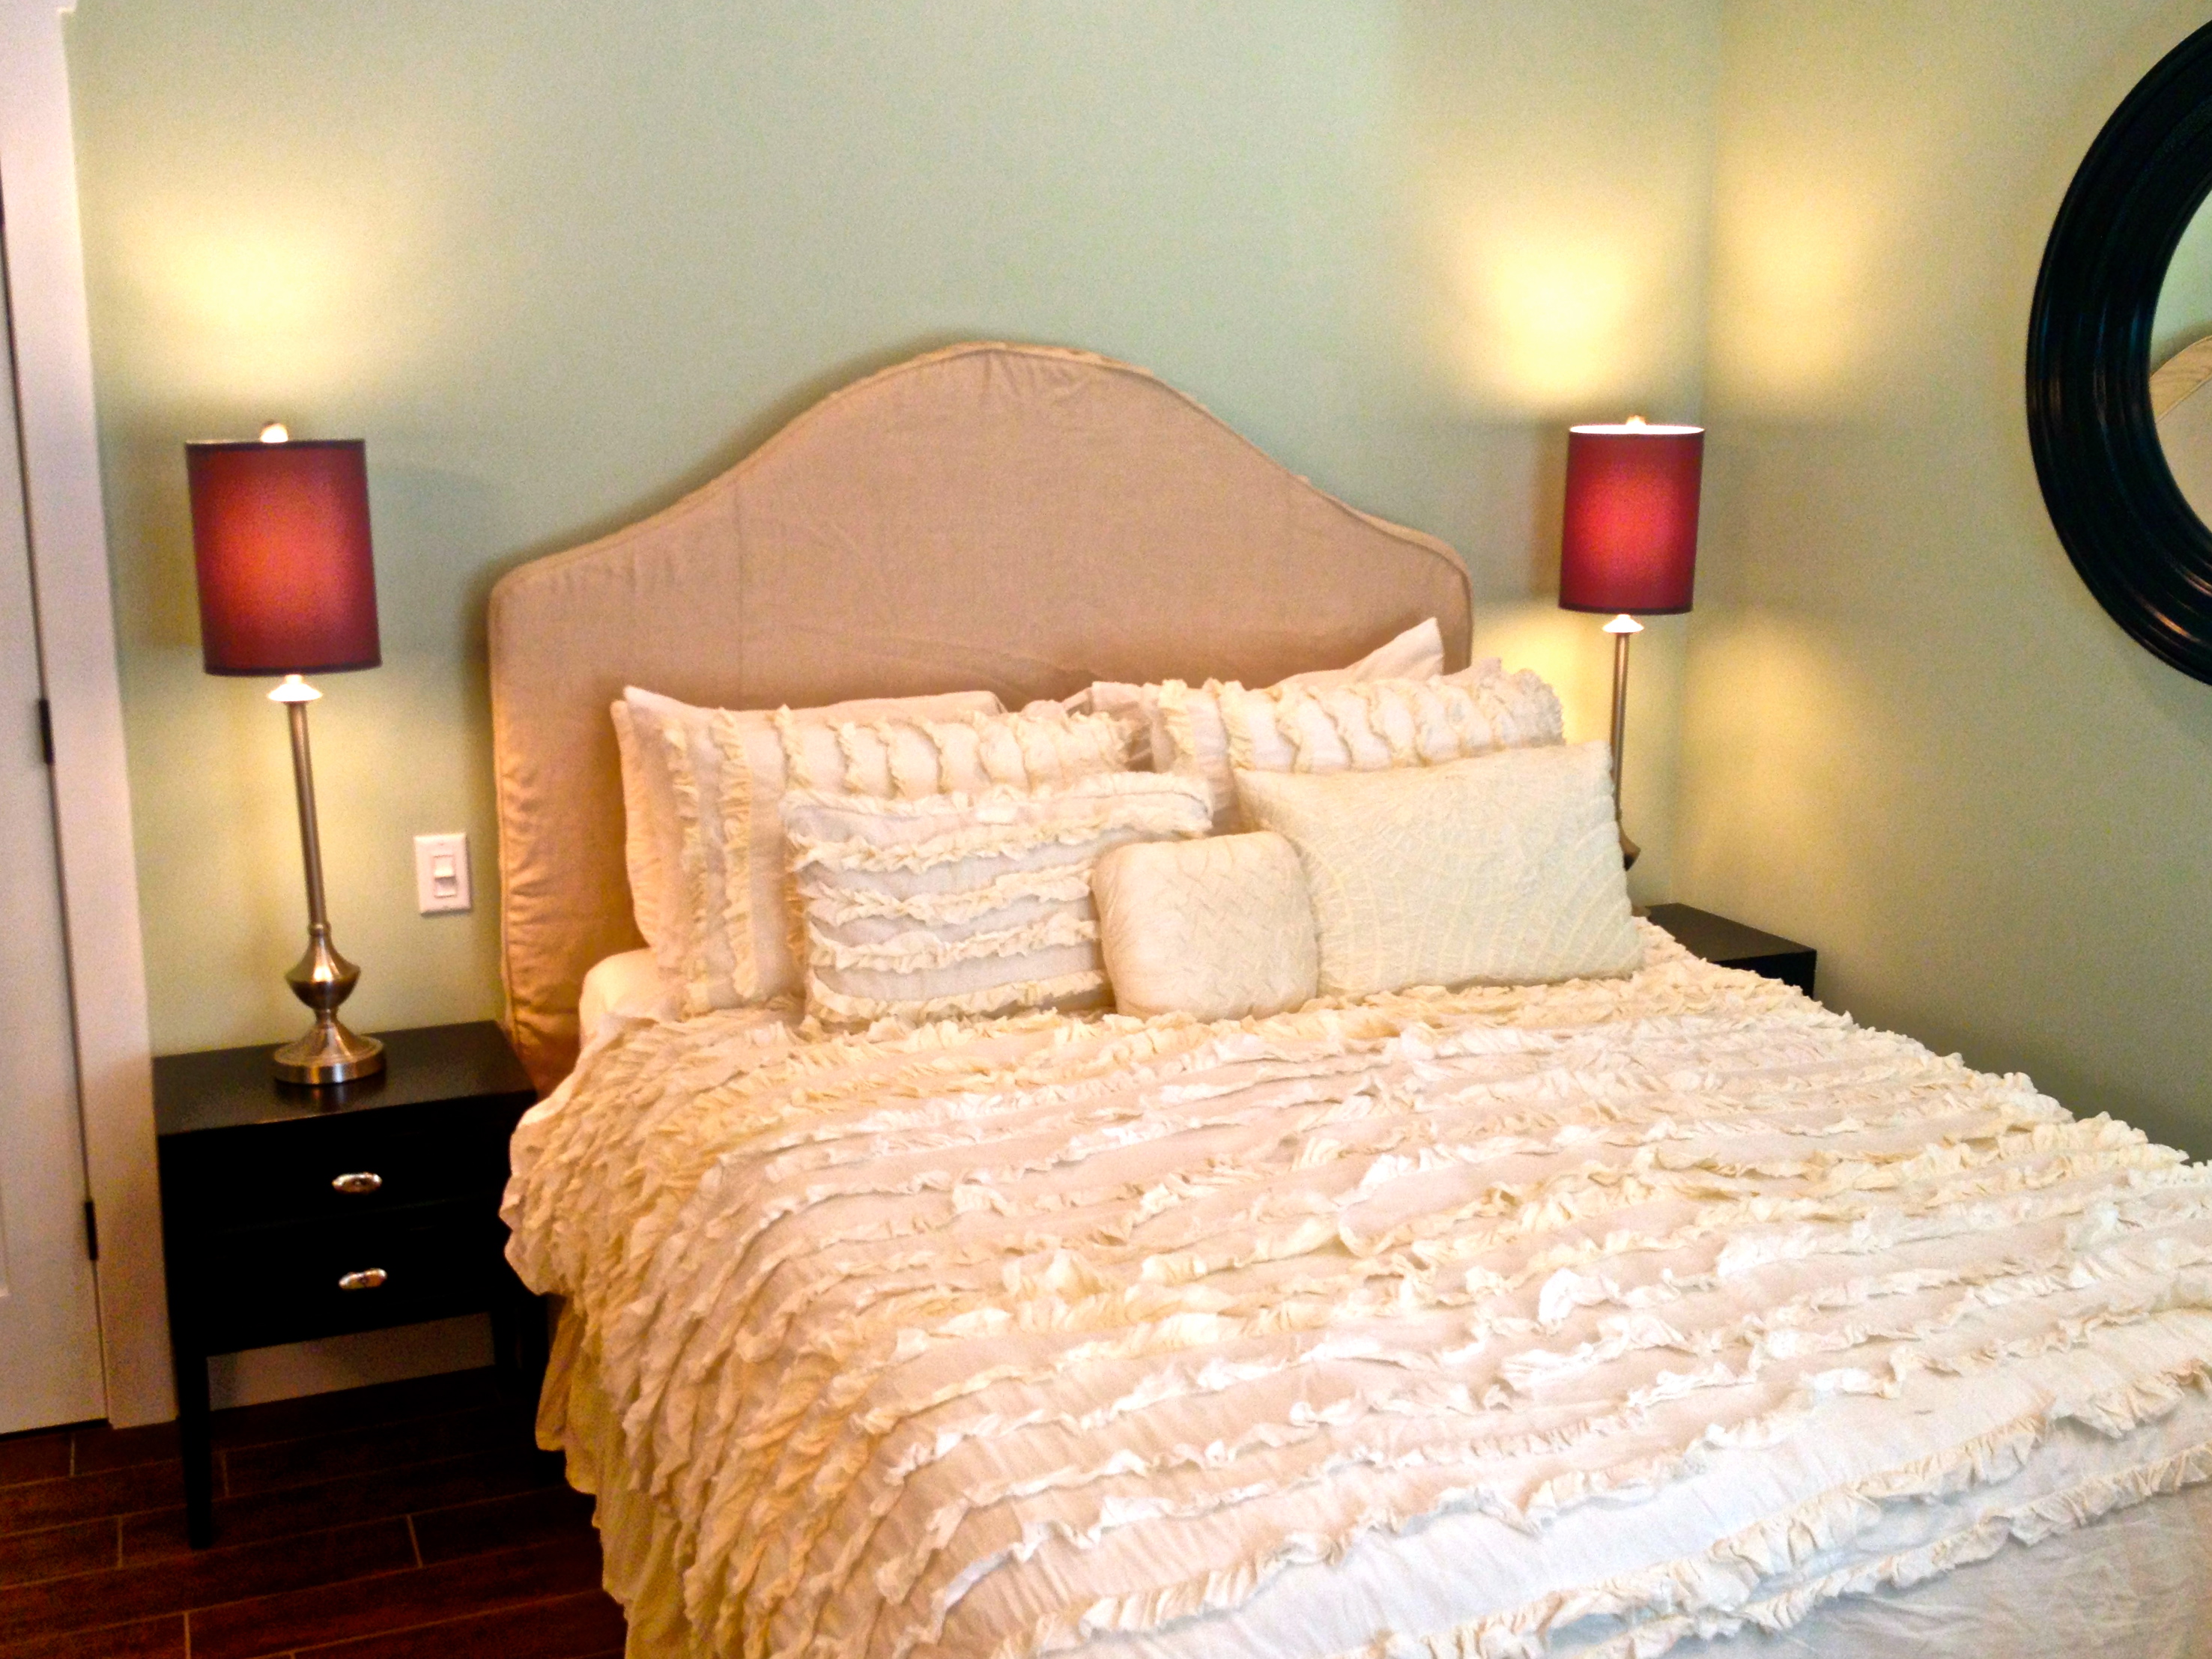
The new room! Do you see the switch to the left of the headboard? There is one placed on each side of the bed connected to an overhead light for reading. On dimmers of course. These are the details I love! The bedding was the client’s prior home’s guest room bedding and worked perfectly in the new space.
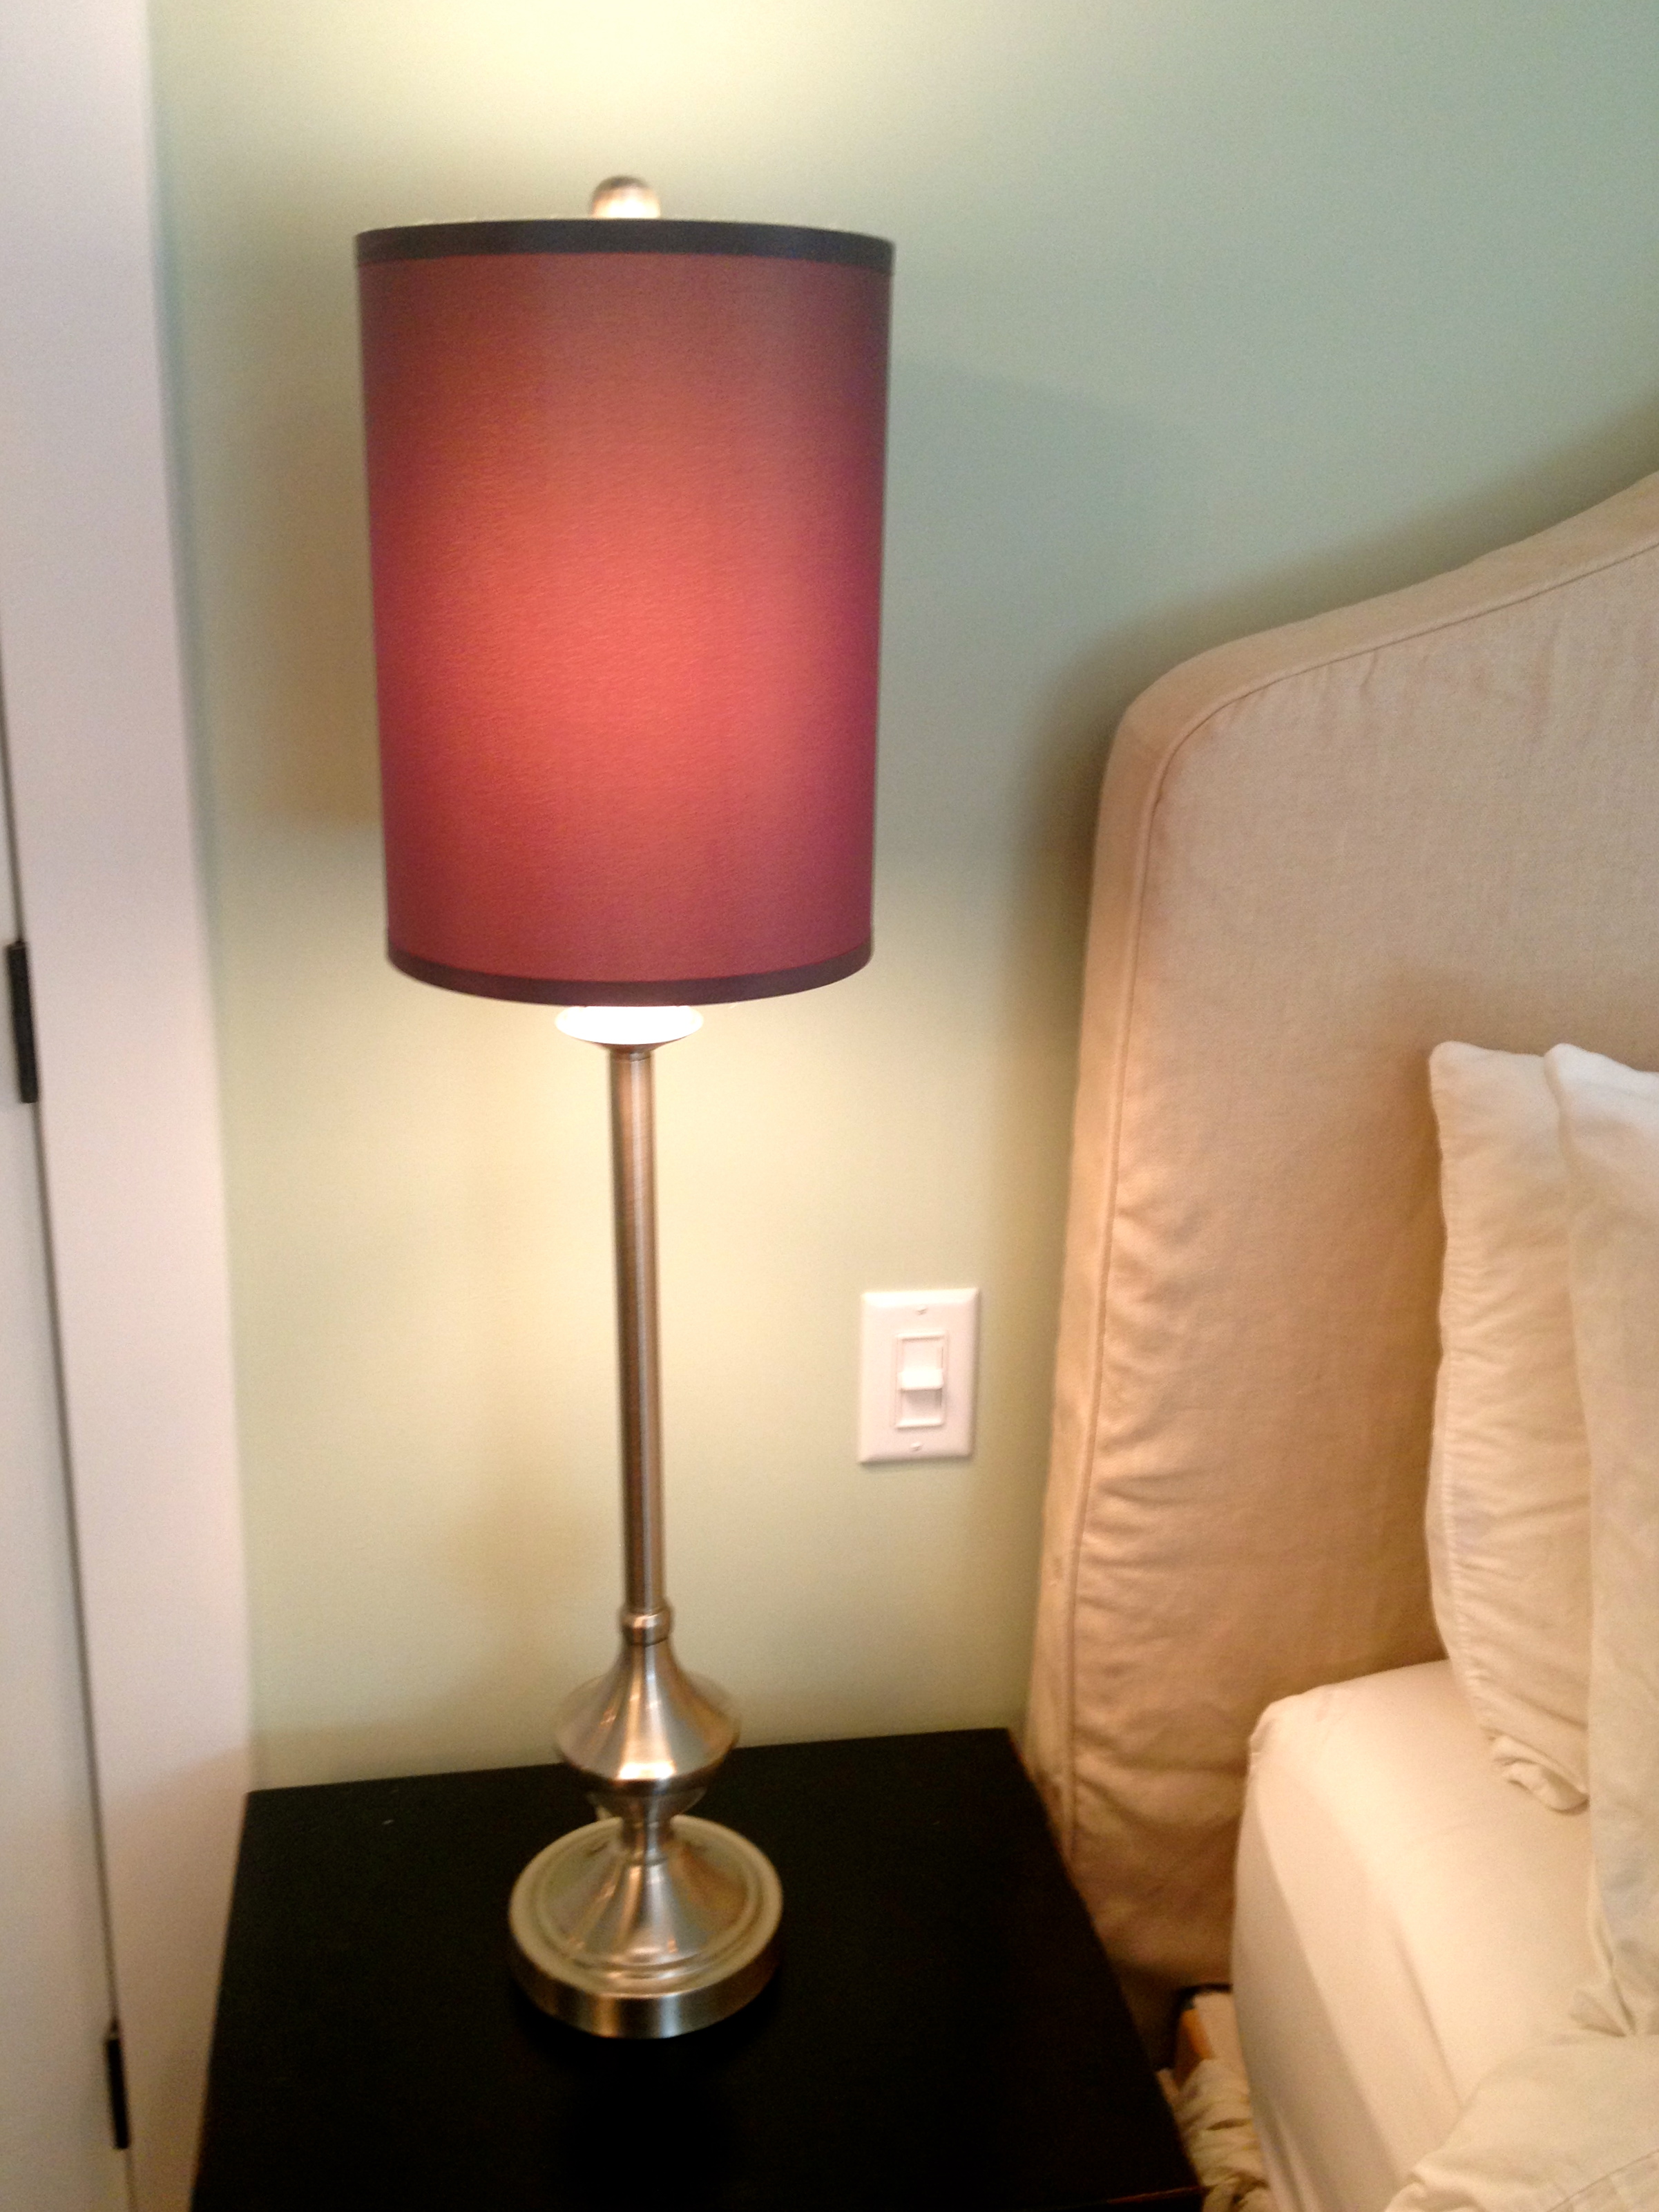
The switch. I am all about the details and really thinking things through to the end. Function and beauty go hand in hand!
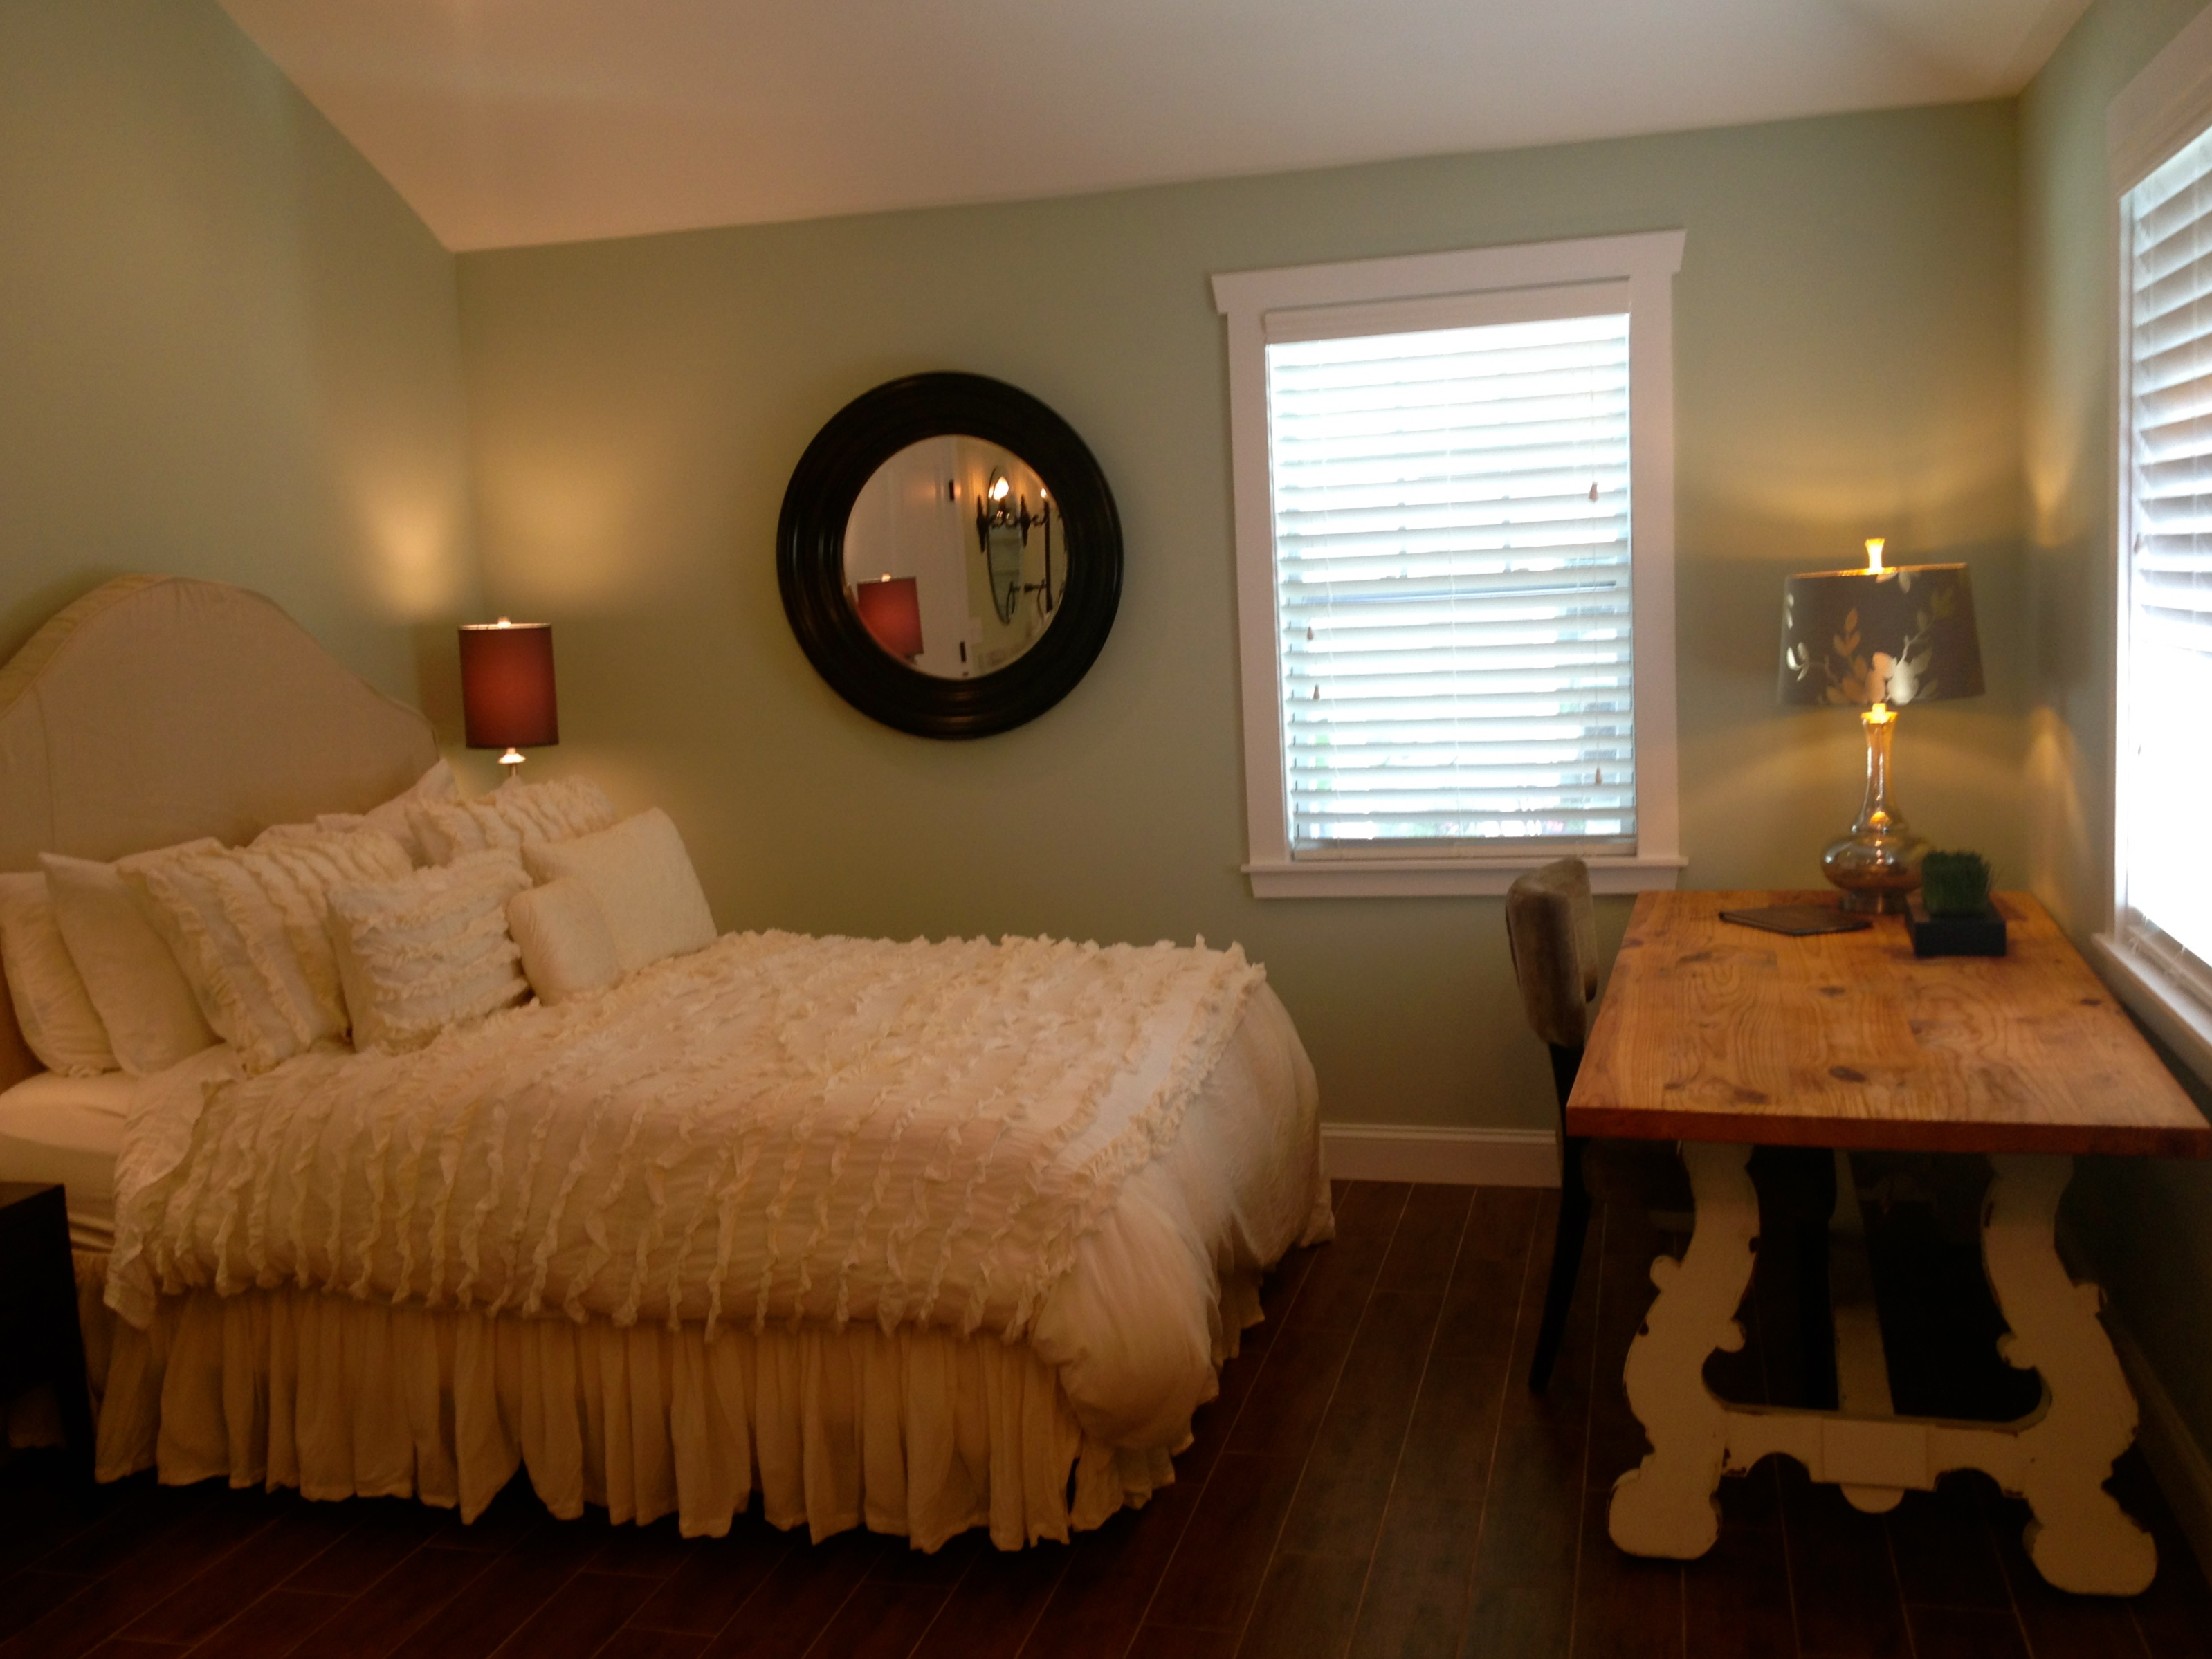
View of bed and desk from bath area.
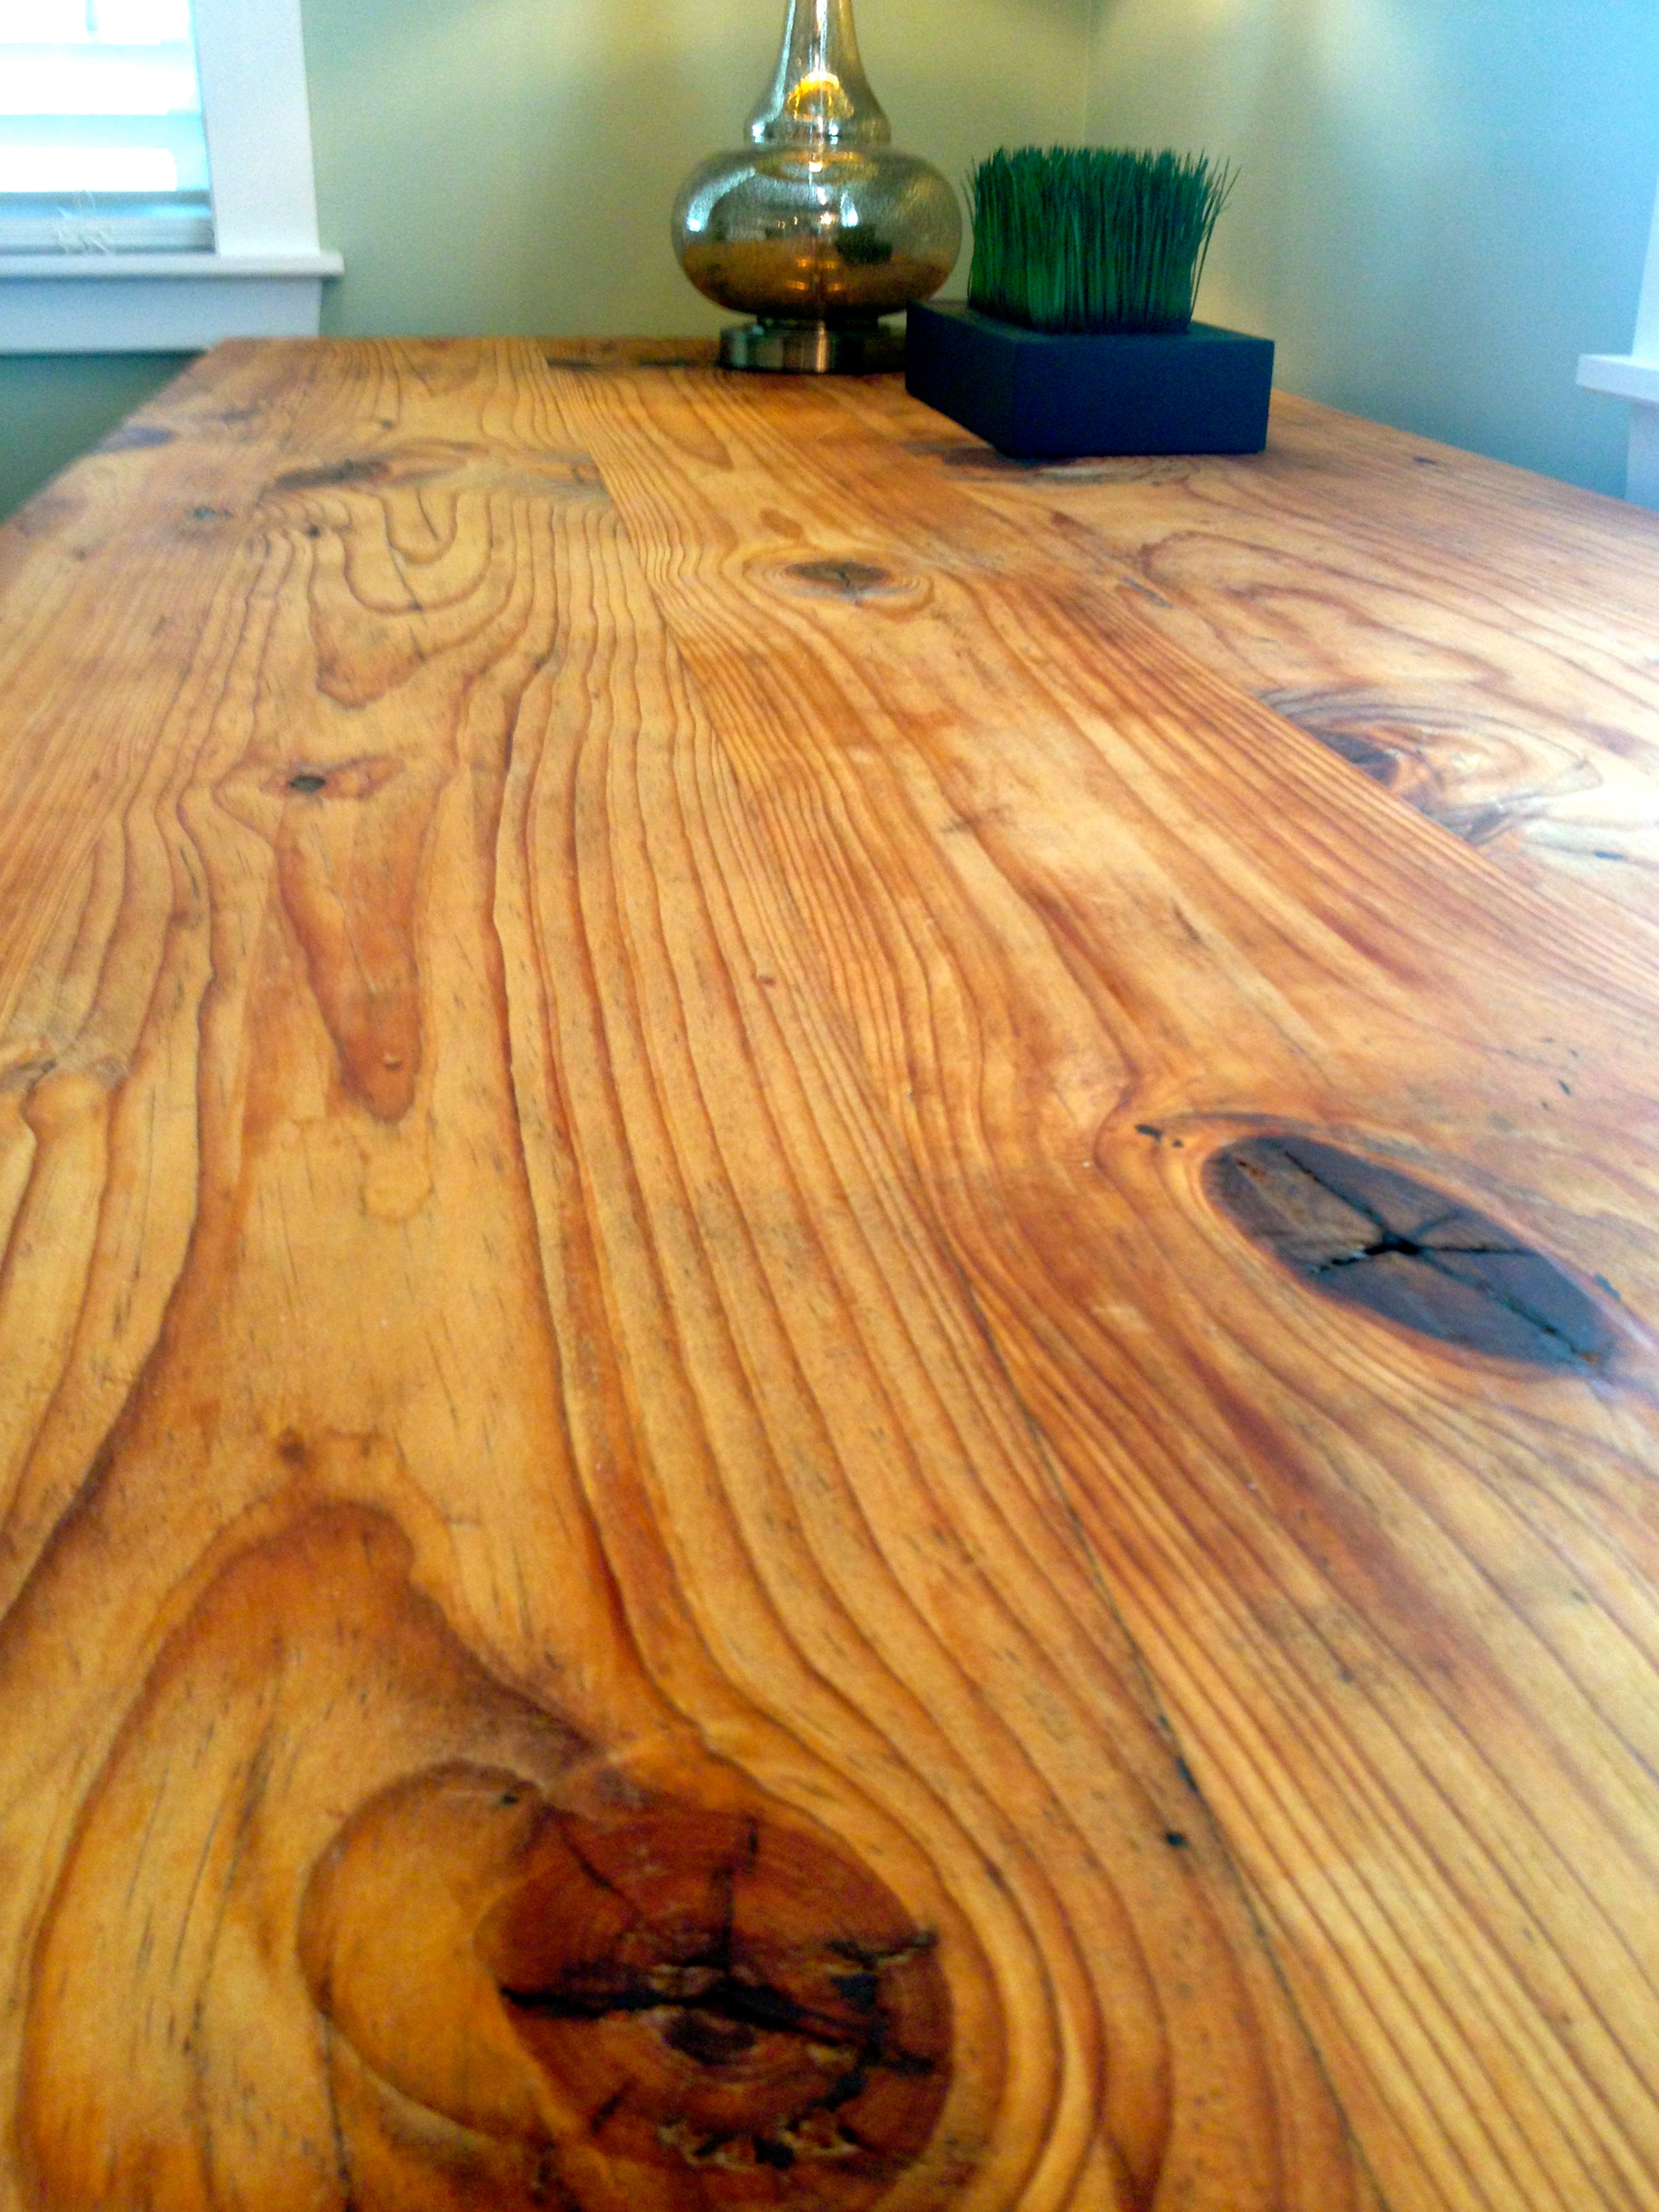
I found this desk/table at a thrift shop. It had a high gloss finish and a scalloped edge. I didn’t like either but I could see that there was a beautiful piece of wood under it all. Jerred removed the scallop edge and the high gloss finish. He then gave it a linseed oil rubbing – now perfect!
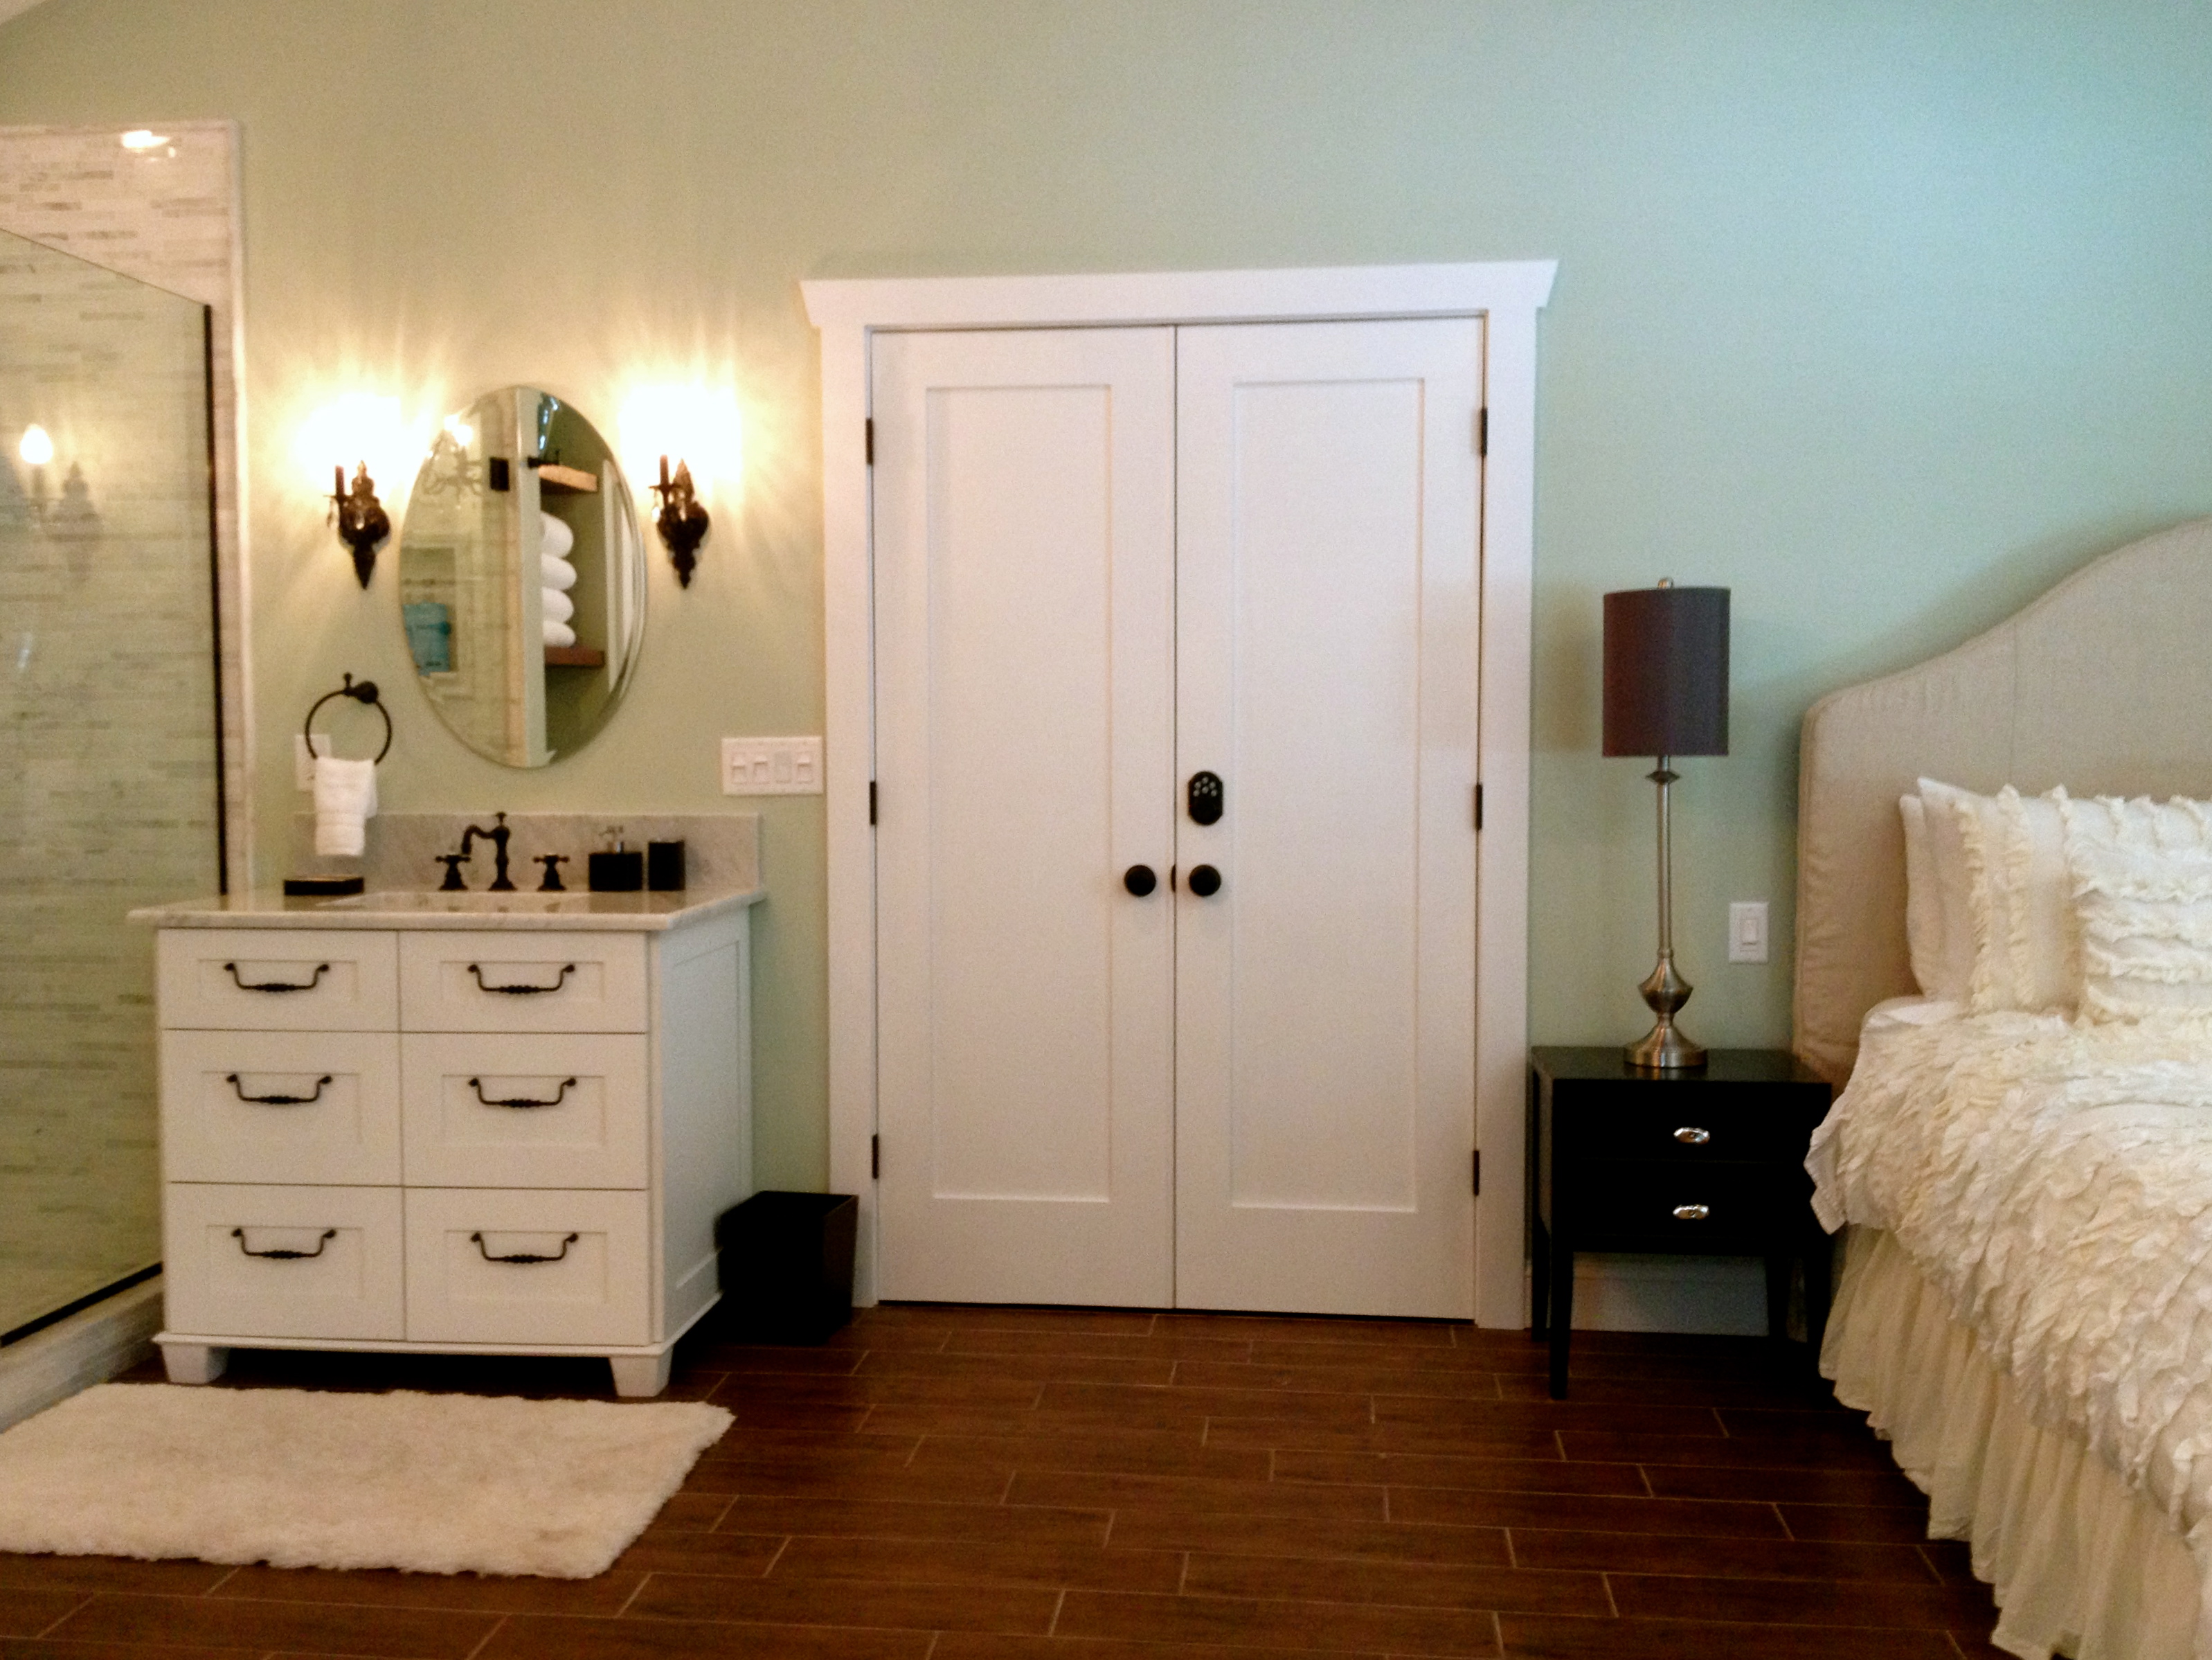
Bedroom and Bath combination, the open European feel.
View from the foot of the bed. Love the open plan. The water closet is behind the frosted pocket door. I choose this type of door to save space, a door swing would have crowded it. I added the frosted glass to bring in diffused light from the window in the water closet.

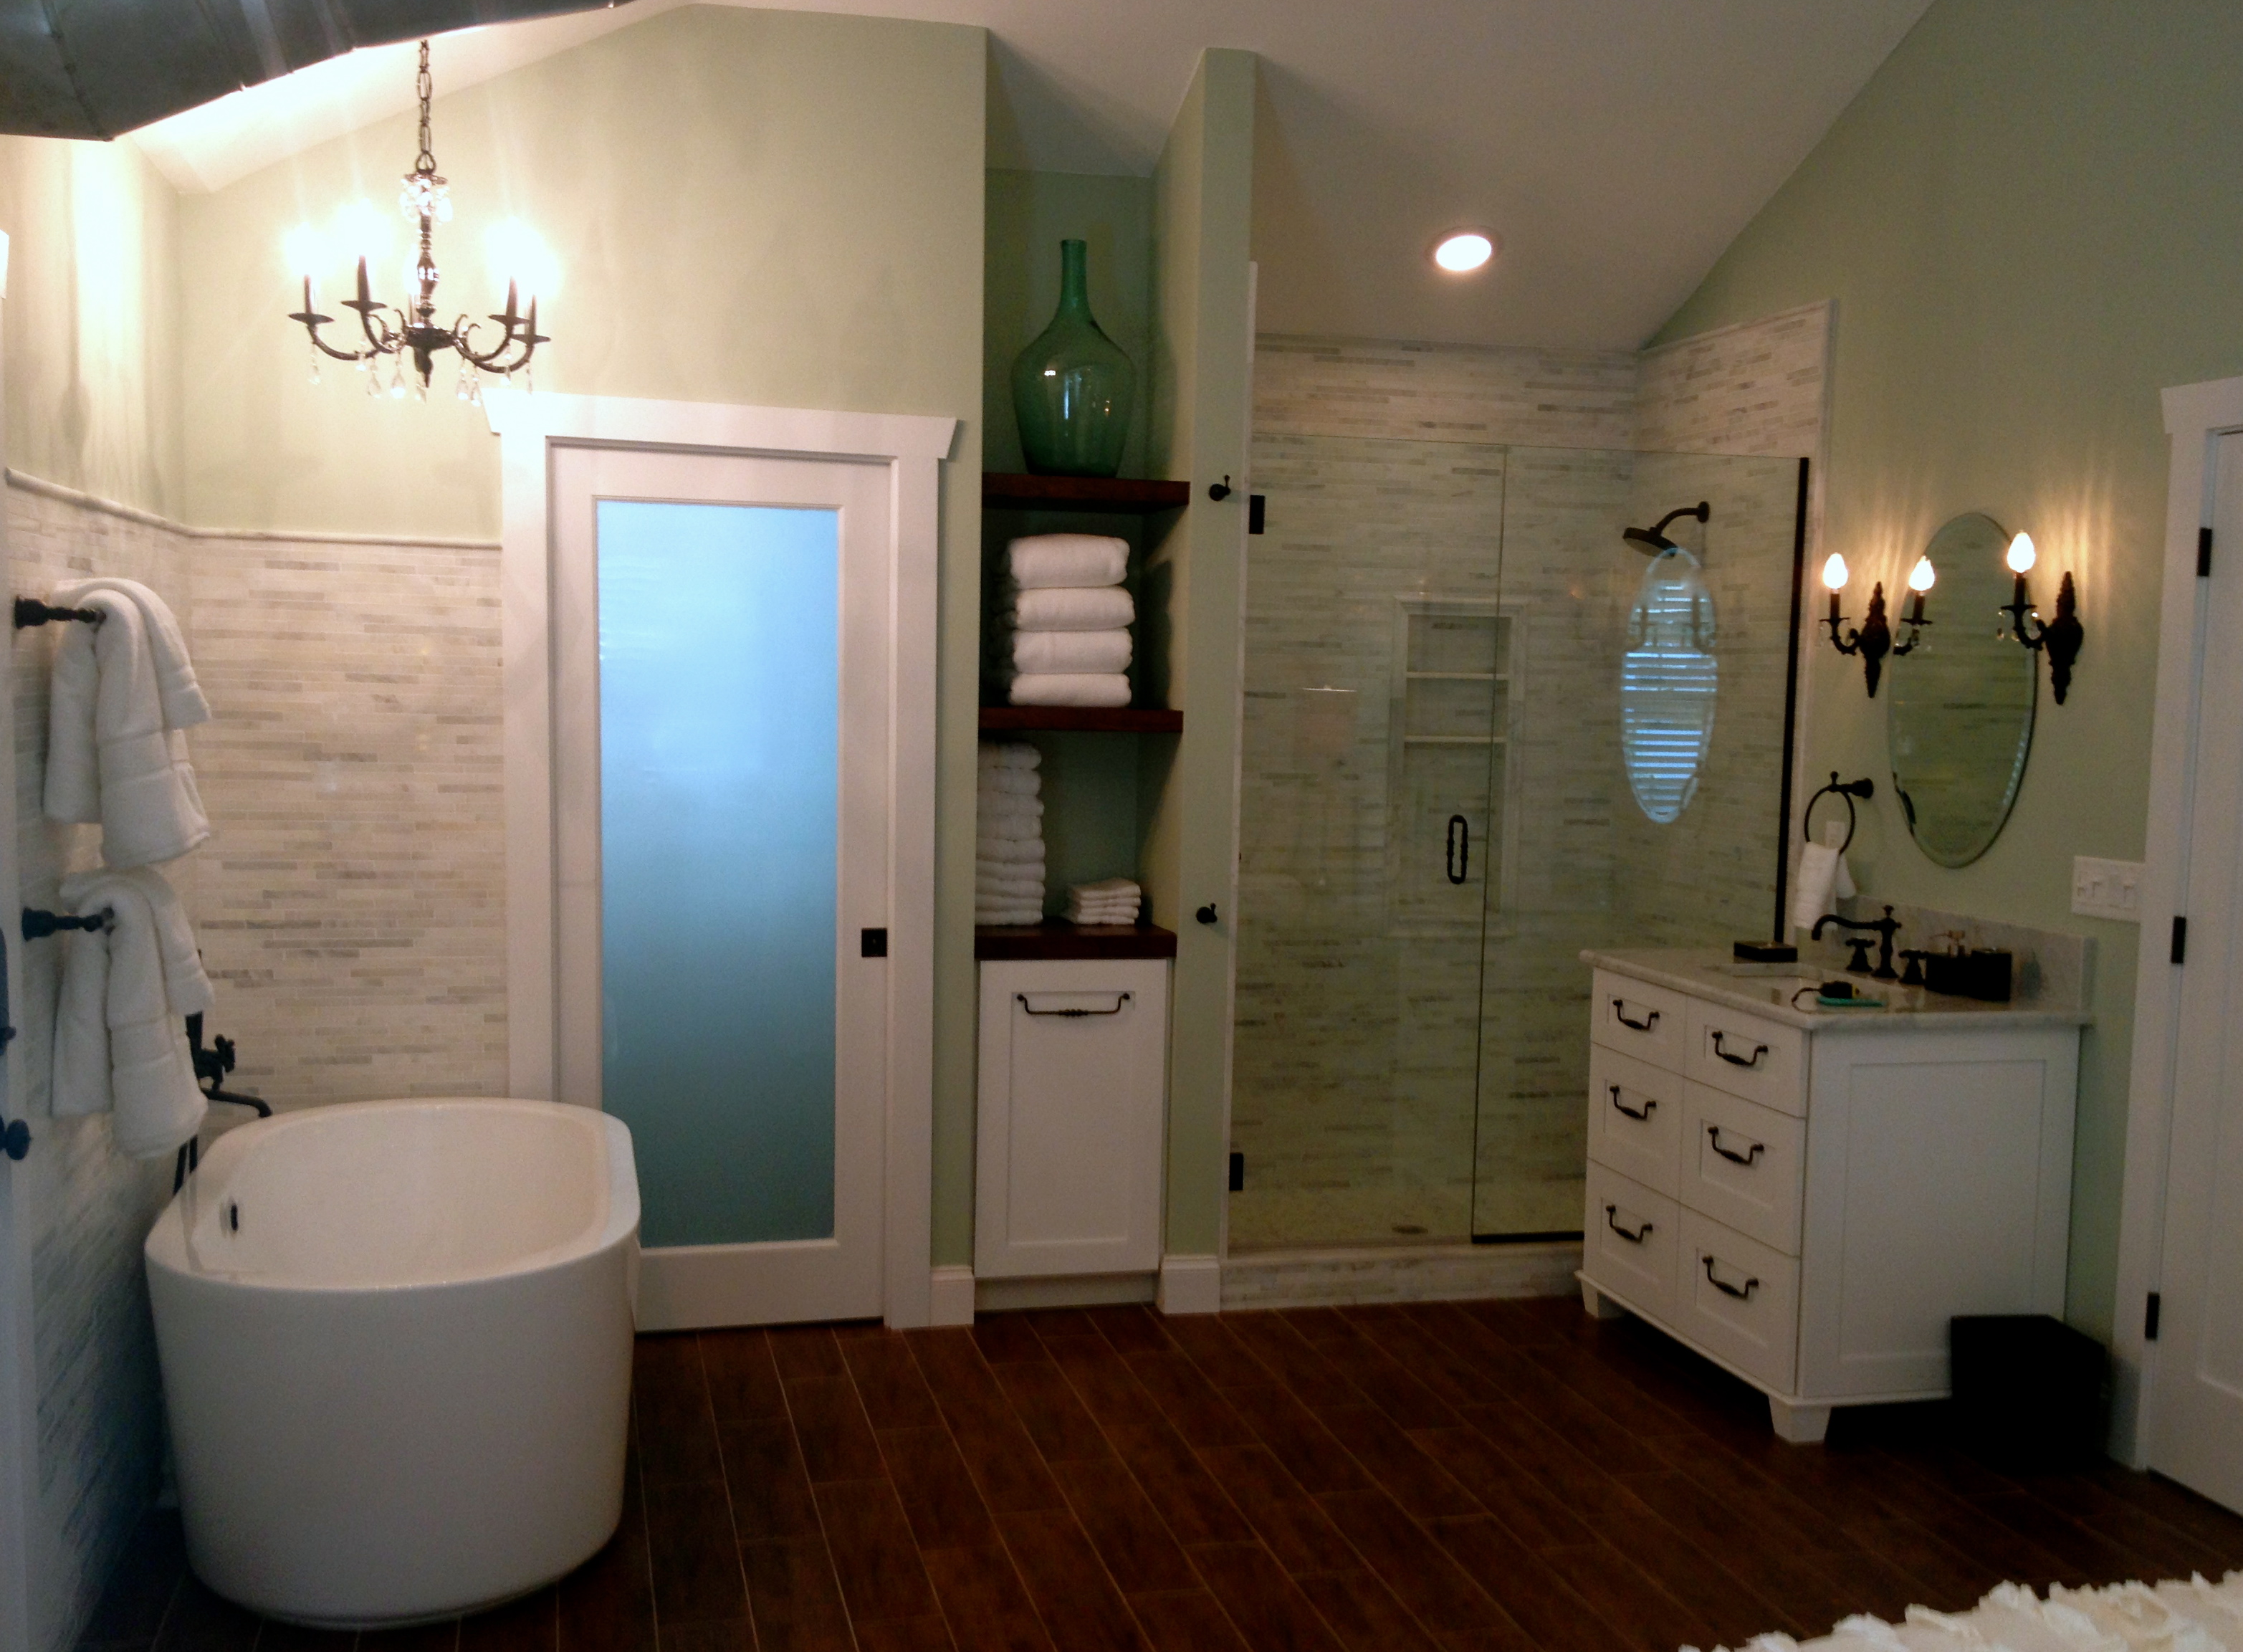
The water closet.
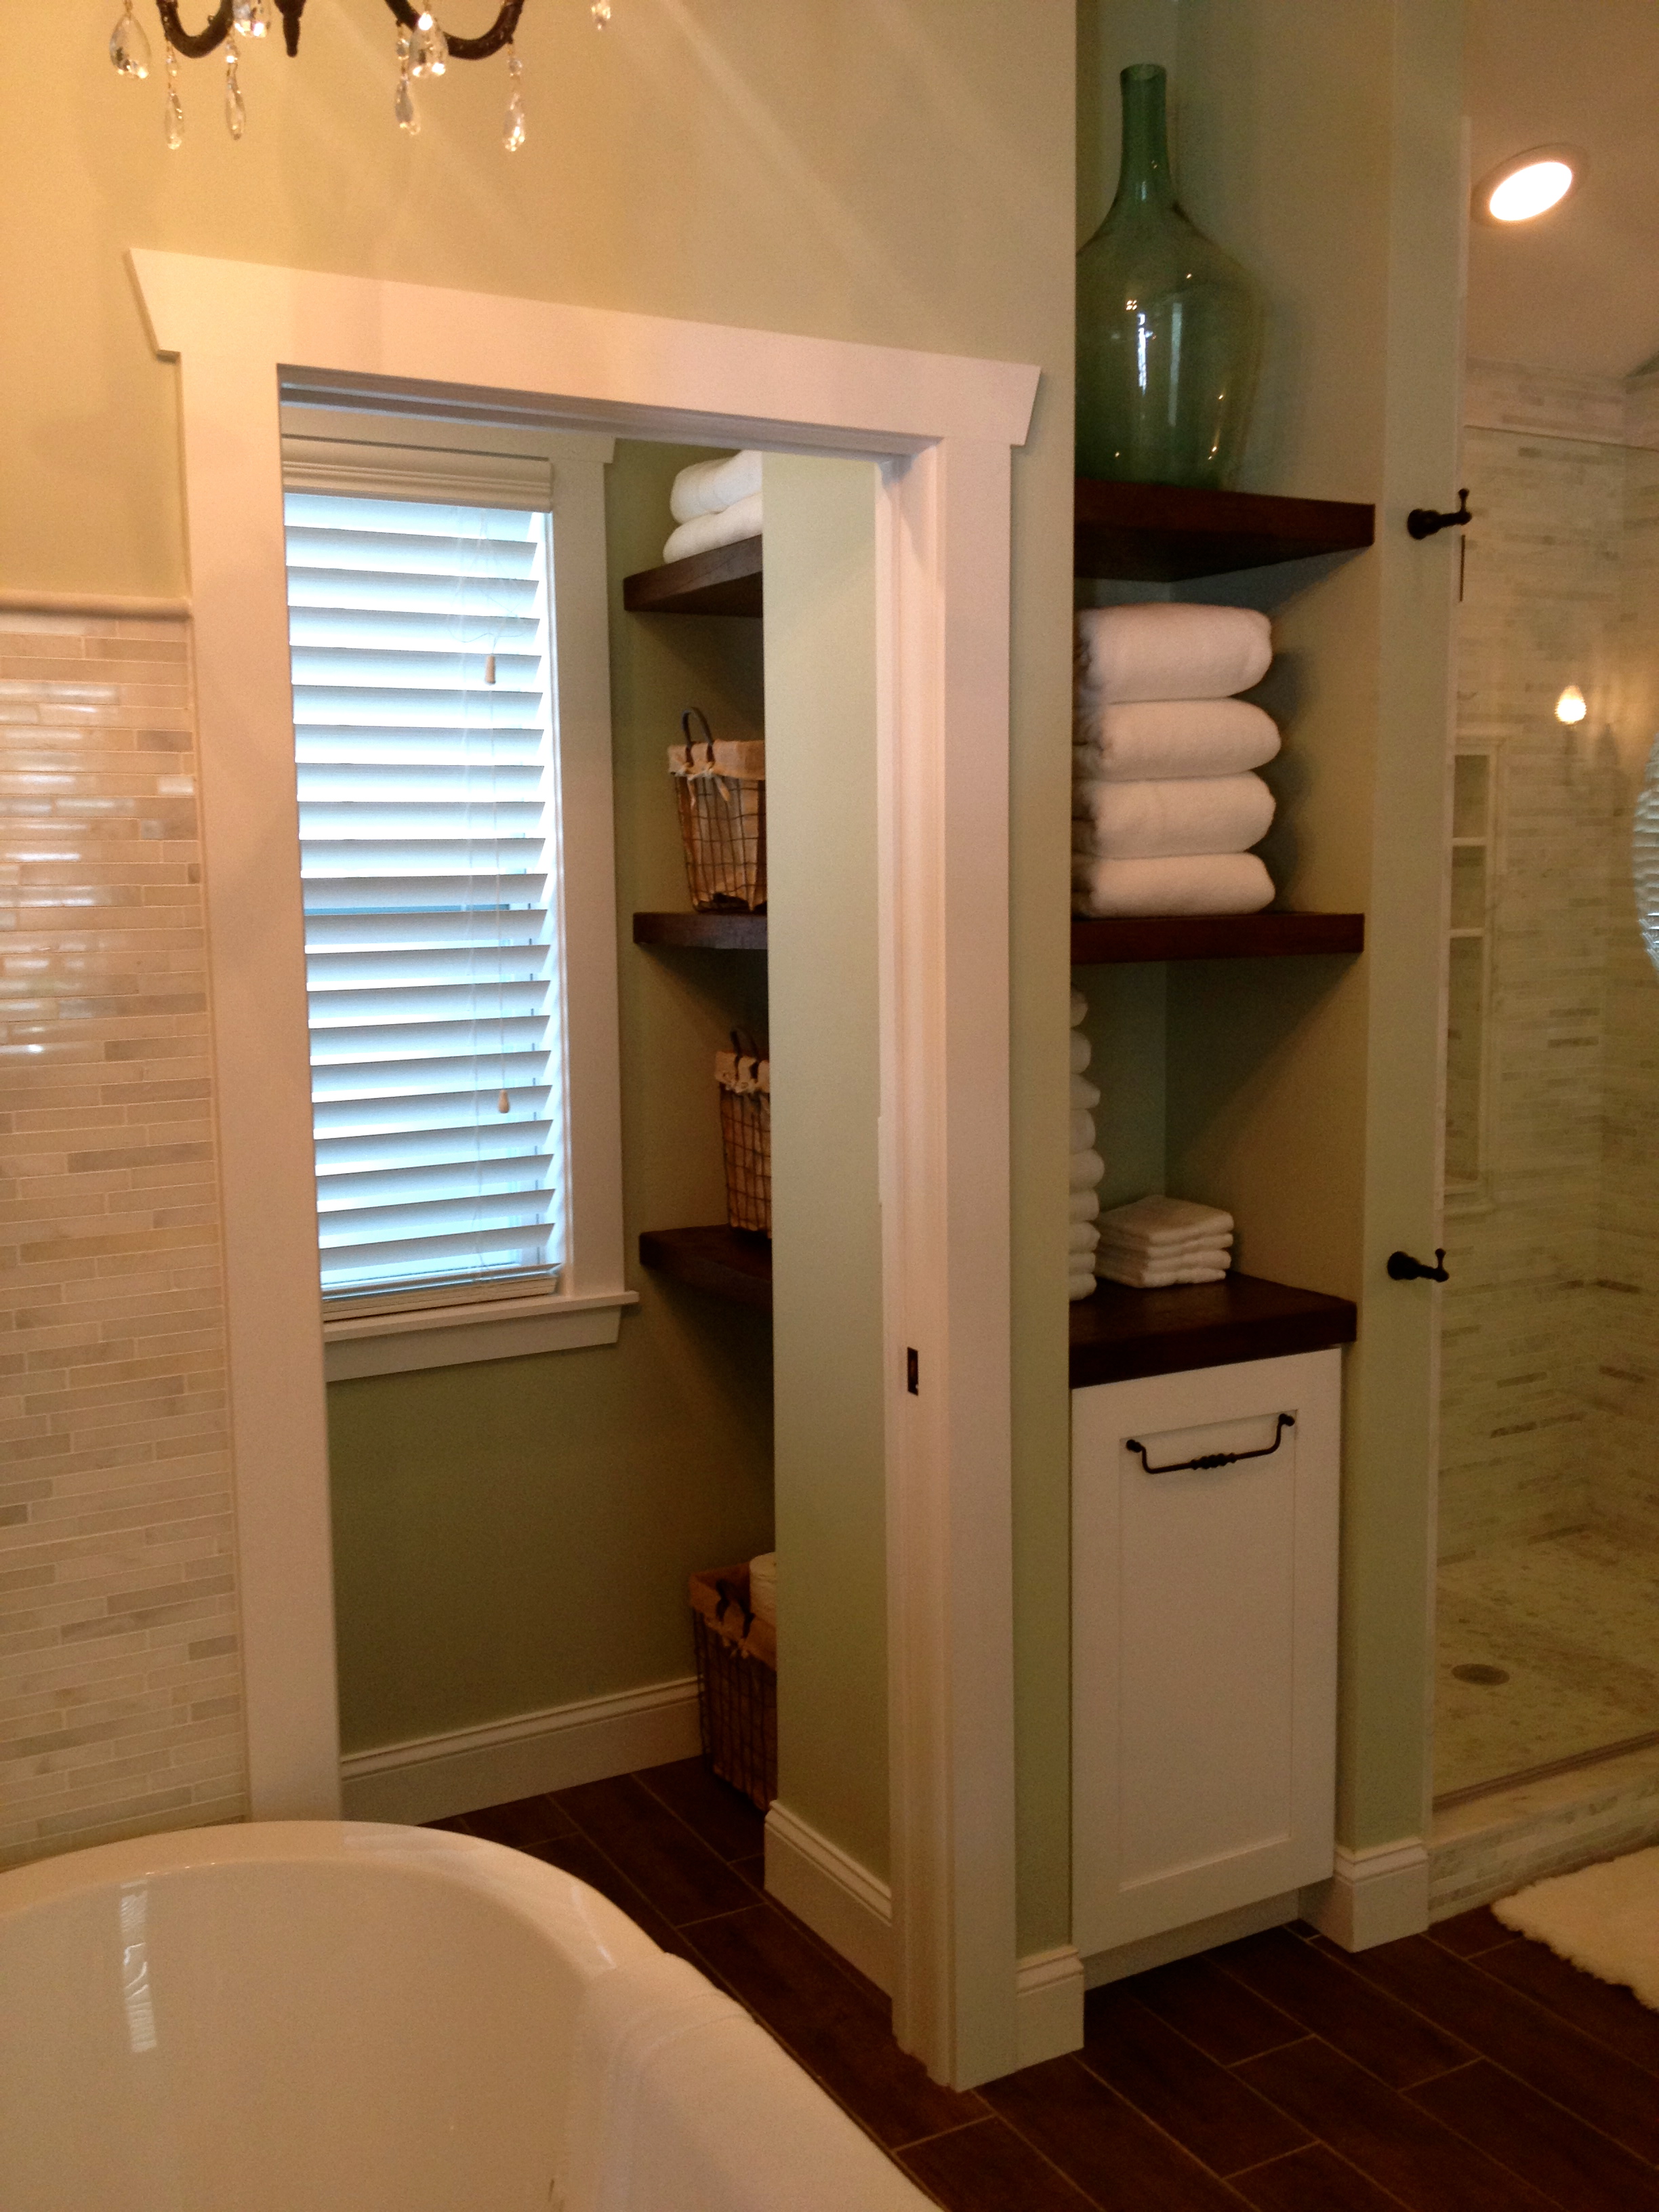
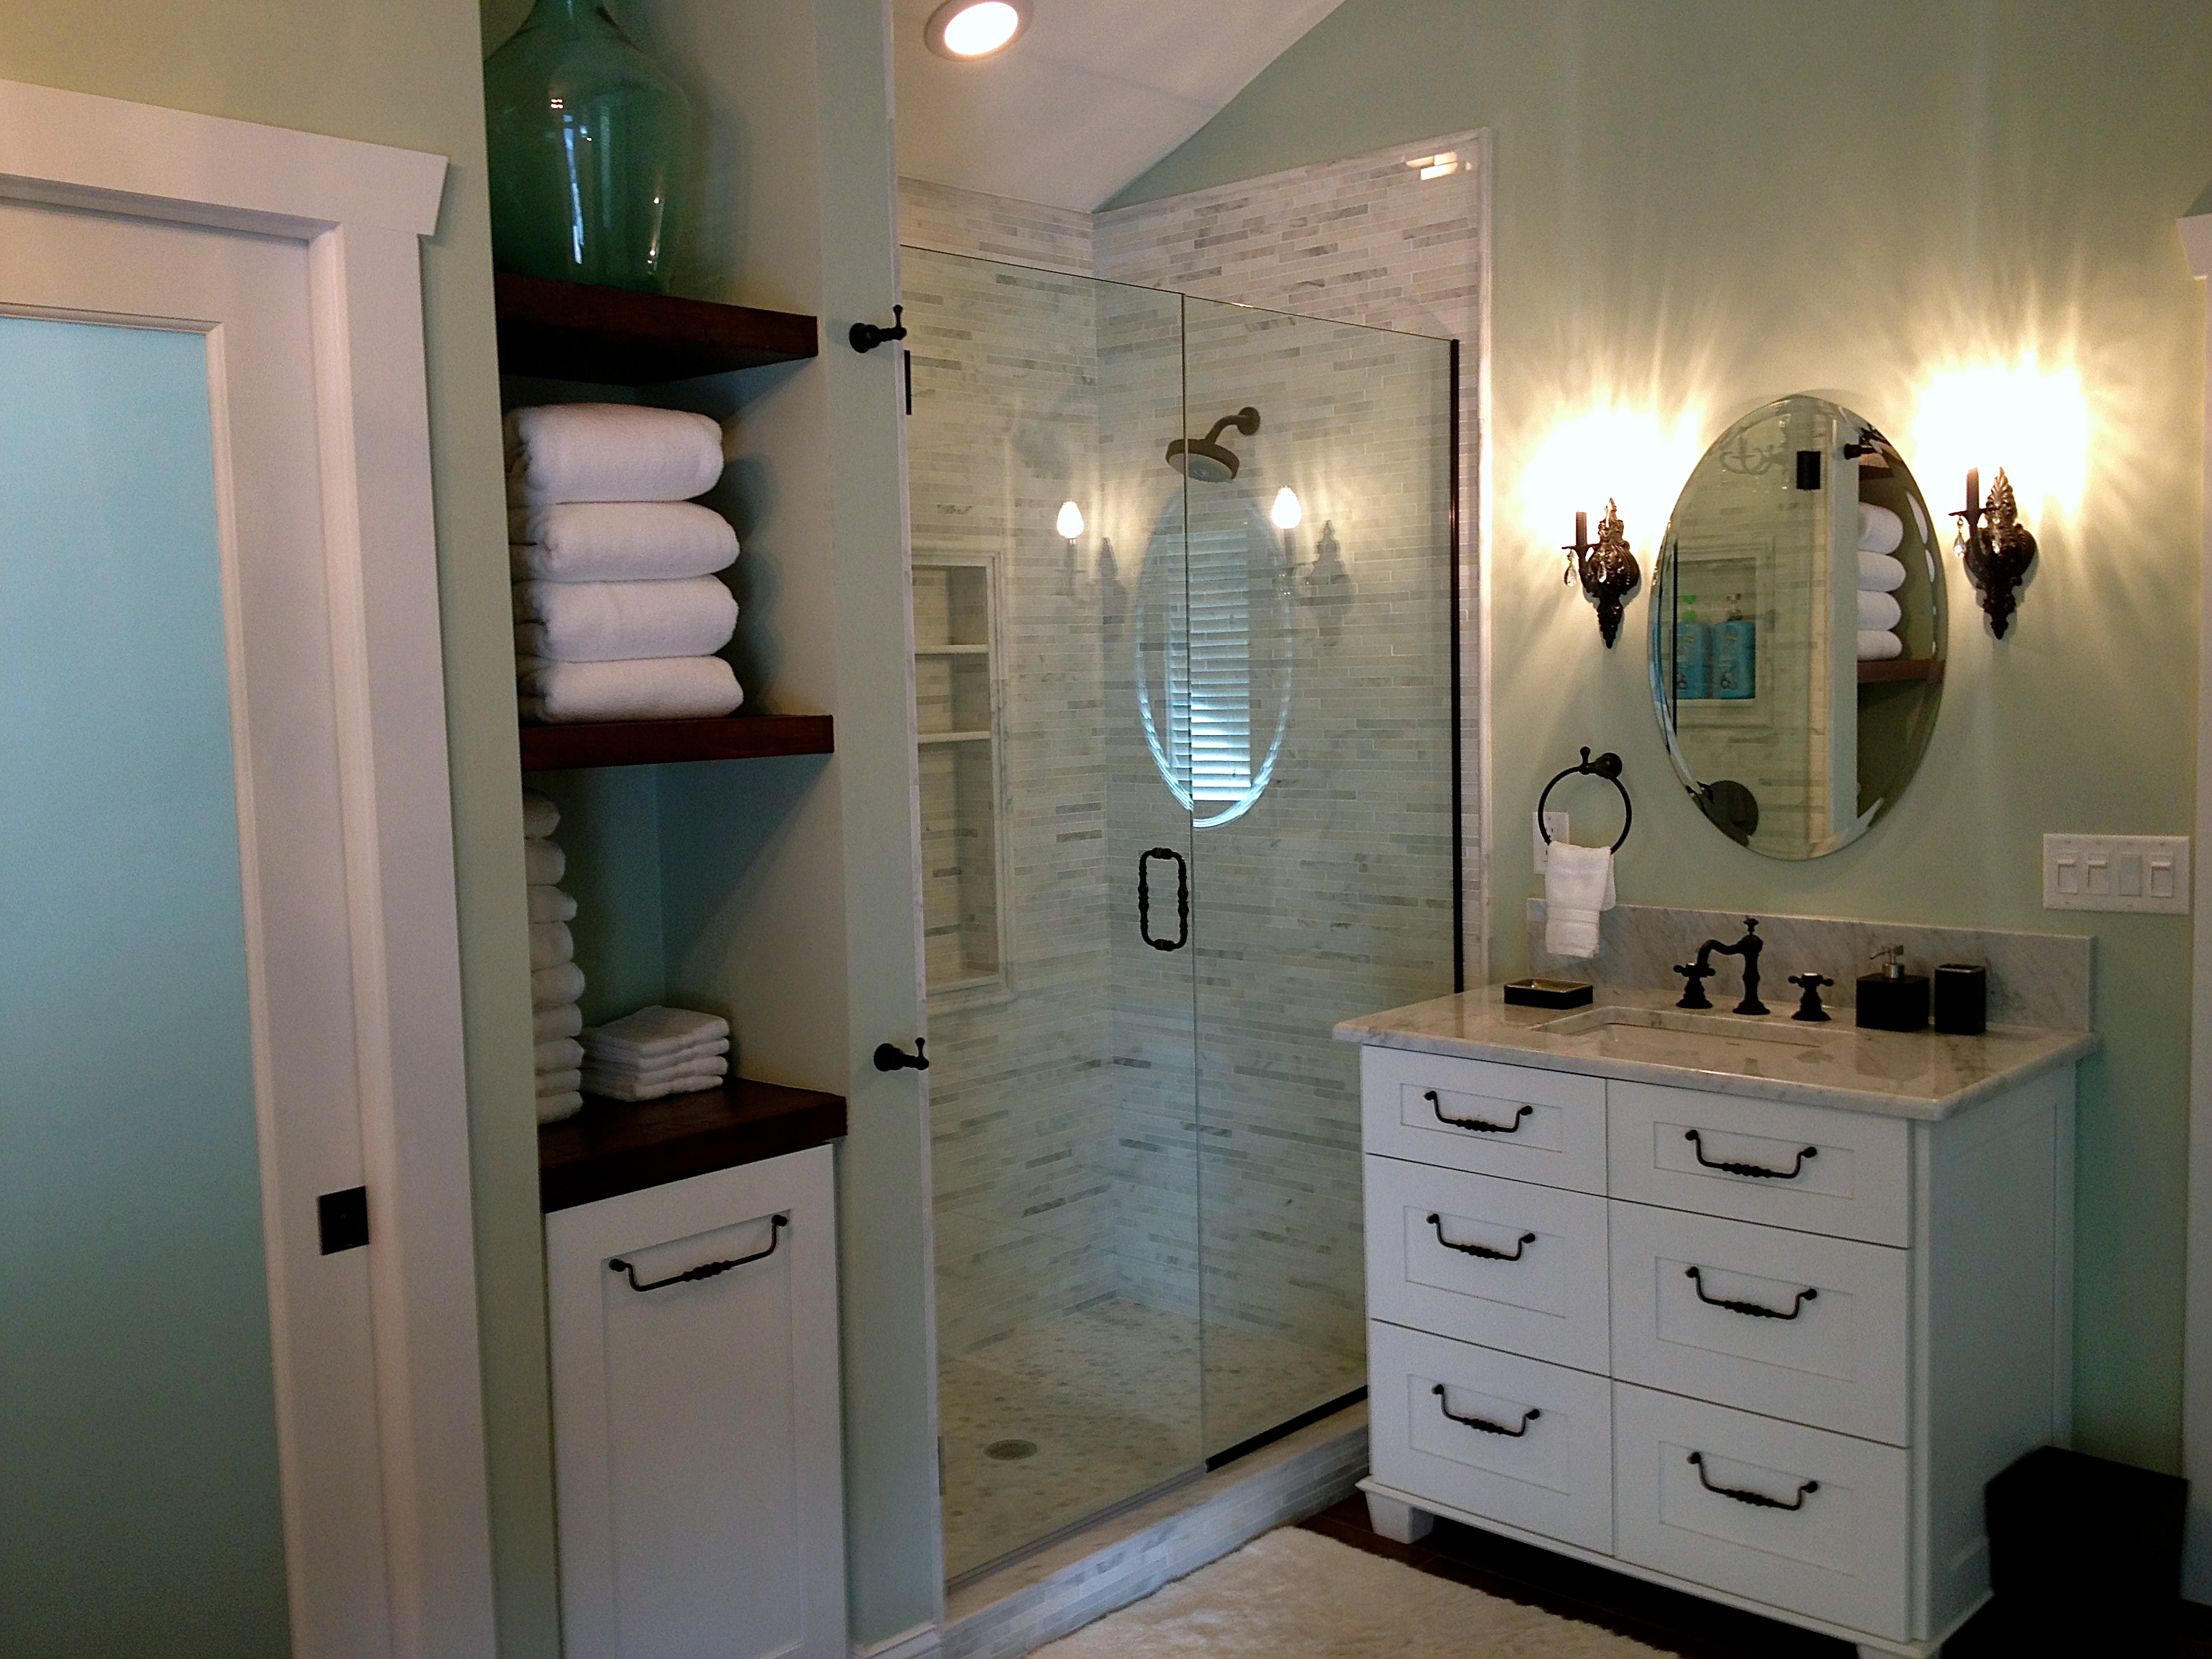
You can see the same floating shelves in water closet and in the main room. I didn’t want to waste any extra storage space!
I designed the shelves for storage and the built in hamper below. I found that beautiful blue glass vase at Homegoods!
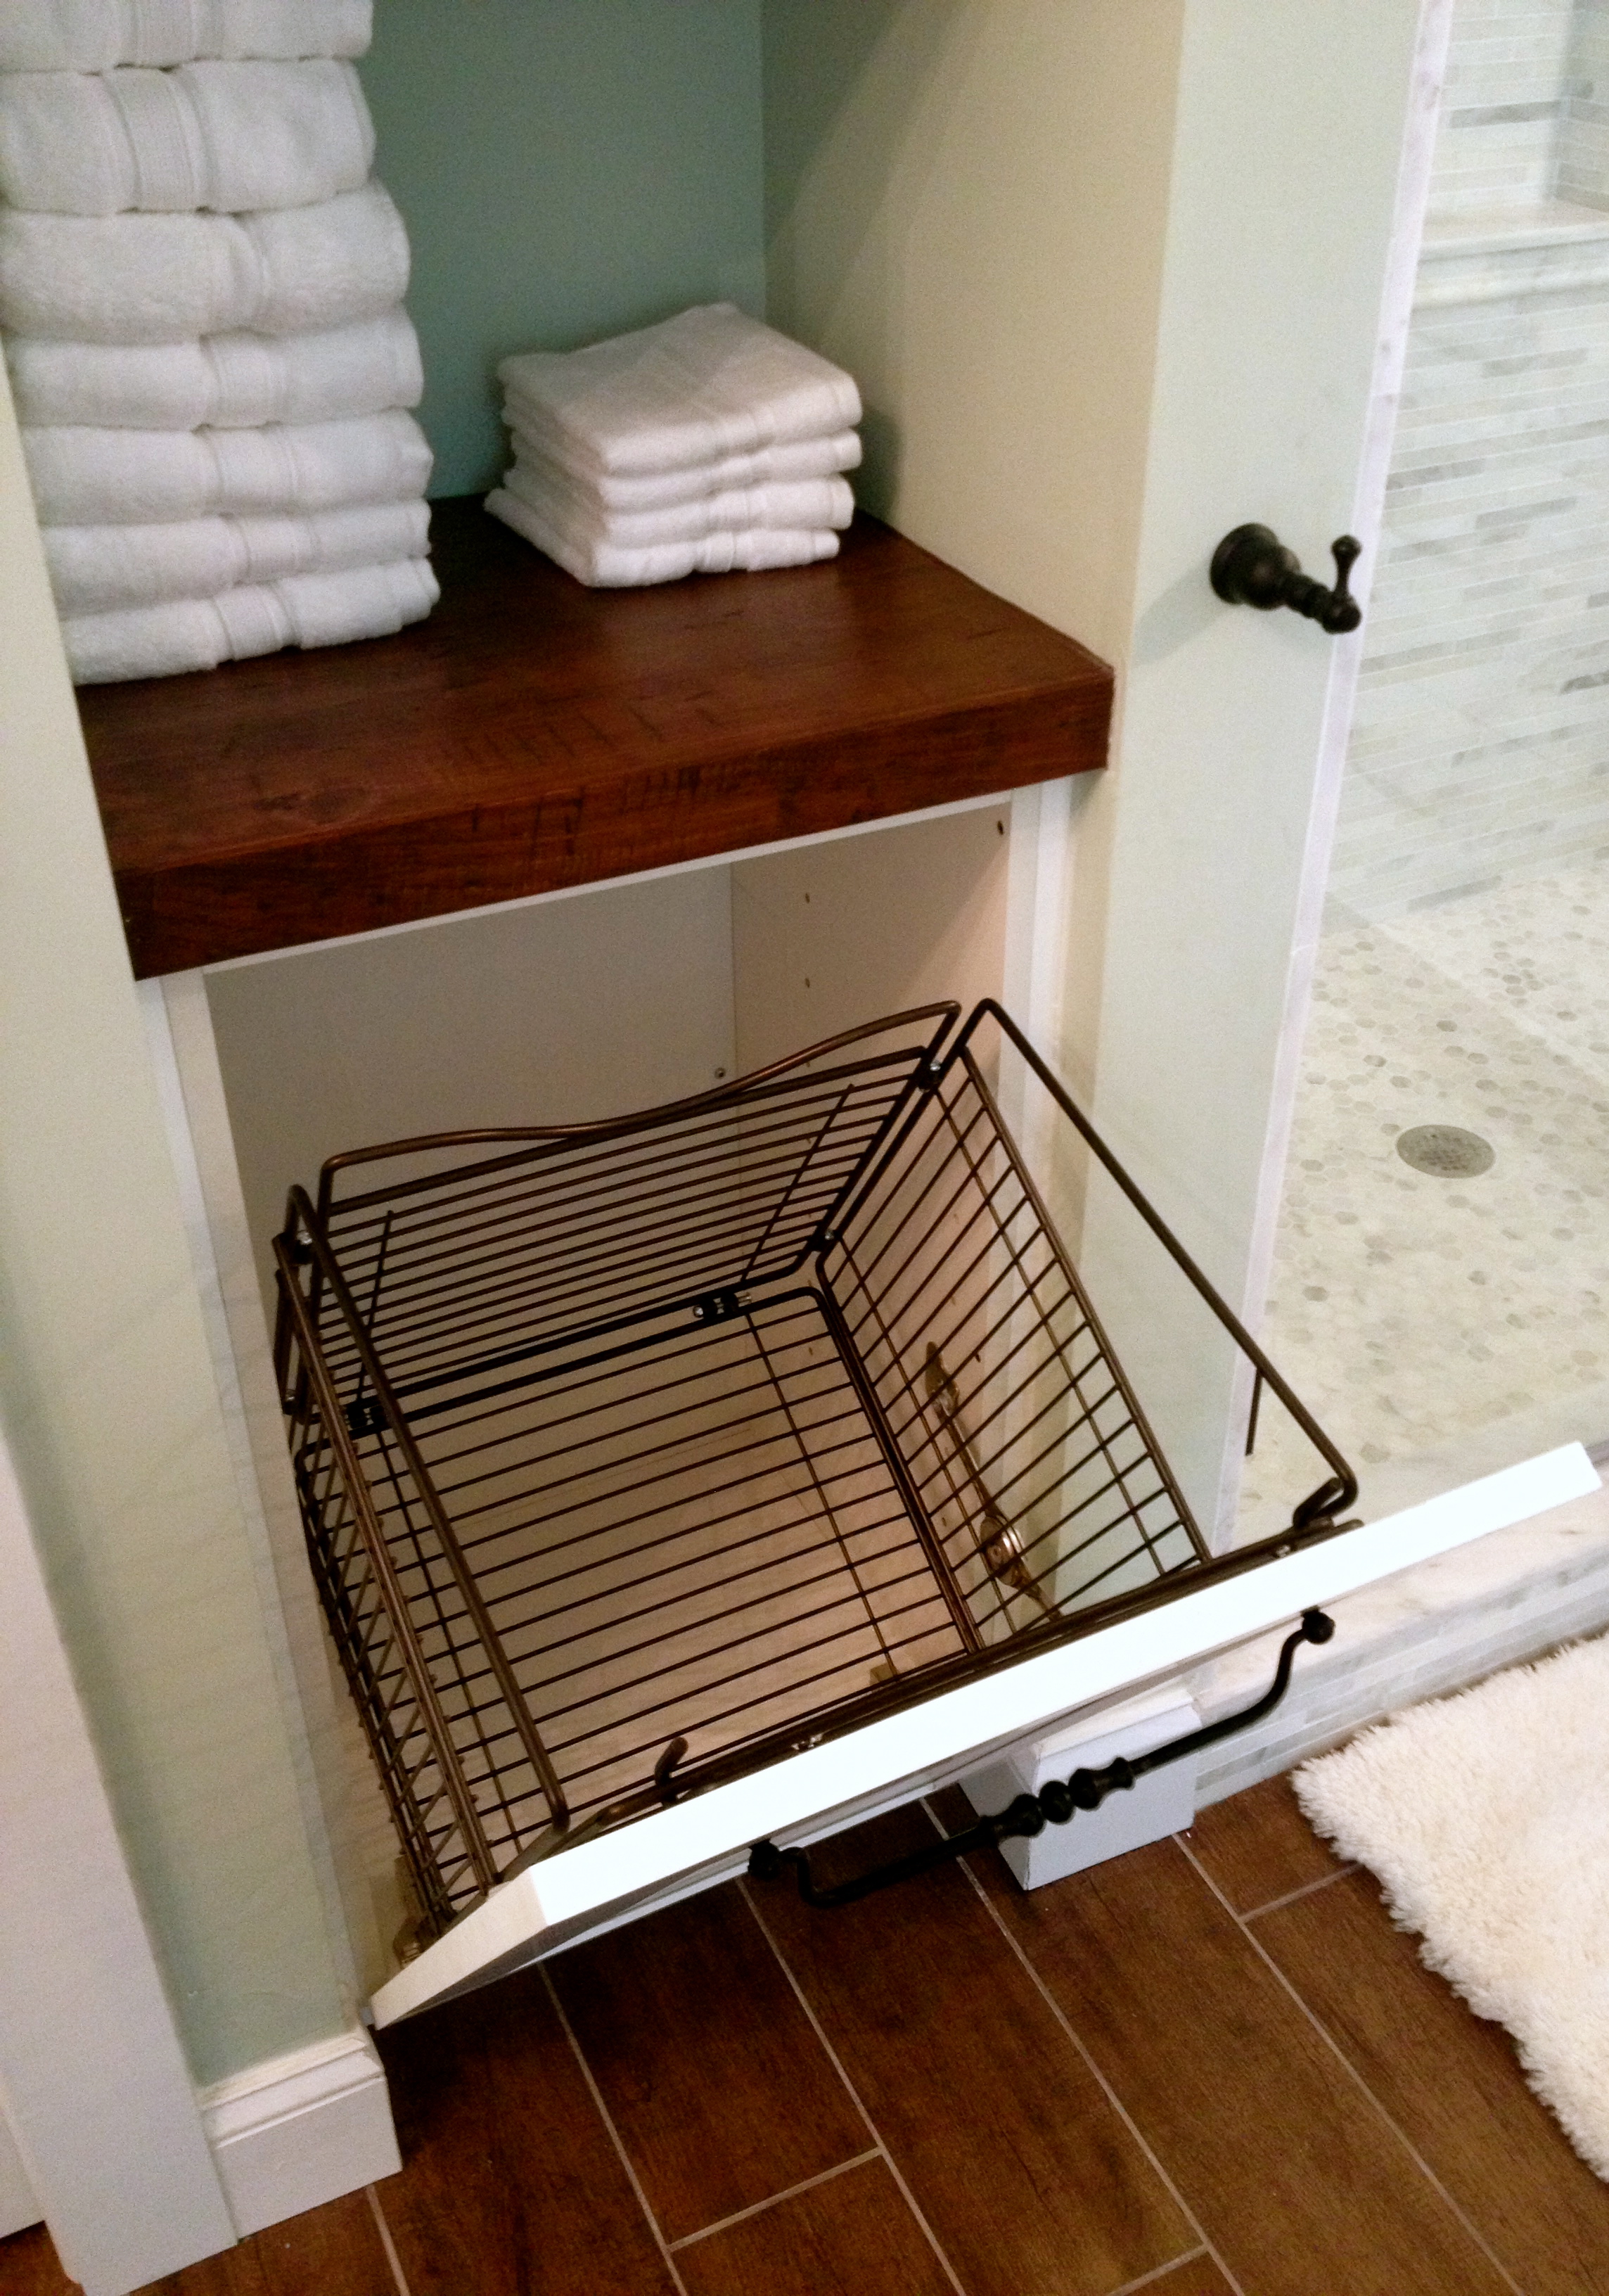
The hamper. Function, space saving and beauty…
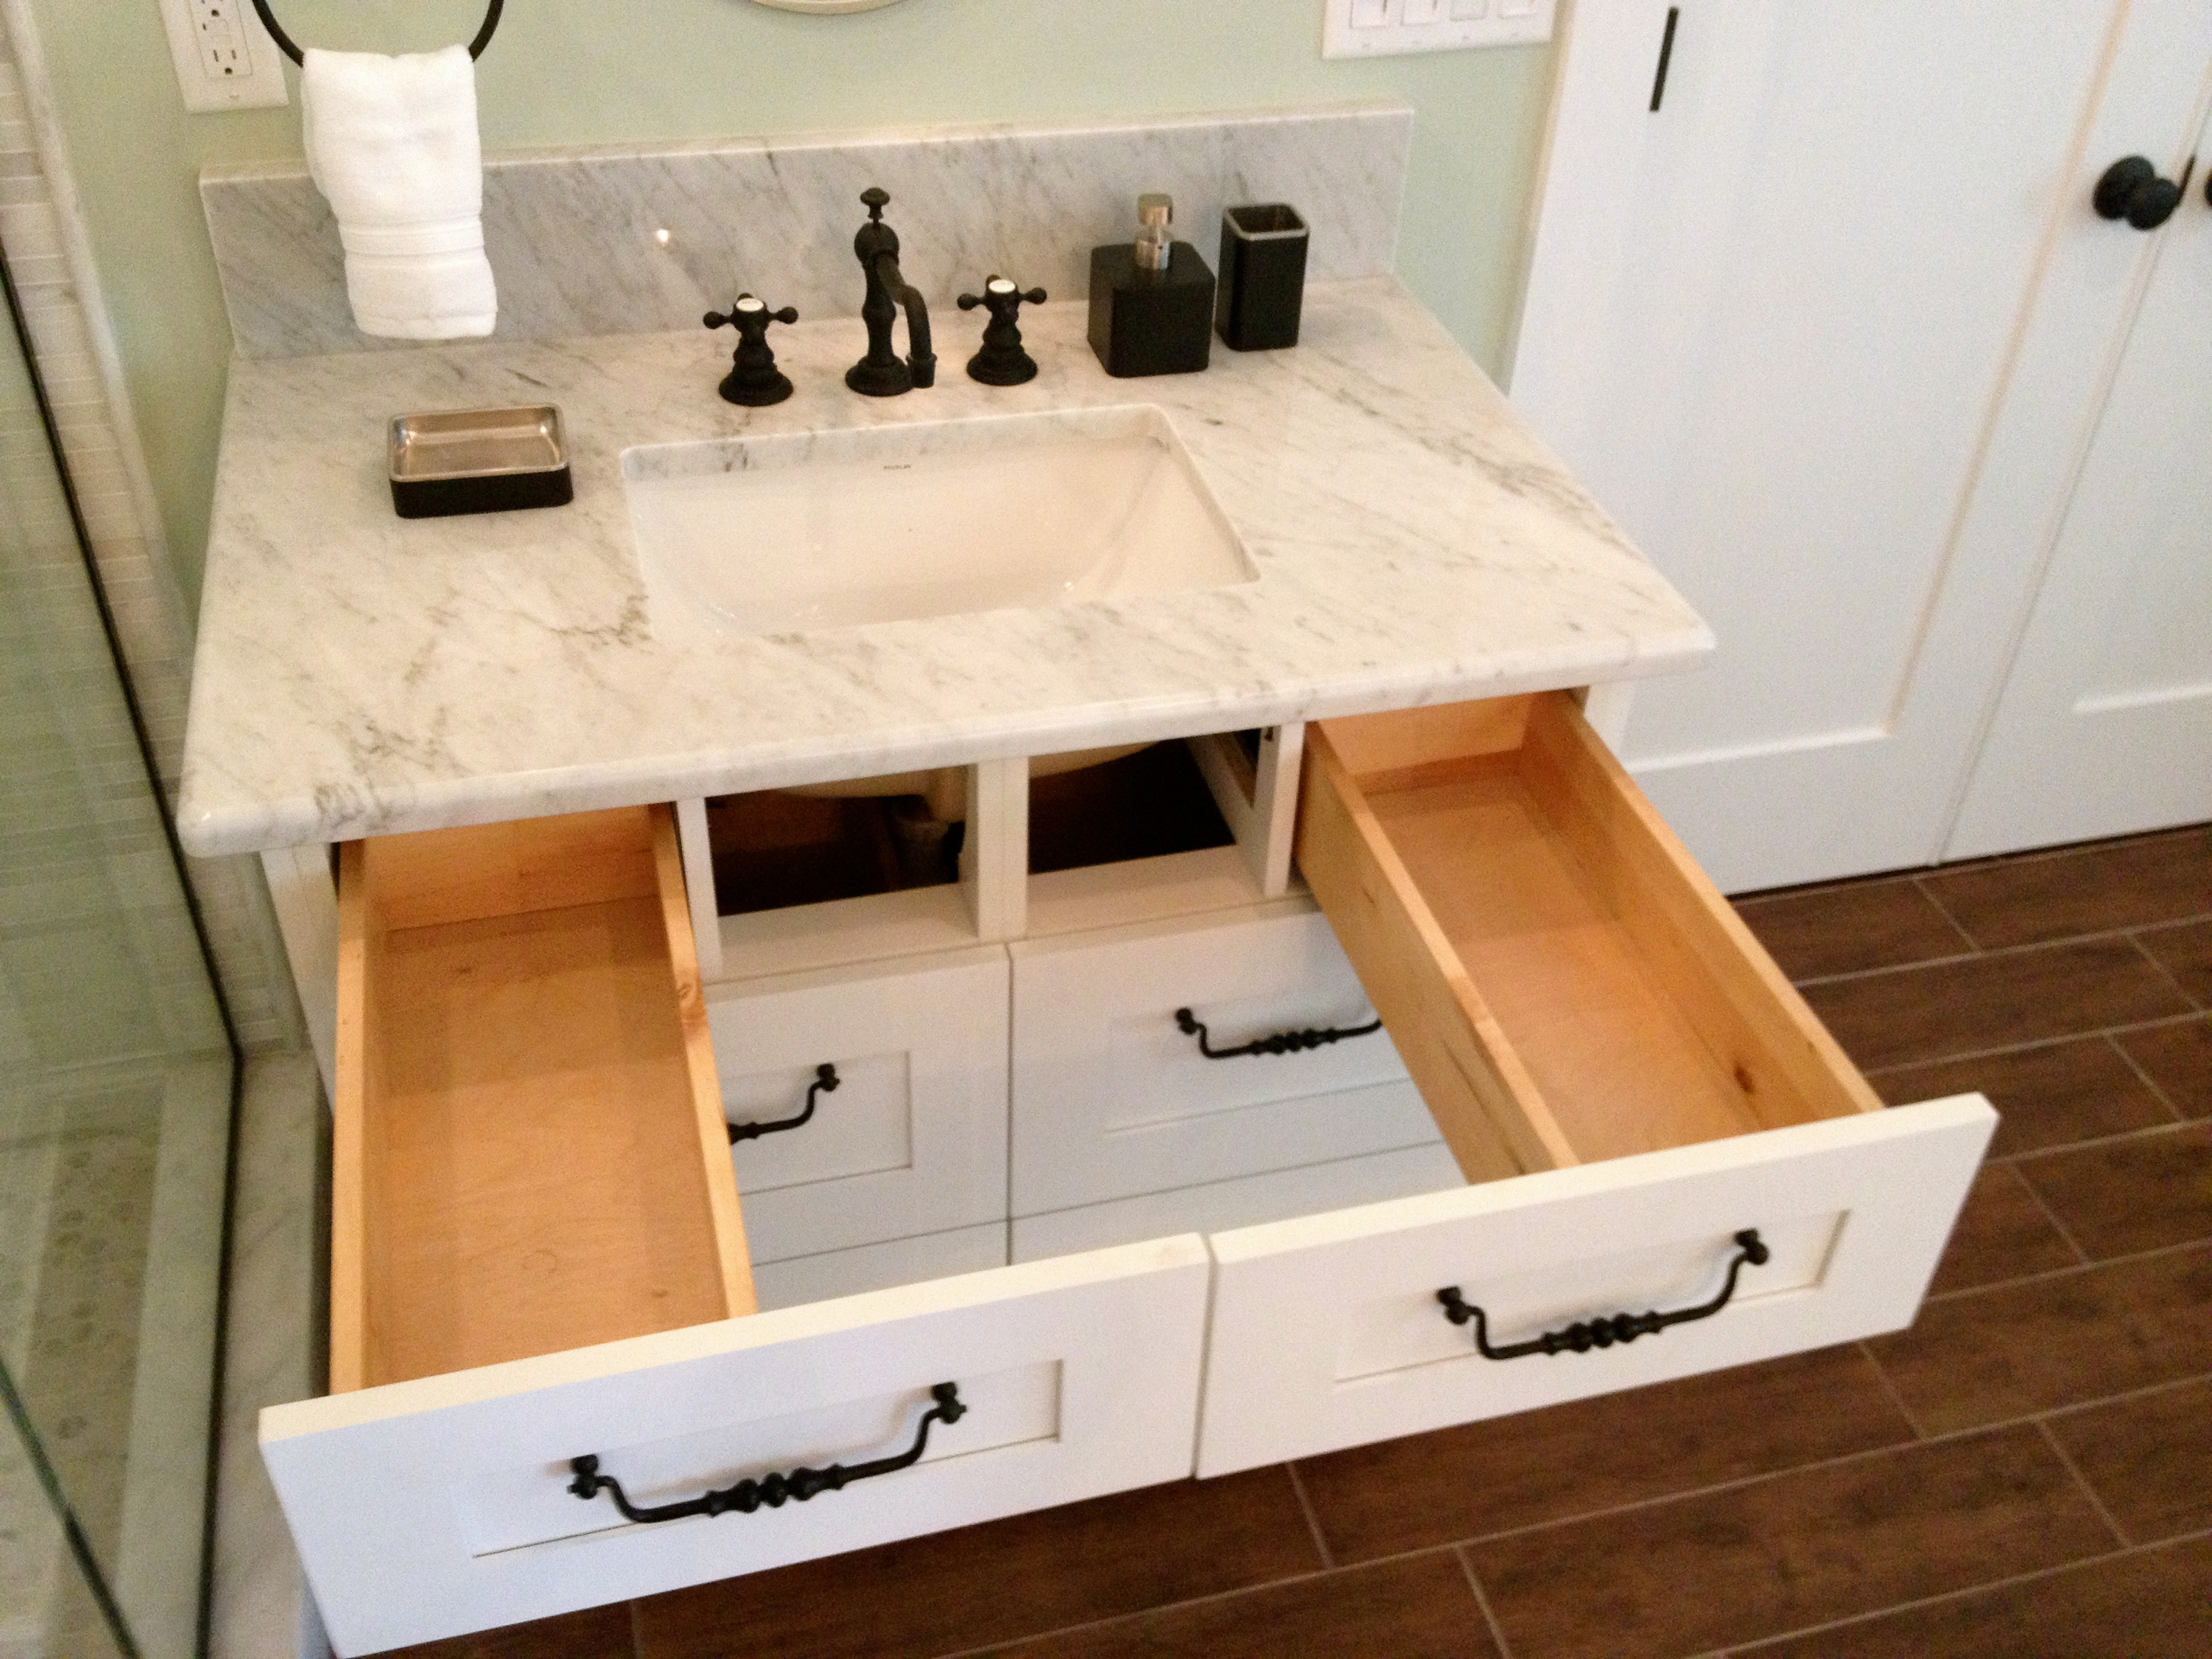
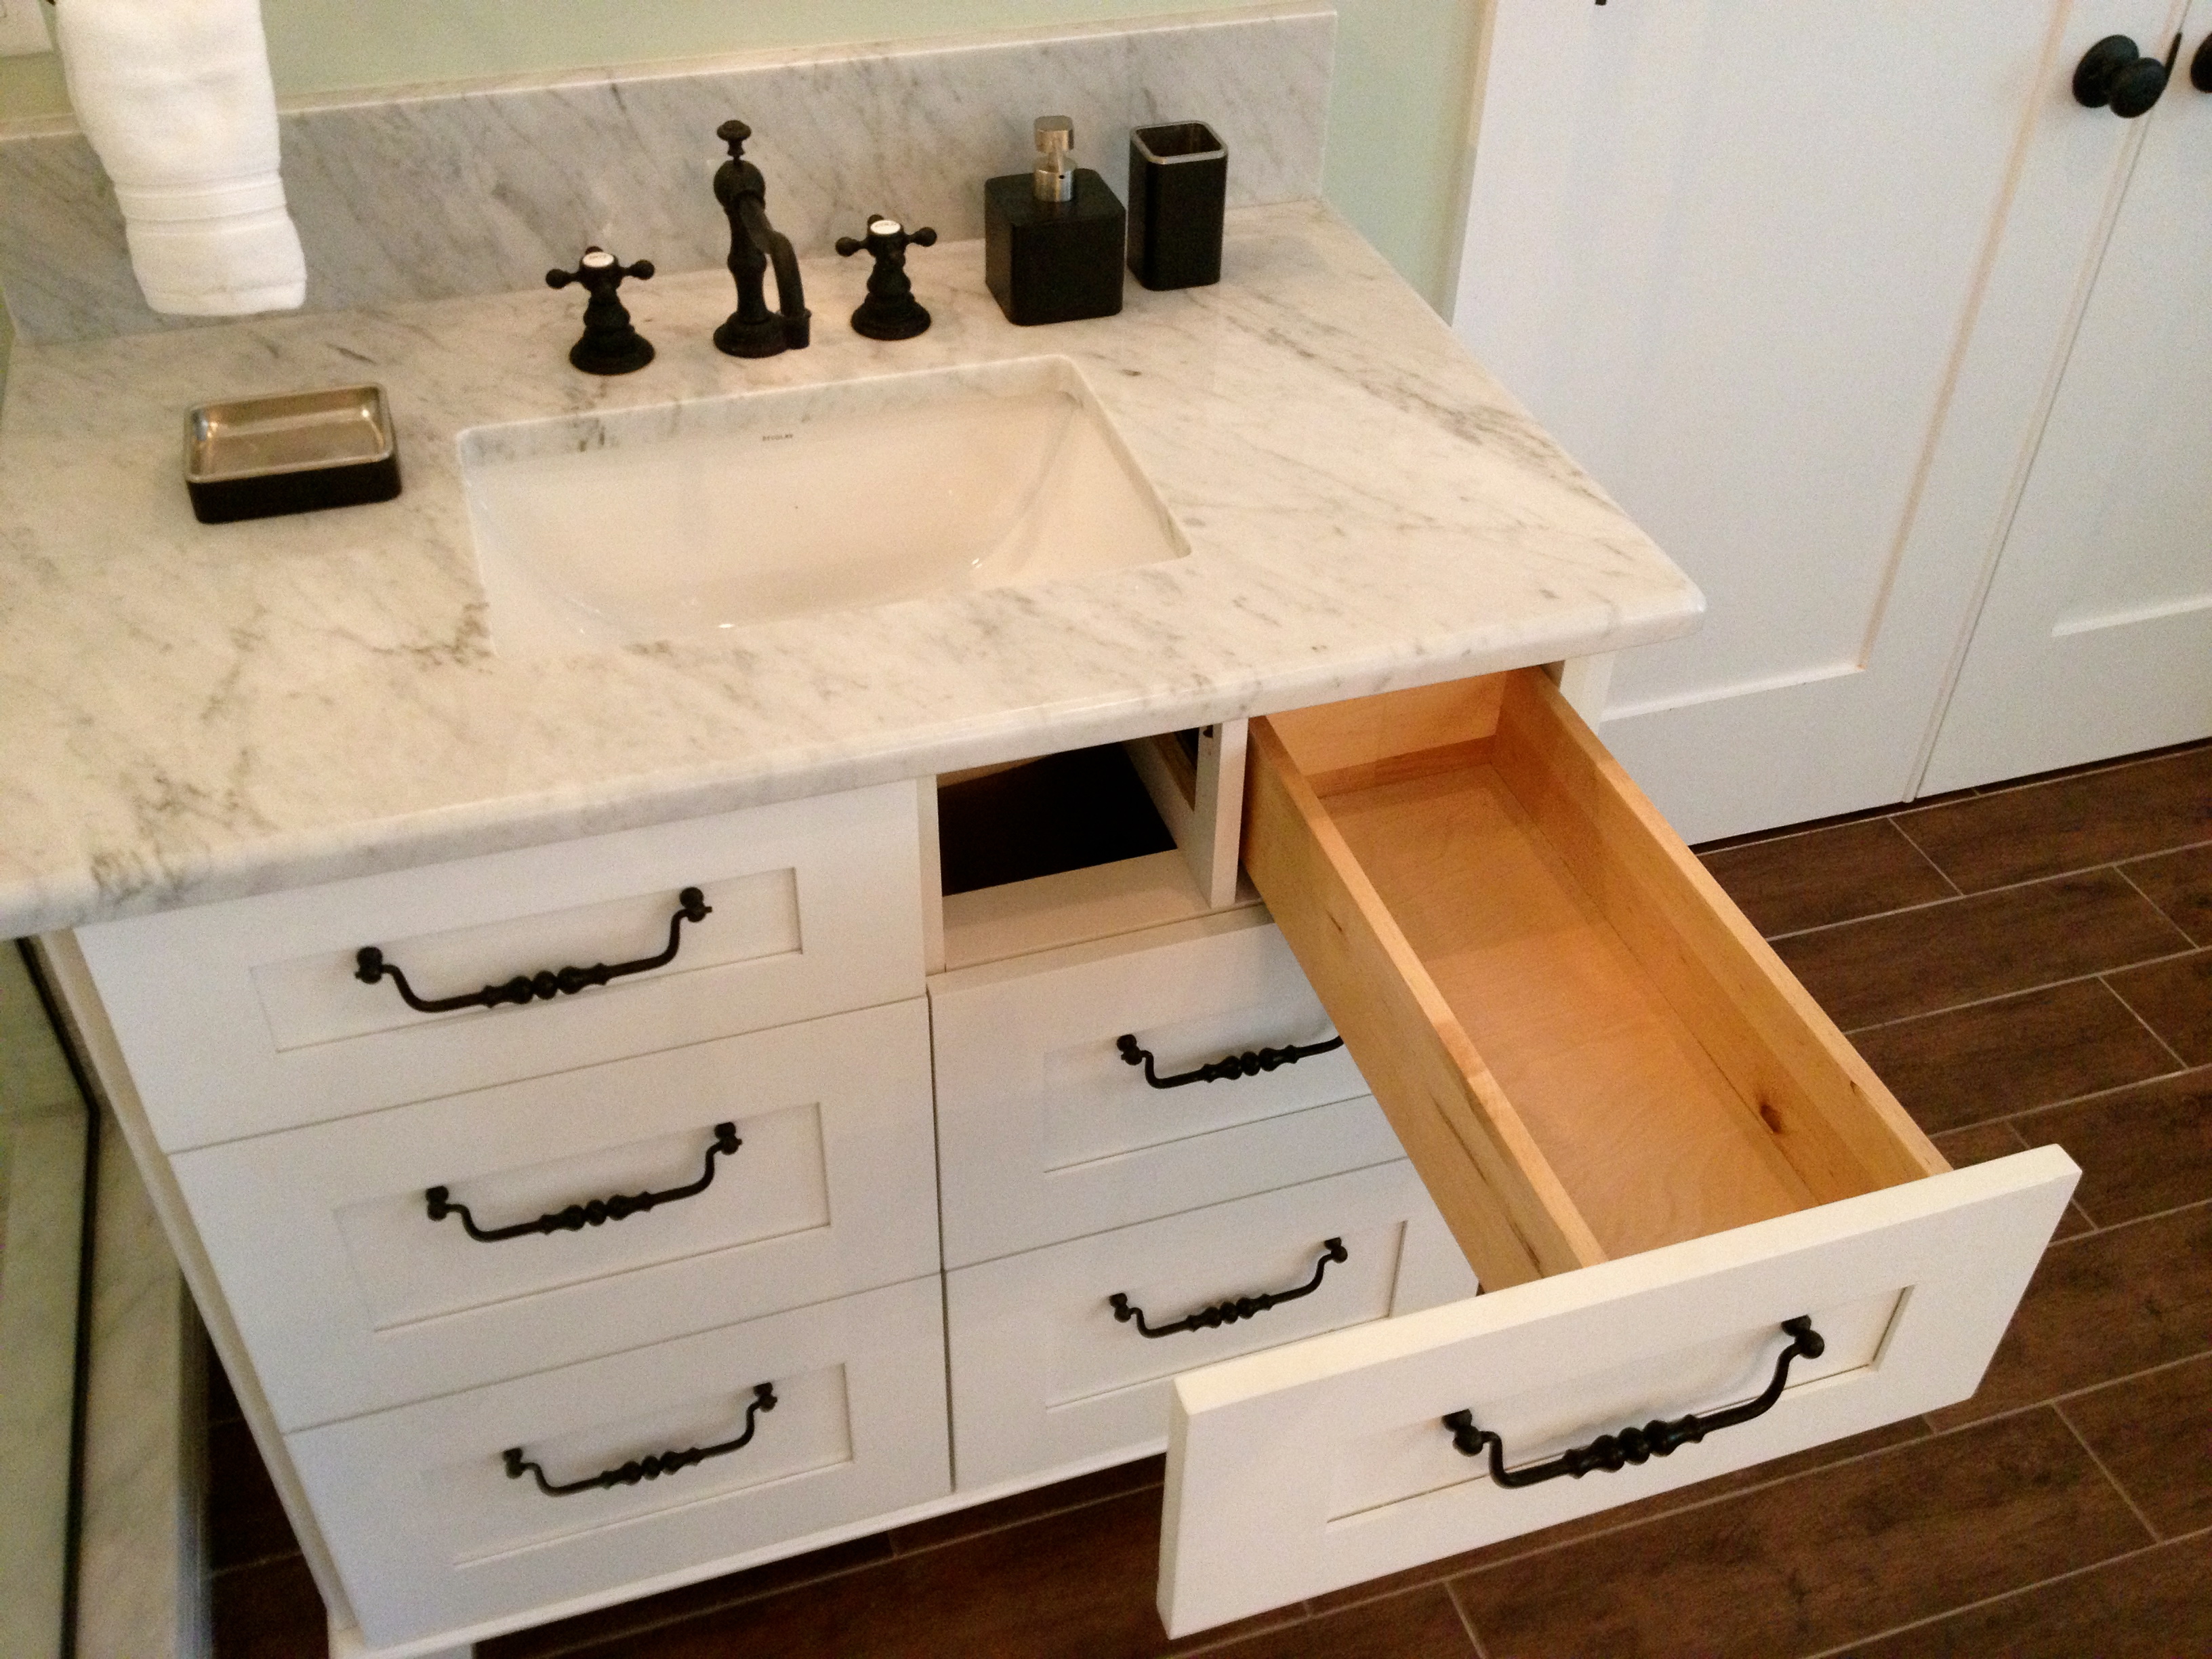
I designed and had this vanity built so there was no lost storage space. Thank you Jerred!
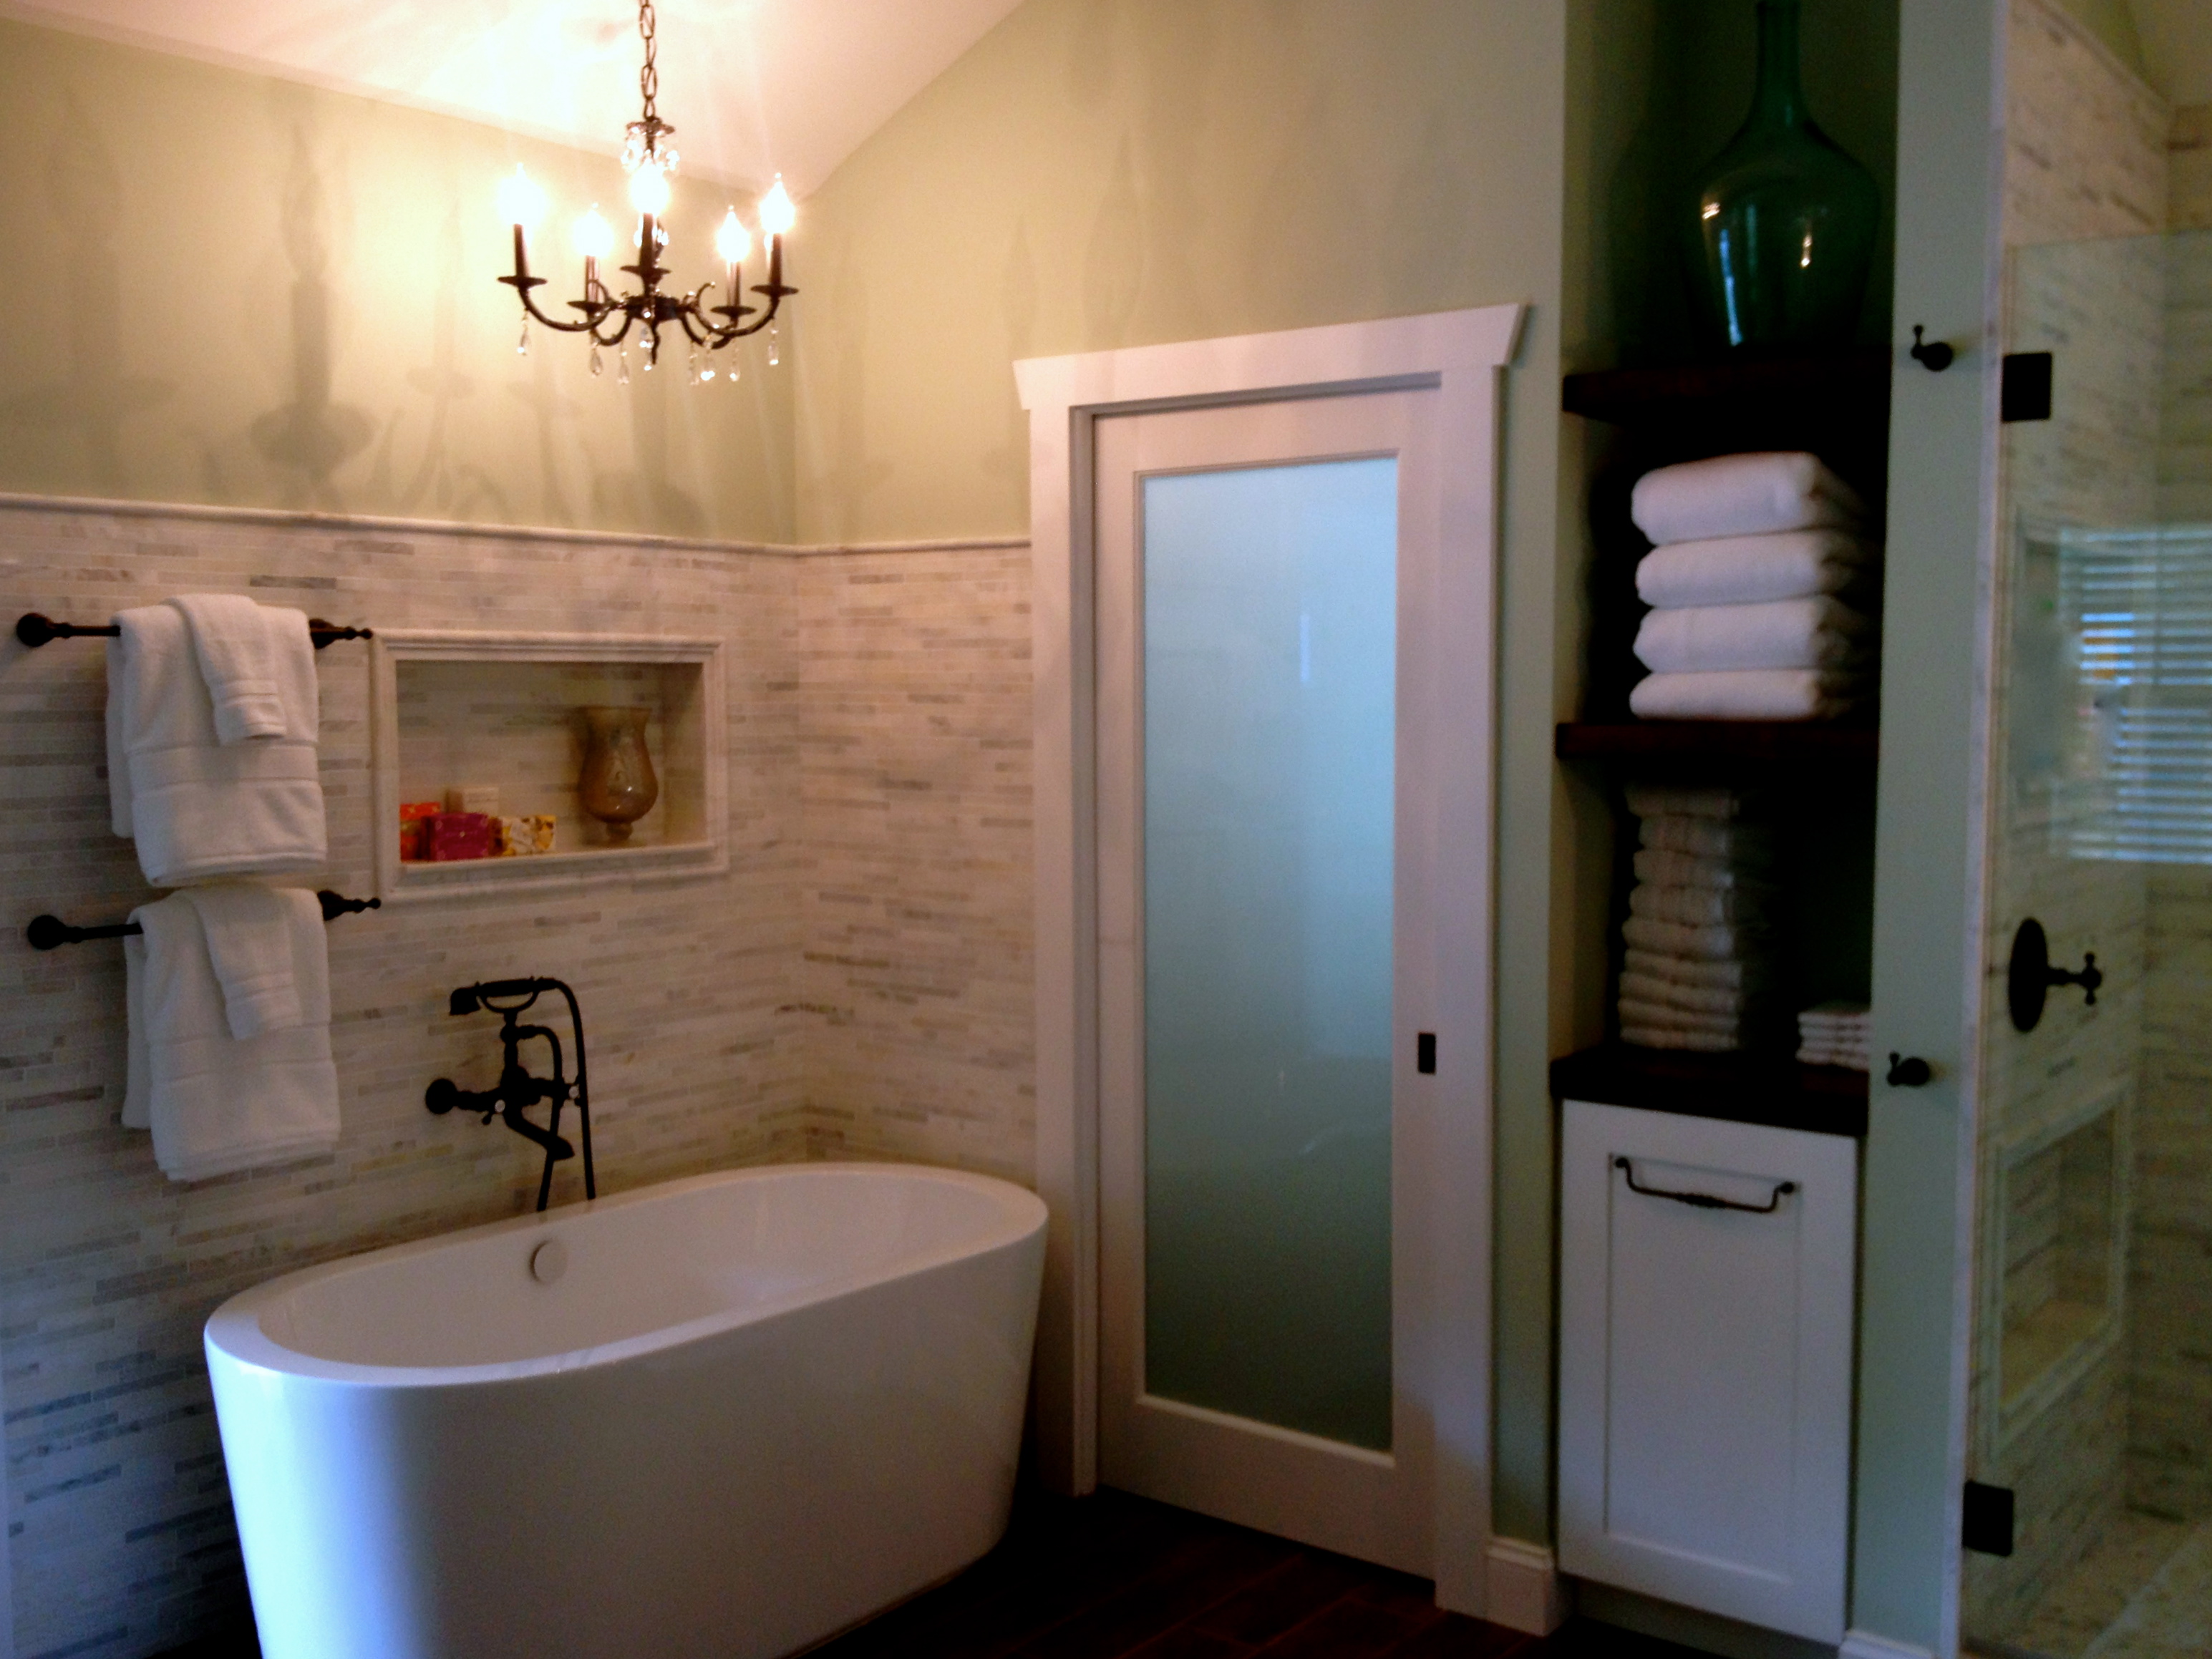
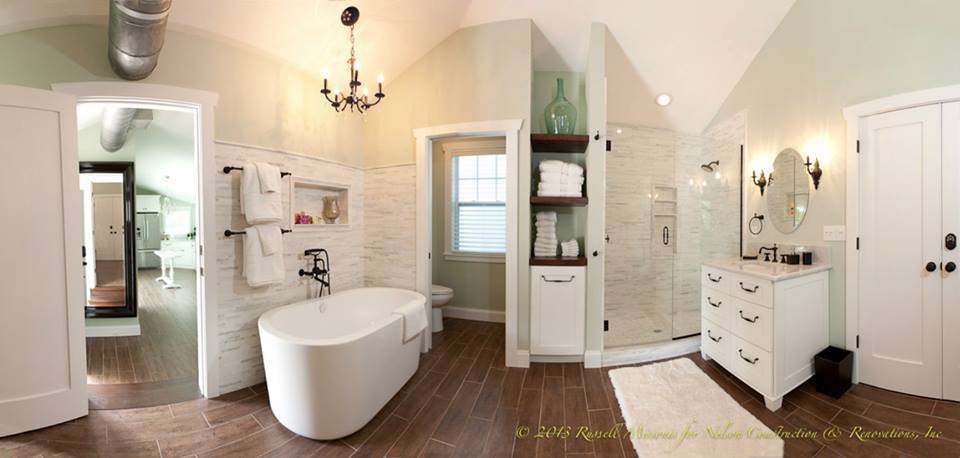
The tub is my favorite. The towel bars are backed in the wall with wood and you could hang on them! Love the 3/4 high stone, with pencil rail, the niche and the thrift store found old chandelier that I rewired, spray painted black and cleaned the crystals with a little water and vinegar. Vinegar is the perfect glass cleaner, makes it shine! But rinse well.
Ok, so Jeff’s photos outshine mine. I’m not a photographer. Just a designer… Oh, and I put that mirror by the front door as decoration but also for anyone visiting so that they can have a full length view of themselves too!
Before – Standing inside what will become the new kitchen, looking through backyard towards main house
After – Standing in the kitchen looking towards main house. I really love the 9′ wide opening.
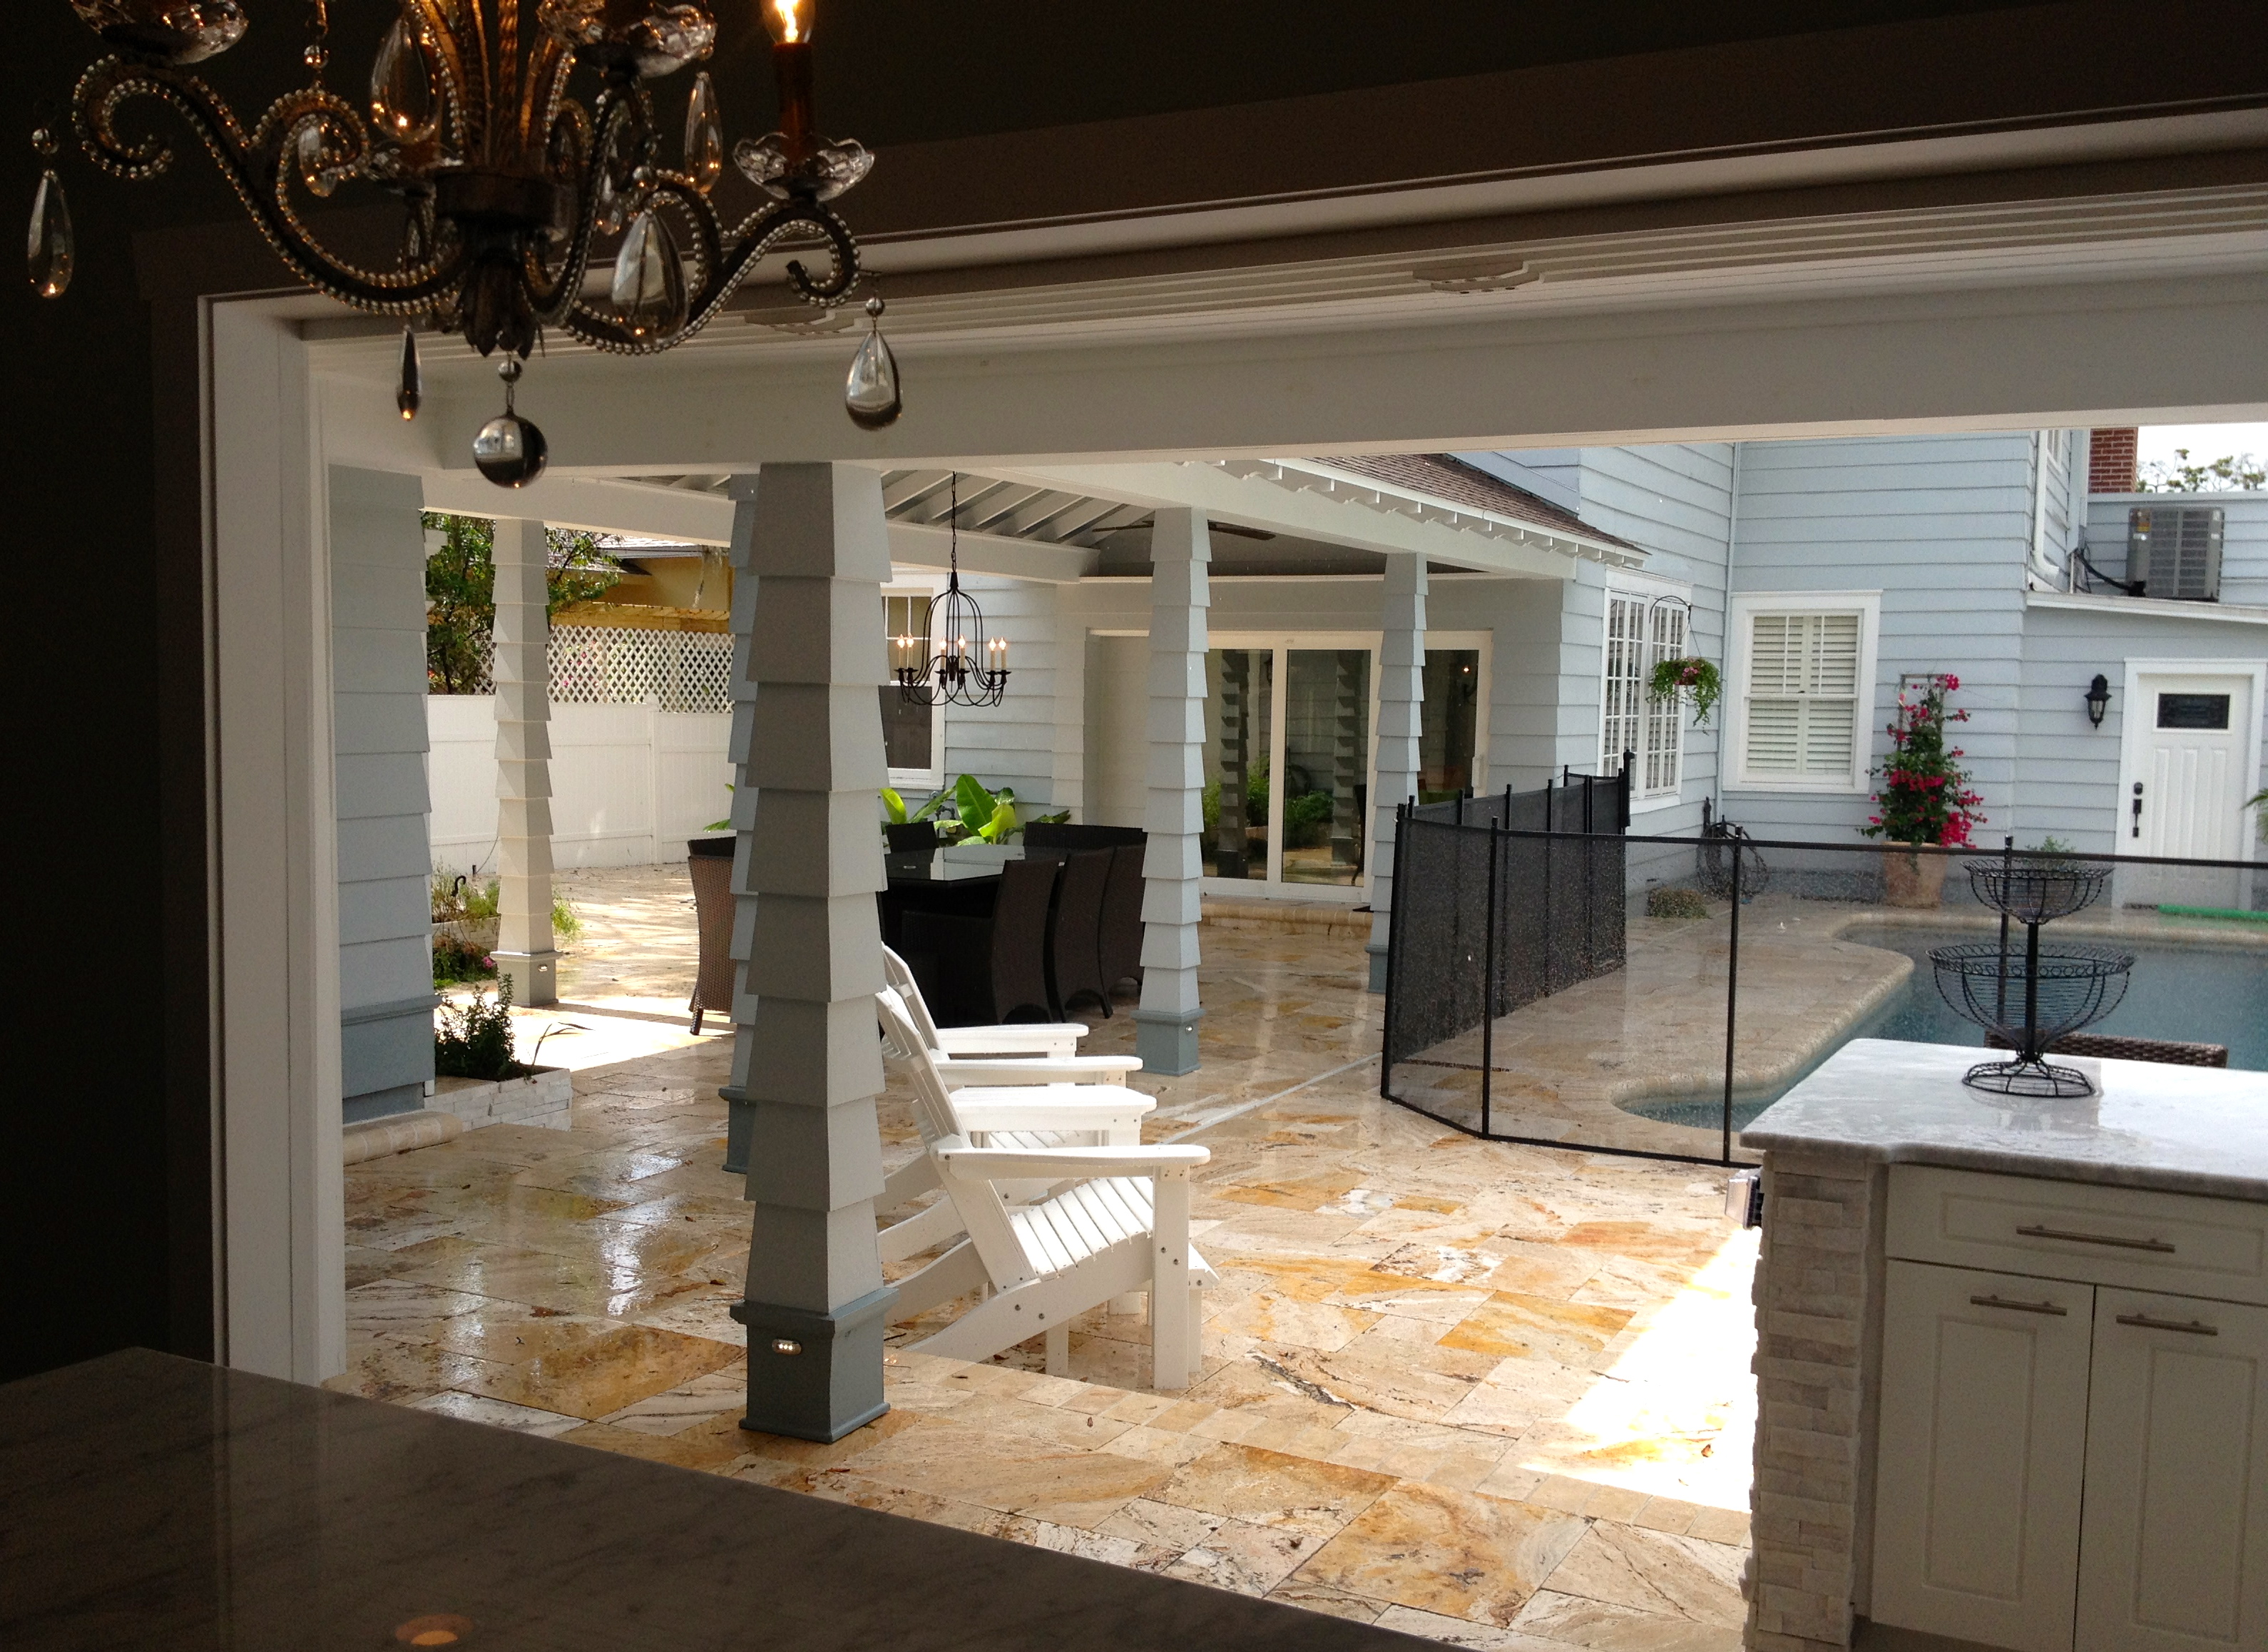
Standing at the backdoor of the main house looking towards the new cottage. The breezeway flawlessly connects the homes and looks like it always been there.
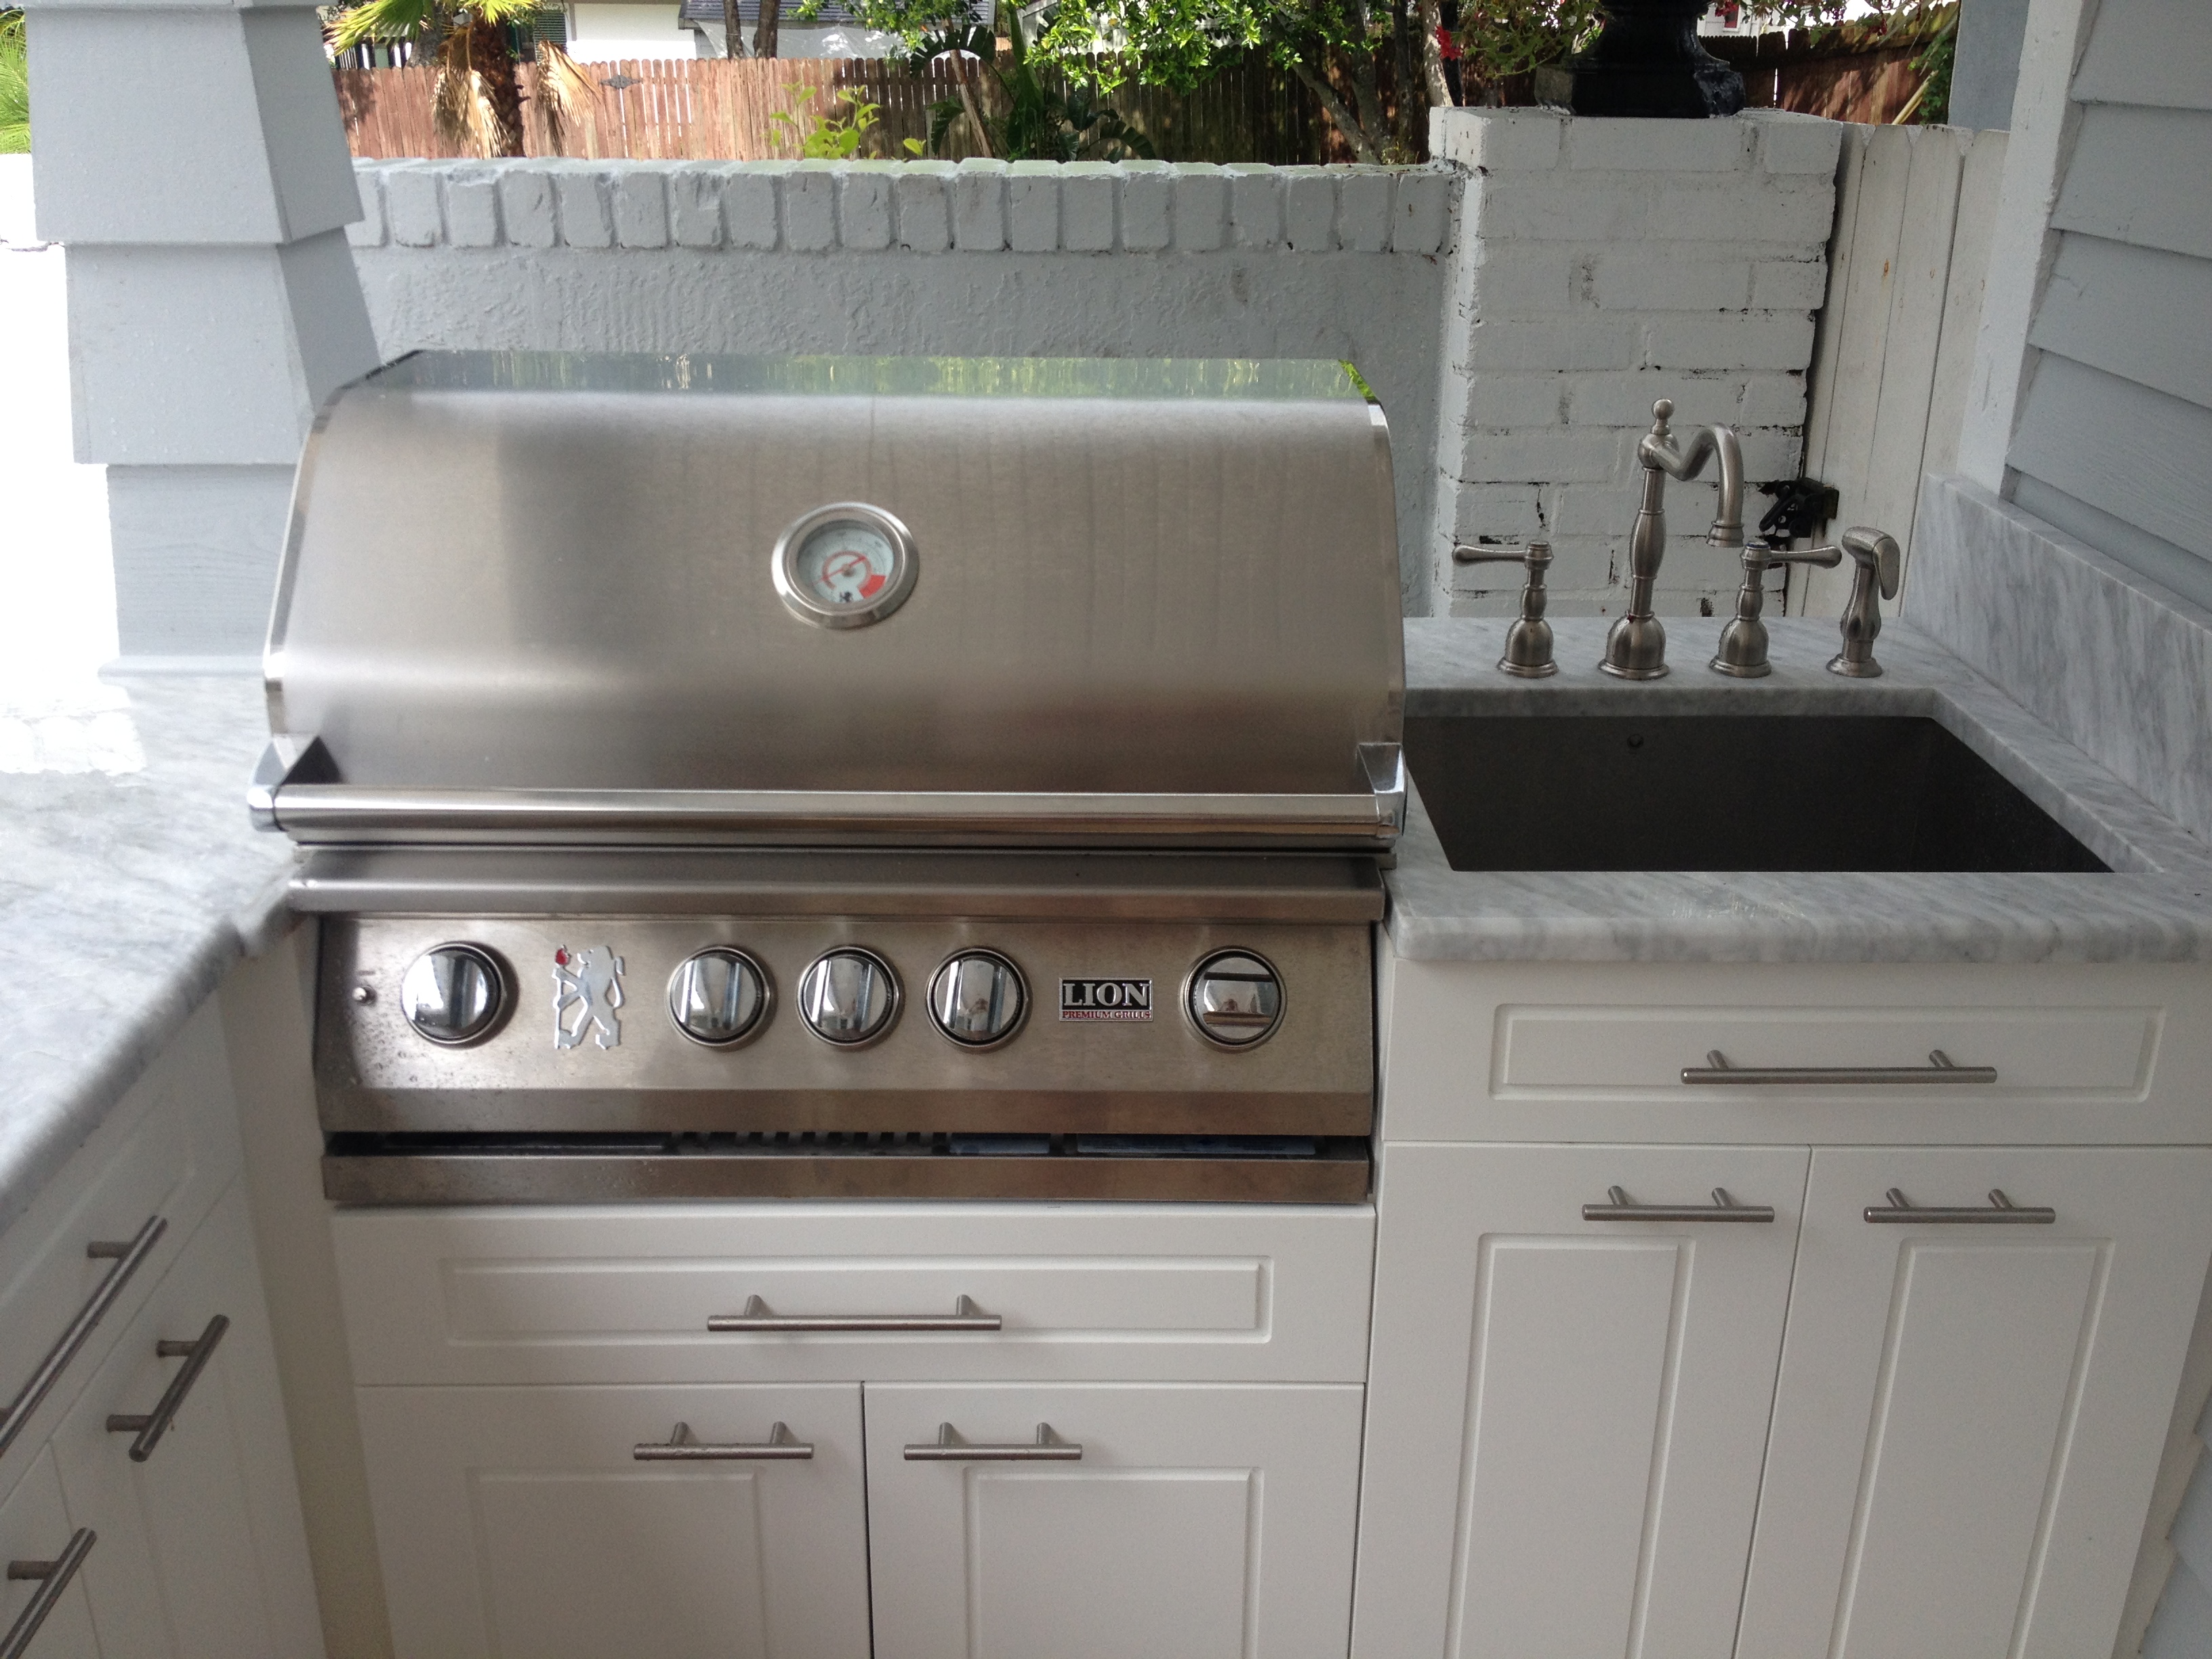
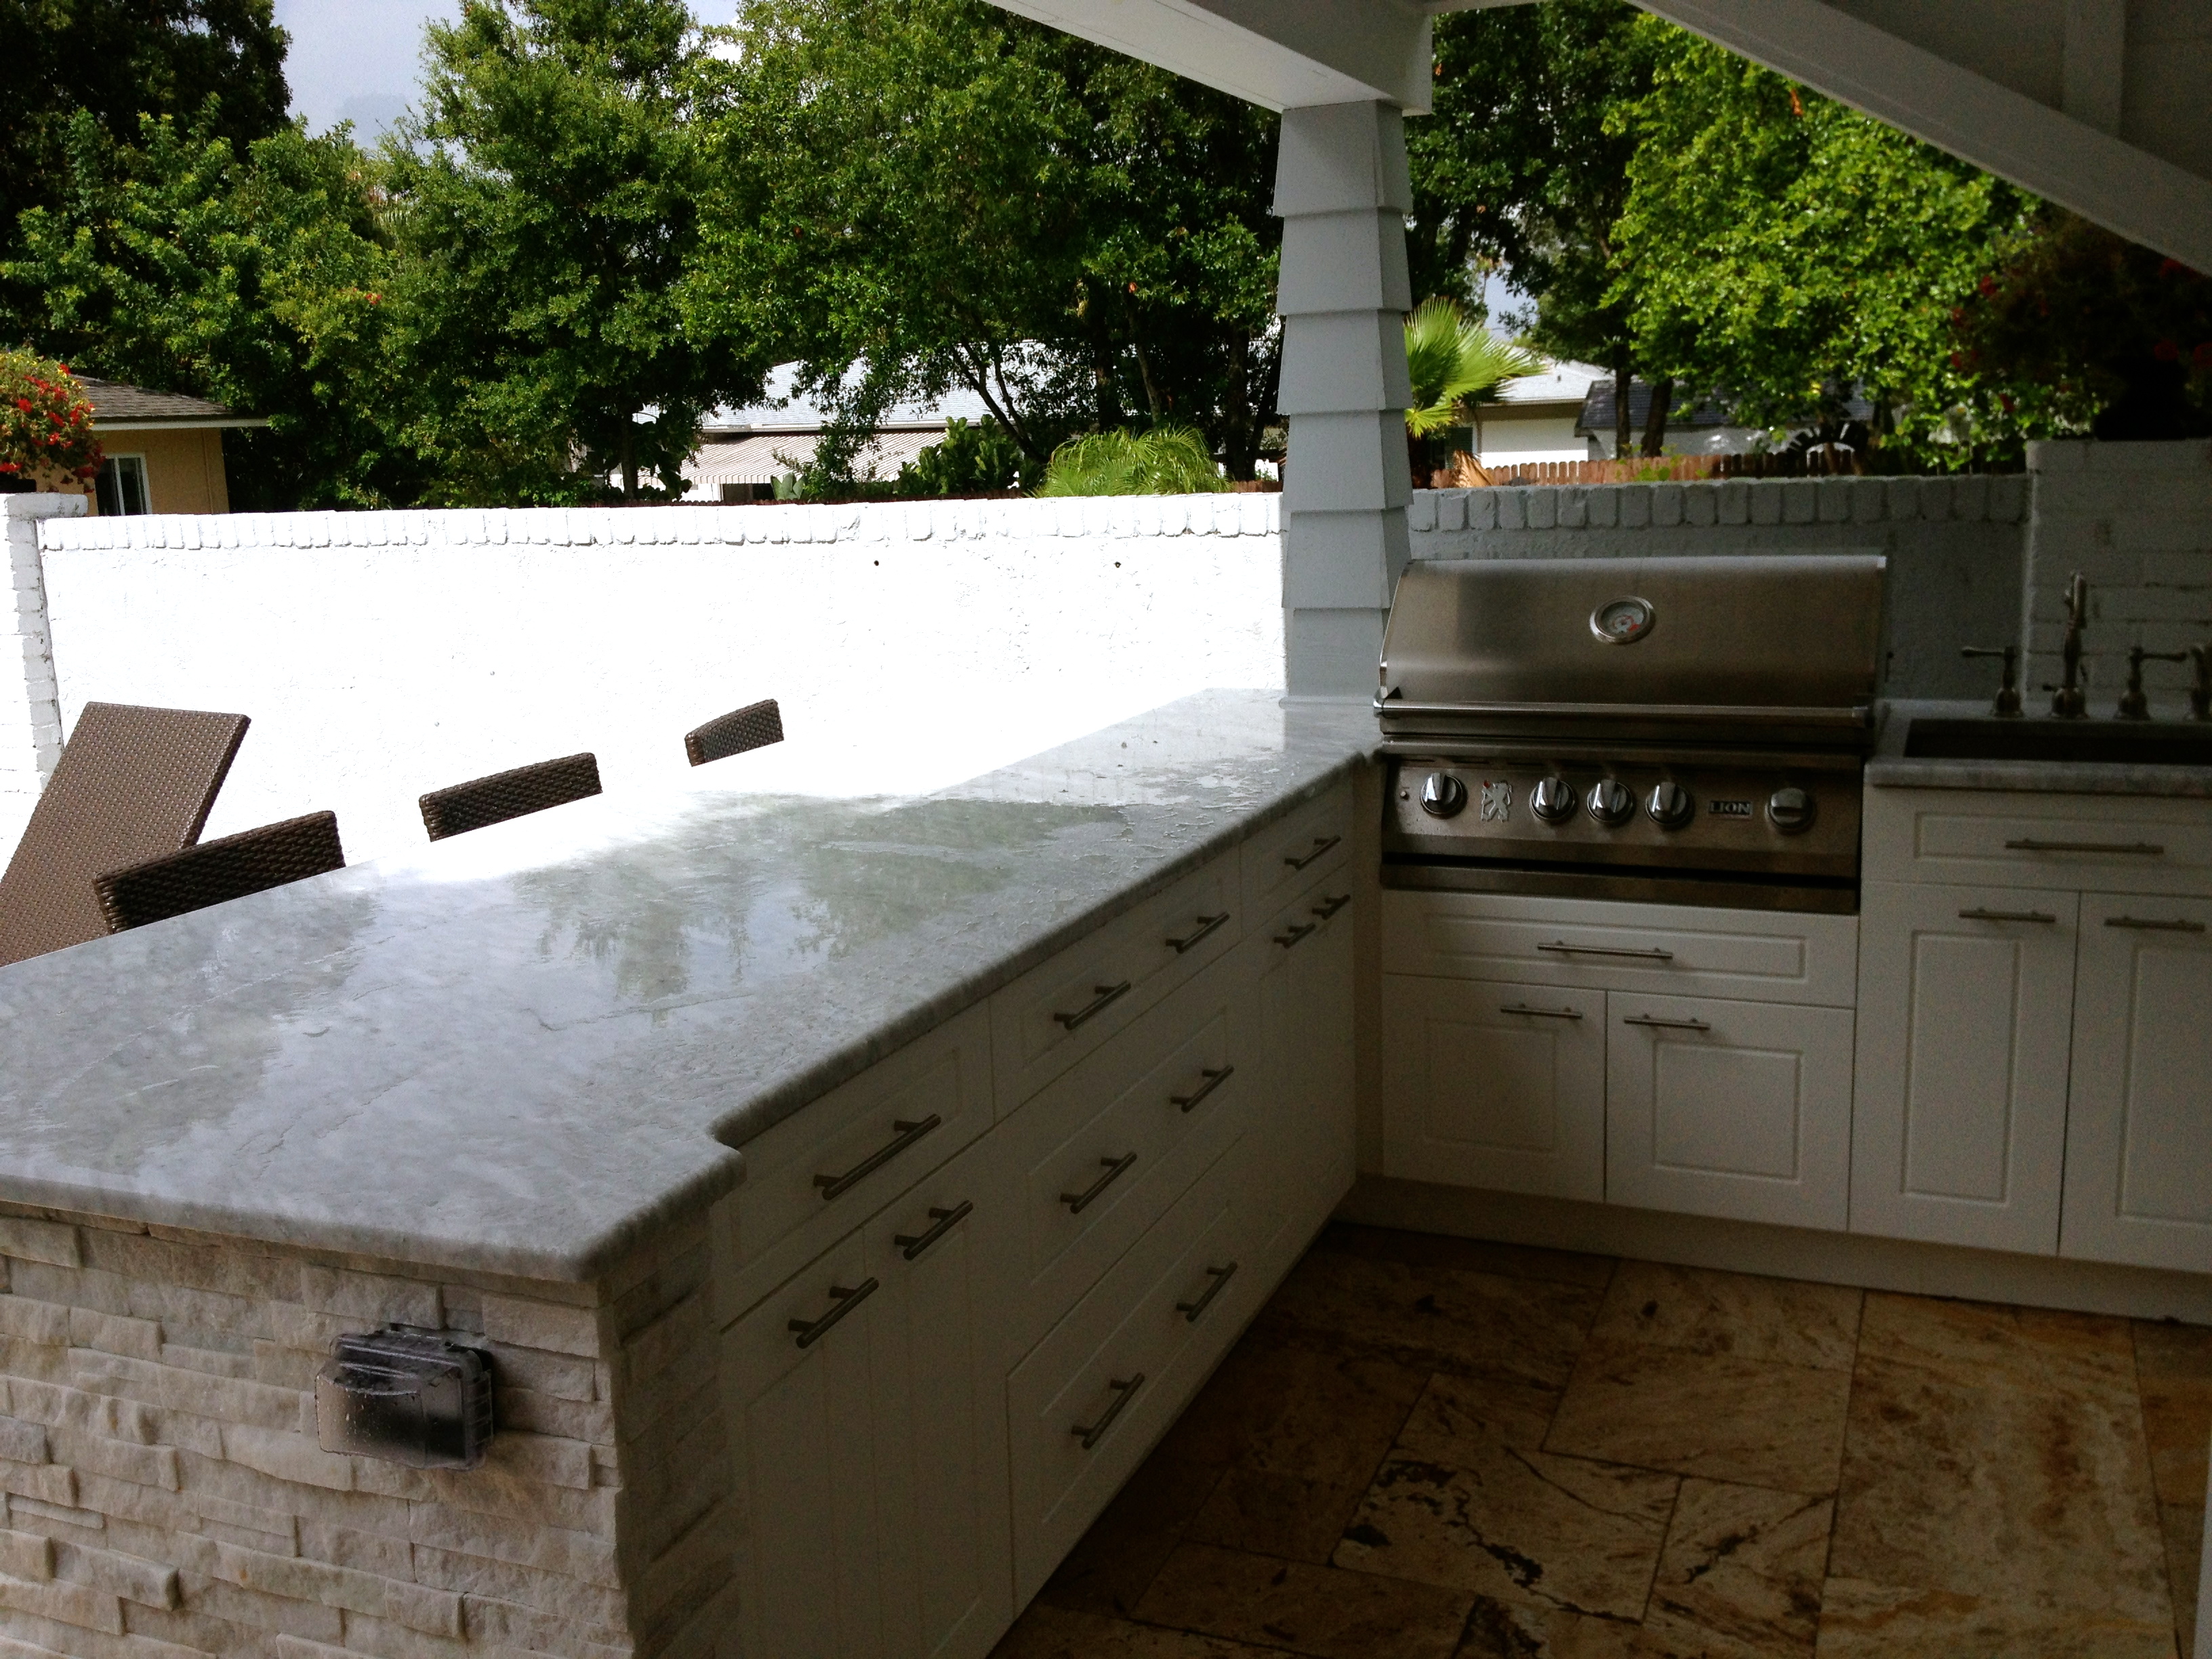
After going around and around with various outdoor kitchen companies and not finding exactly what I wanted I just designed the whole outdoor kitchen myself. I choose the grill (Ok, so I had a lot of help from my husband. Thank you Jordan!). I selected the deep stainless steel sink, the faucet, Carrera counters, double trash, all the cabinet drawers, the stacked stone I fell in love with and even had it built out of marine grade materials (Thank you Jerred). This thing will last forever! I saved the client thousands and we got what we wanted this way!
There was a beautiful little sun shower when I was taking the pics, hence the water on the counters.
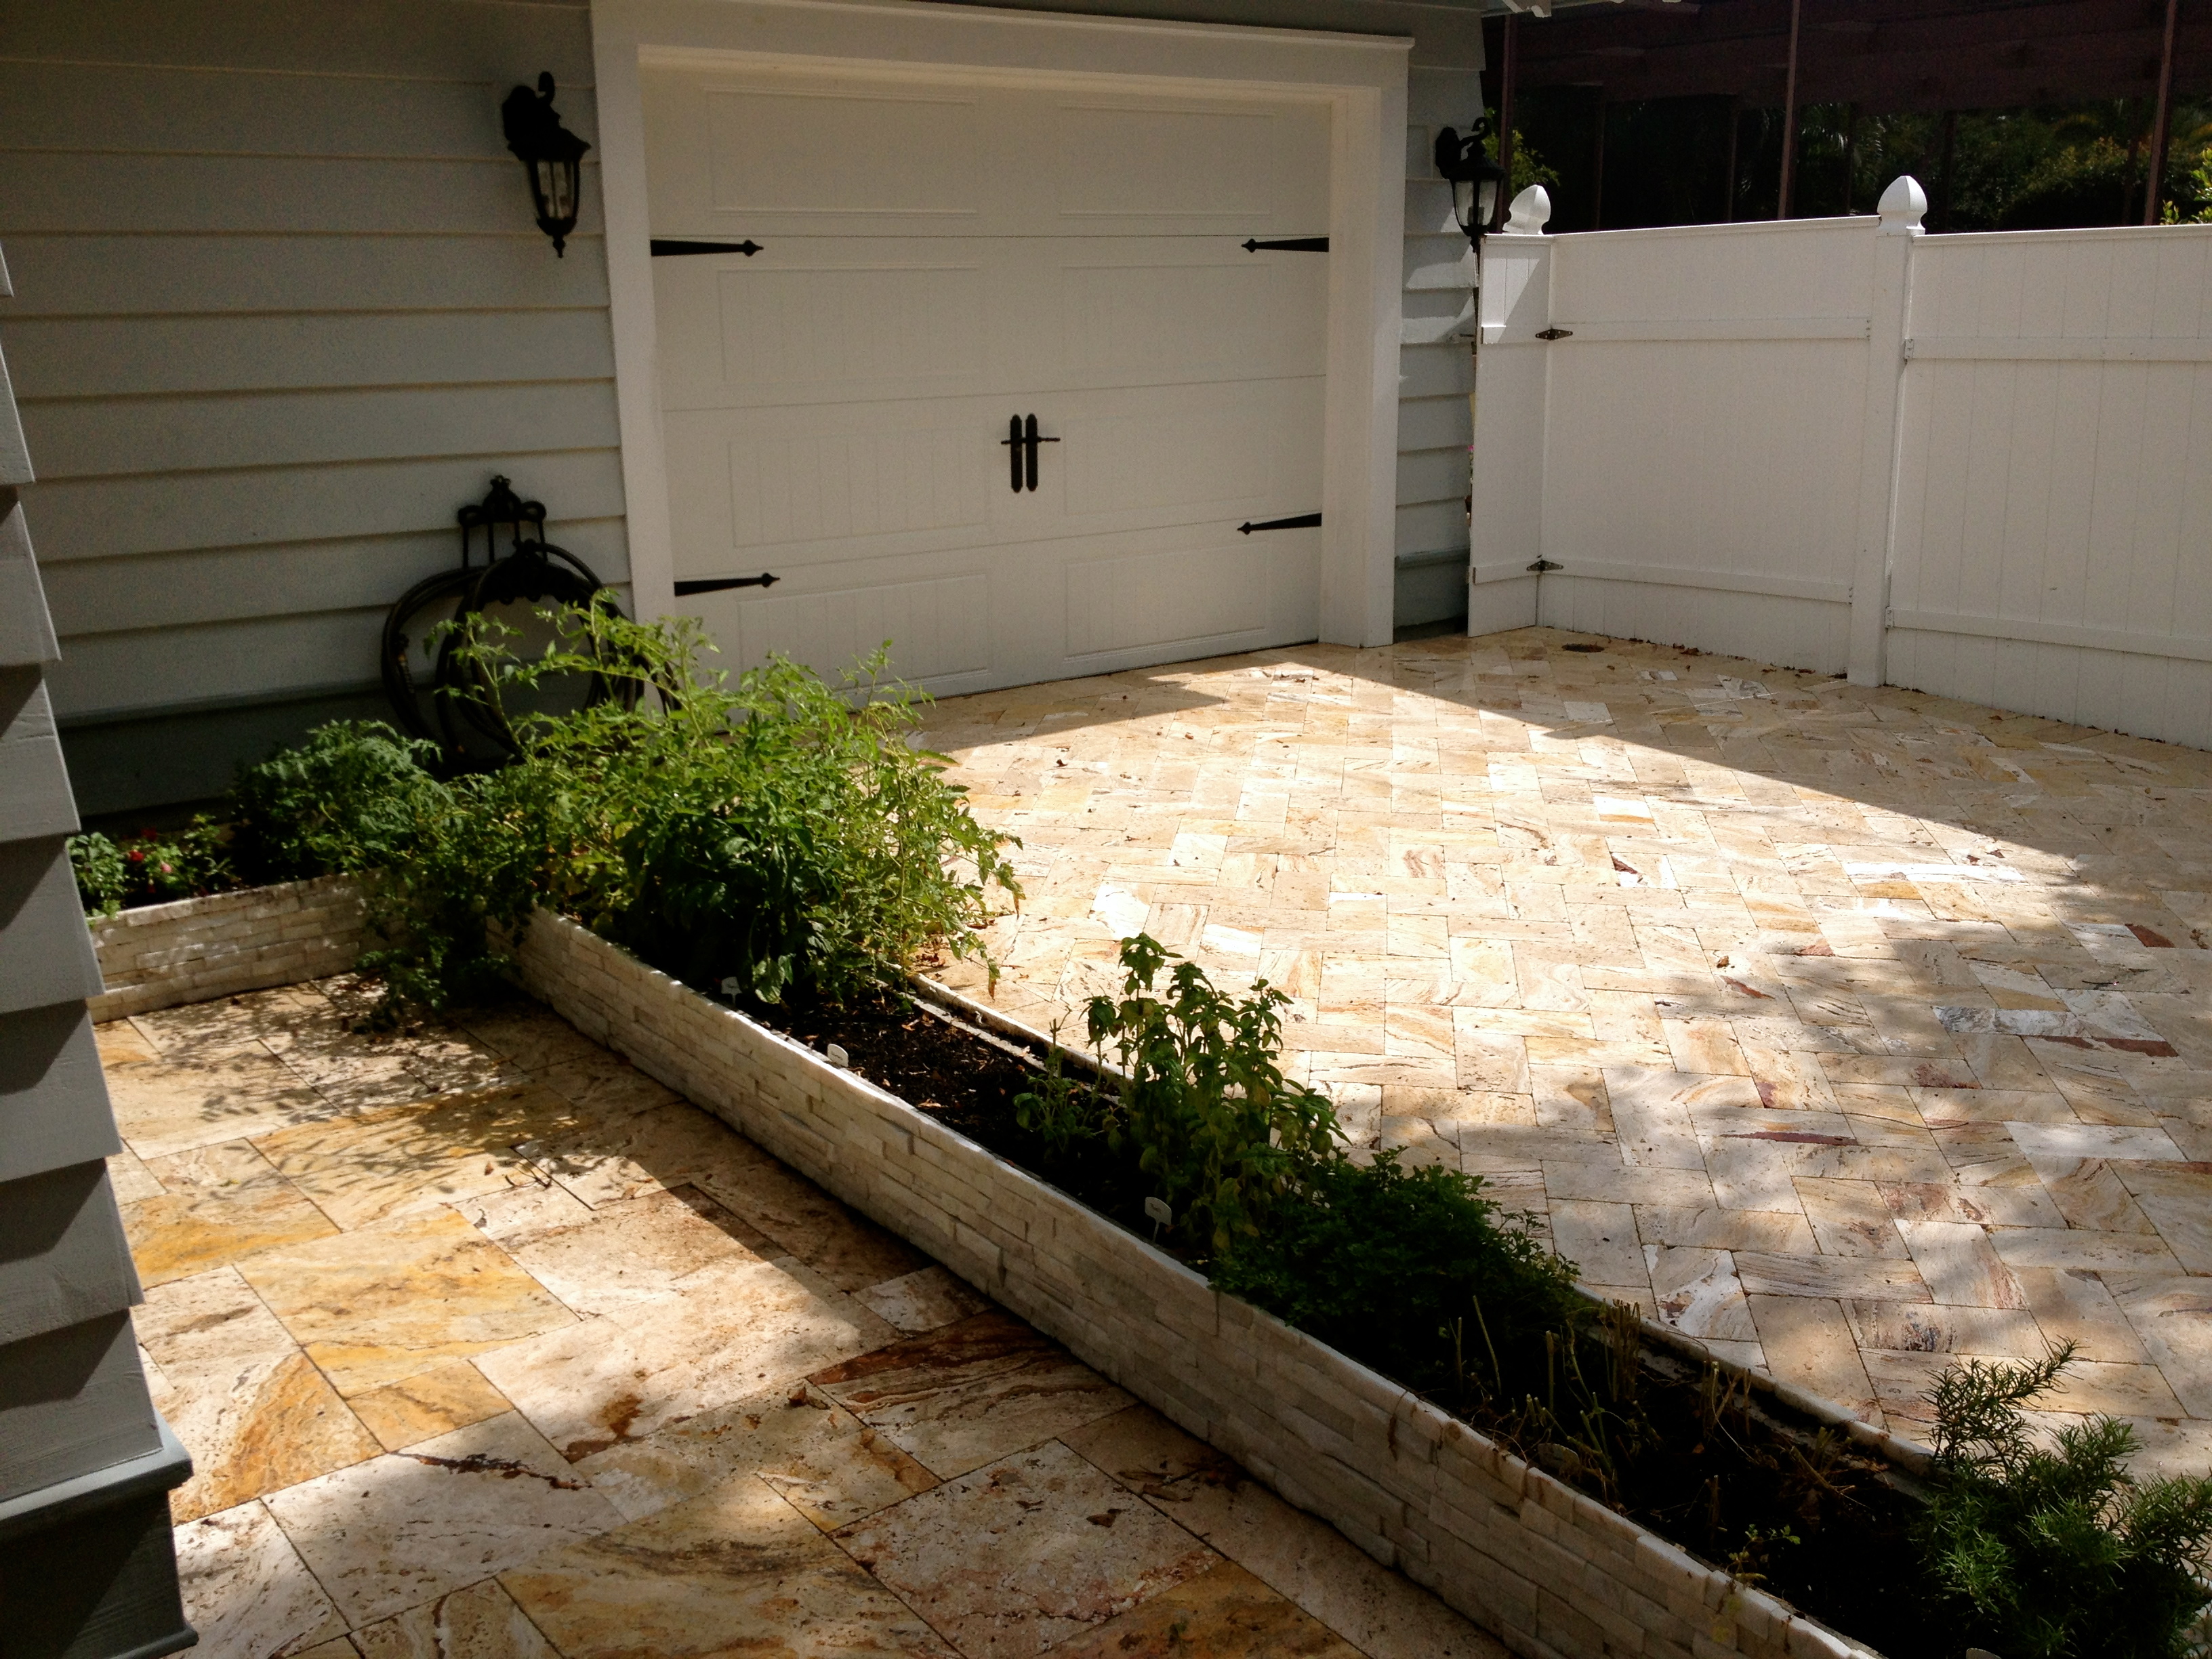
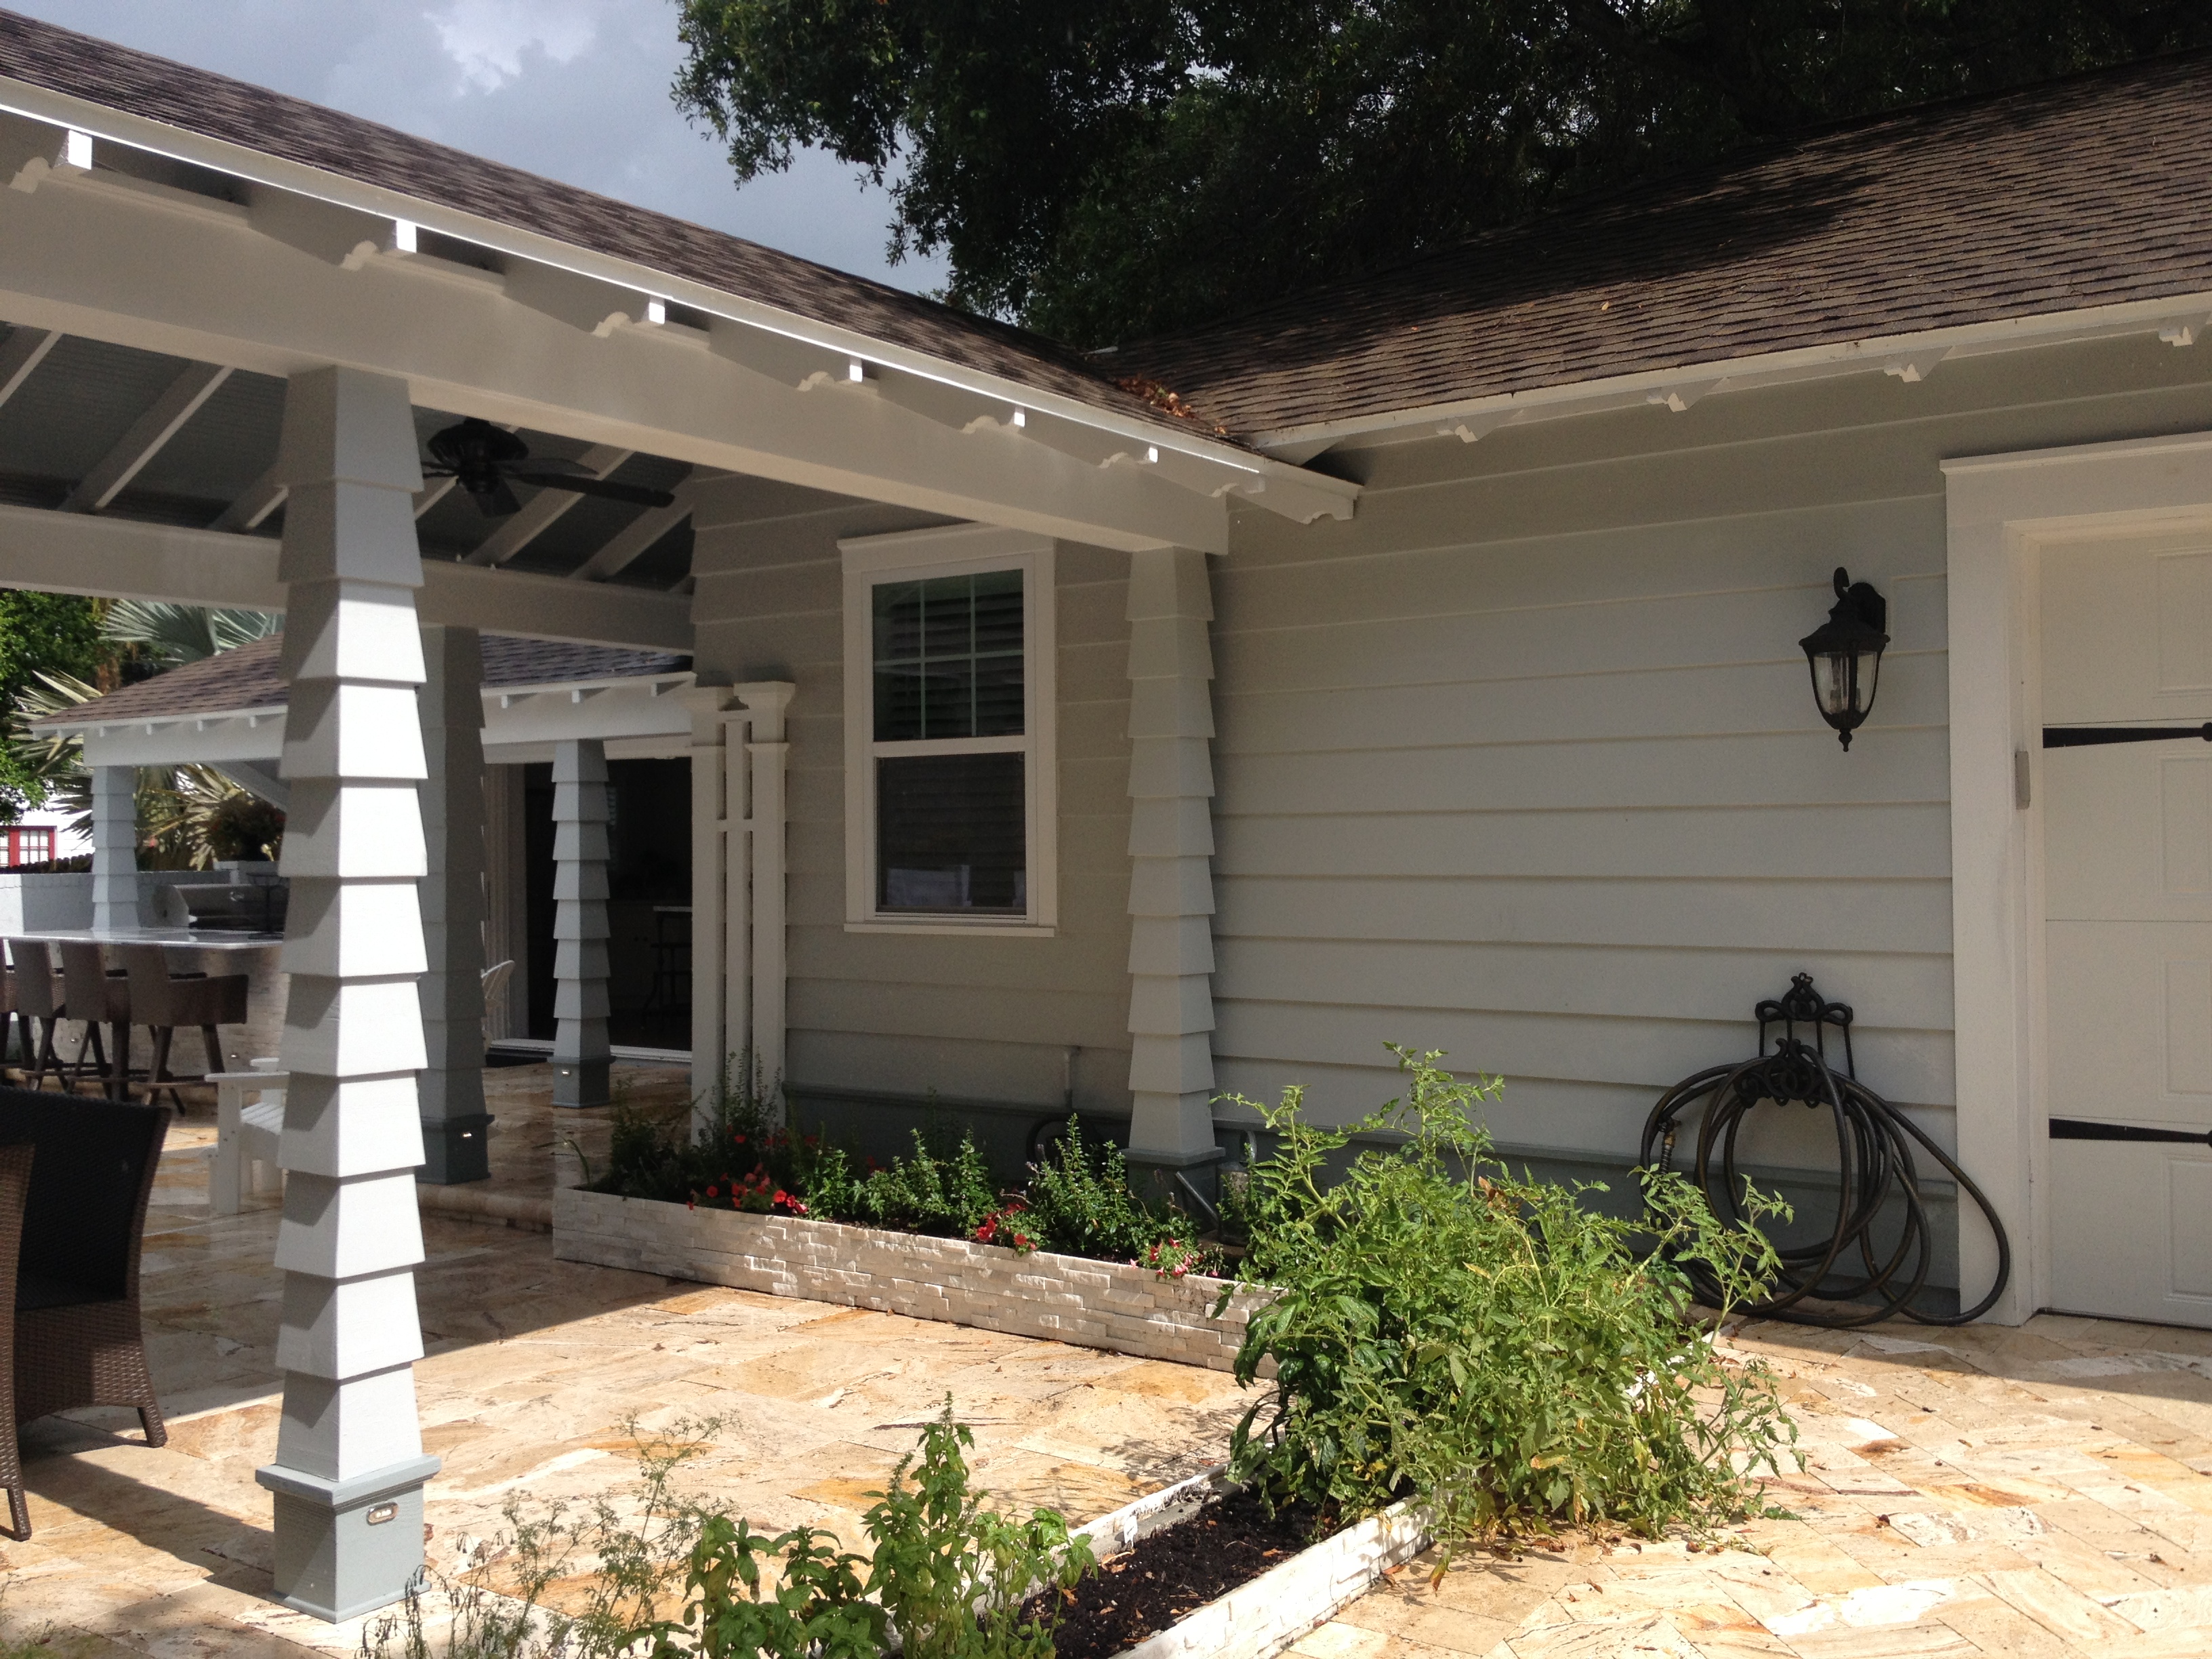
I had to come up with a way to divide the level surface of the outdoor dining and back paver area from the driveway. The driveway had to remain pitched upwards to meet the garage floor. I designed the planter to do that. And I made it a planter so that it functioned as a divider and a wonderful planting space for herbs! Function and beauty…
Before and during – View from the driveway looking towards the garage, breezeway and cottage.
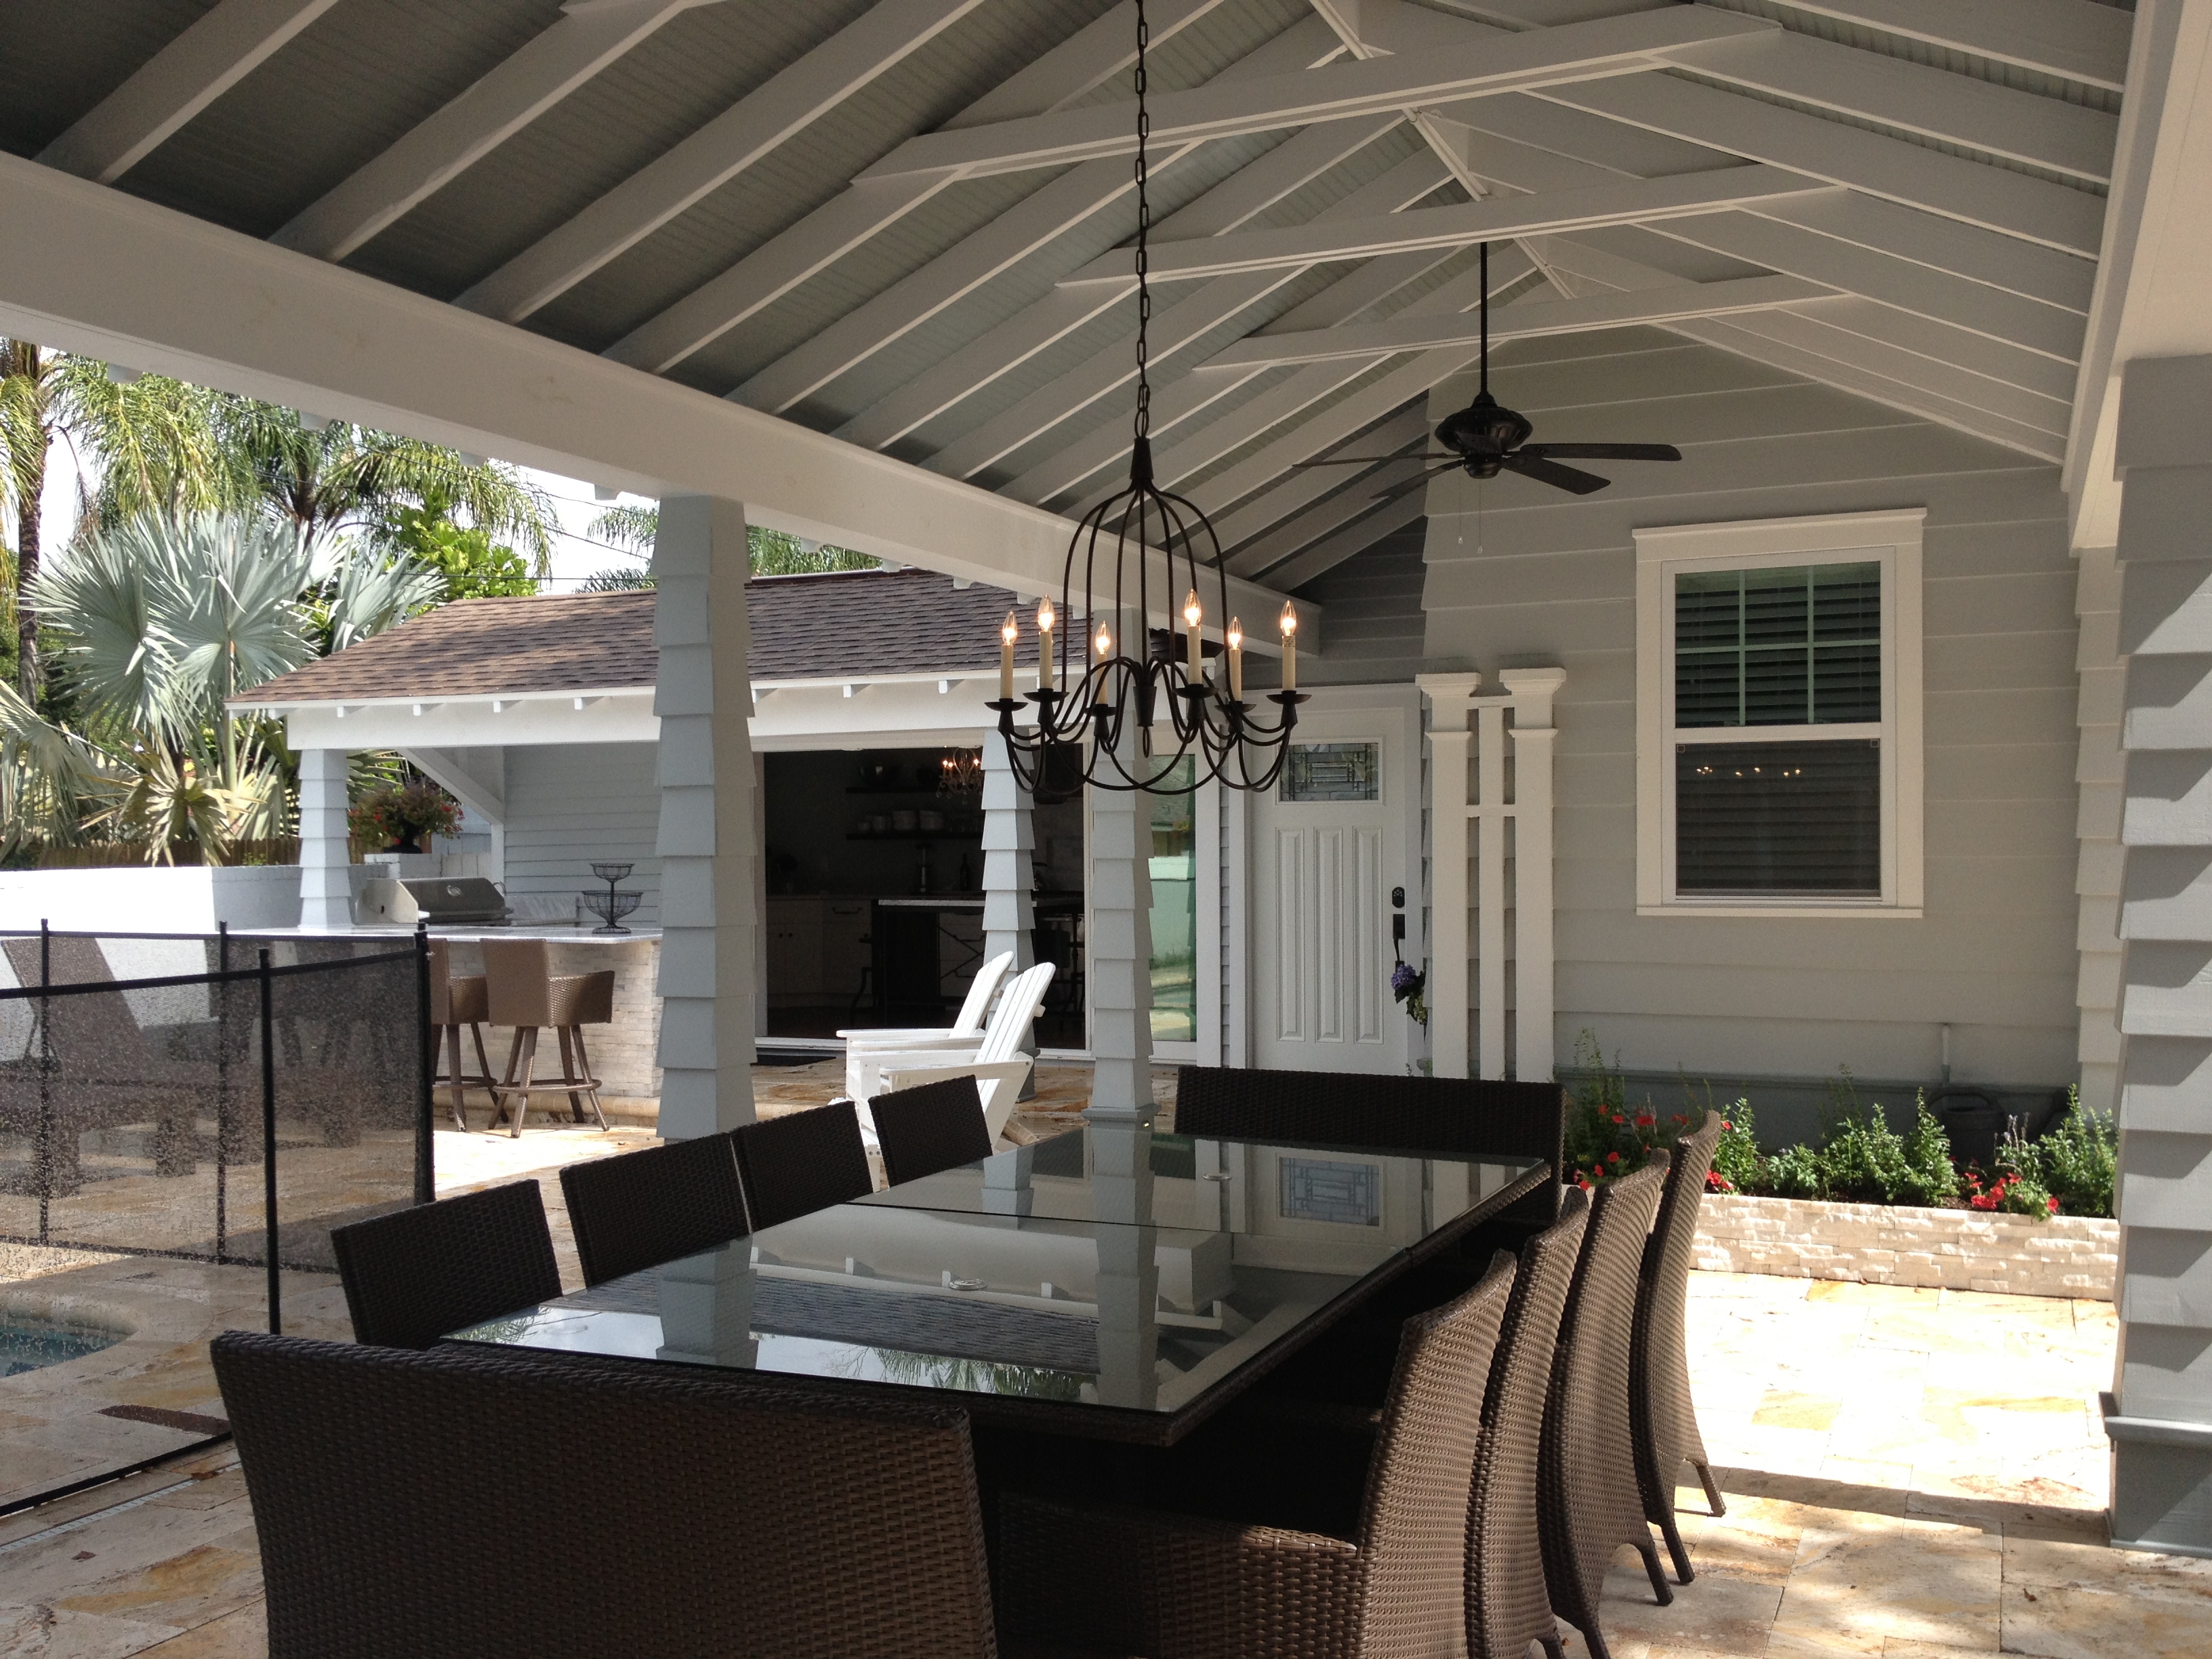
After – View from the driveway looking towards the garage, breezeway and cottage.

A happy little pepper plant in the new planter